Pedal steel guitar build slowly getting along
Moderator: J D Sauser
-
- Posts: 10
- Joined: 15 Feb 2022 2:50 pm
- Location: Austria
Pedal steel guitar build slowly getting along
Hi everyone!
Since over a year I have been meaning to start building a pedal steel guitar. After some failed attempts at an all-pull changer I've settled on making a Steel with a Pull-Release changer which is the most reasonably doable as soon as I get some suitable pieces of Aluminum to make the actual changer. Nonetheless, I've decided to start by making a glued panel beech (18mm thick) body measuring 80x20x8.8cm with beech ply fingerboard
And making the most simple bell-cranks (pictured at the top) and holders for the cross bars (pictured at the bottom) from some 2mm thick galvanized steel corner pieces for chairs and using M8x120 bolts for the cross bars
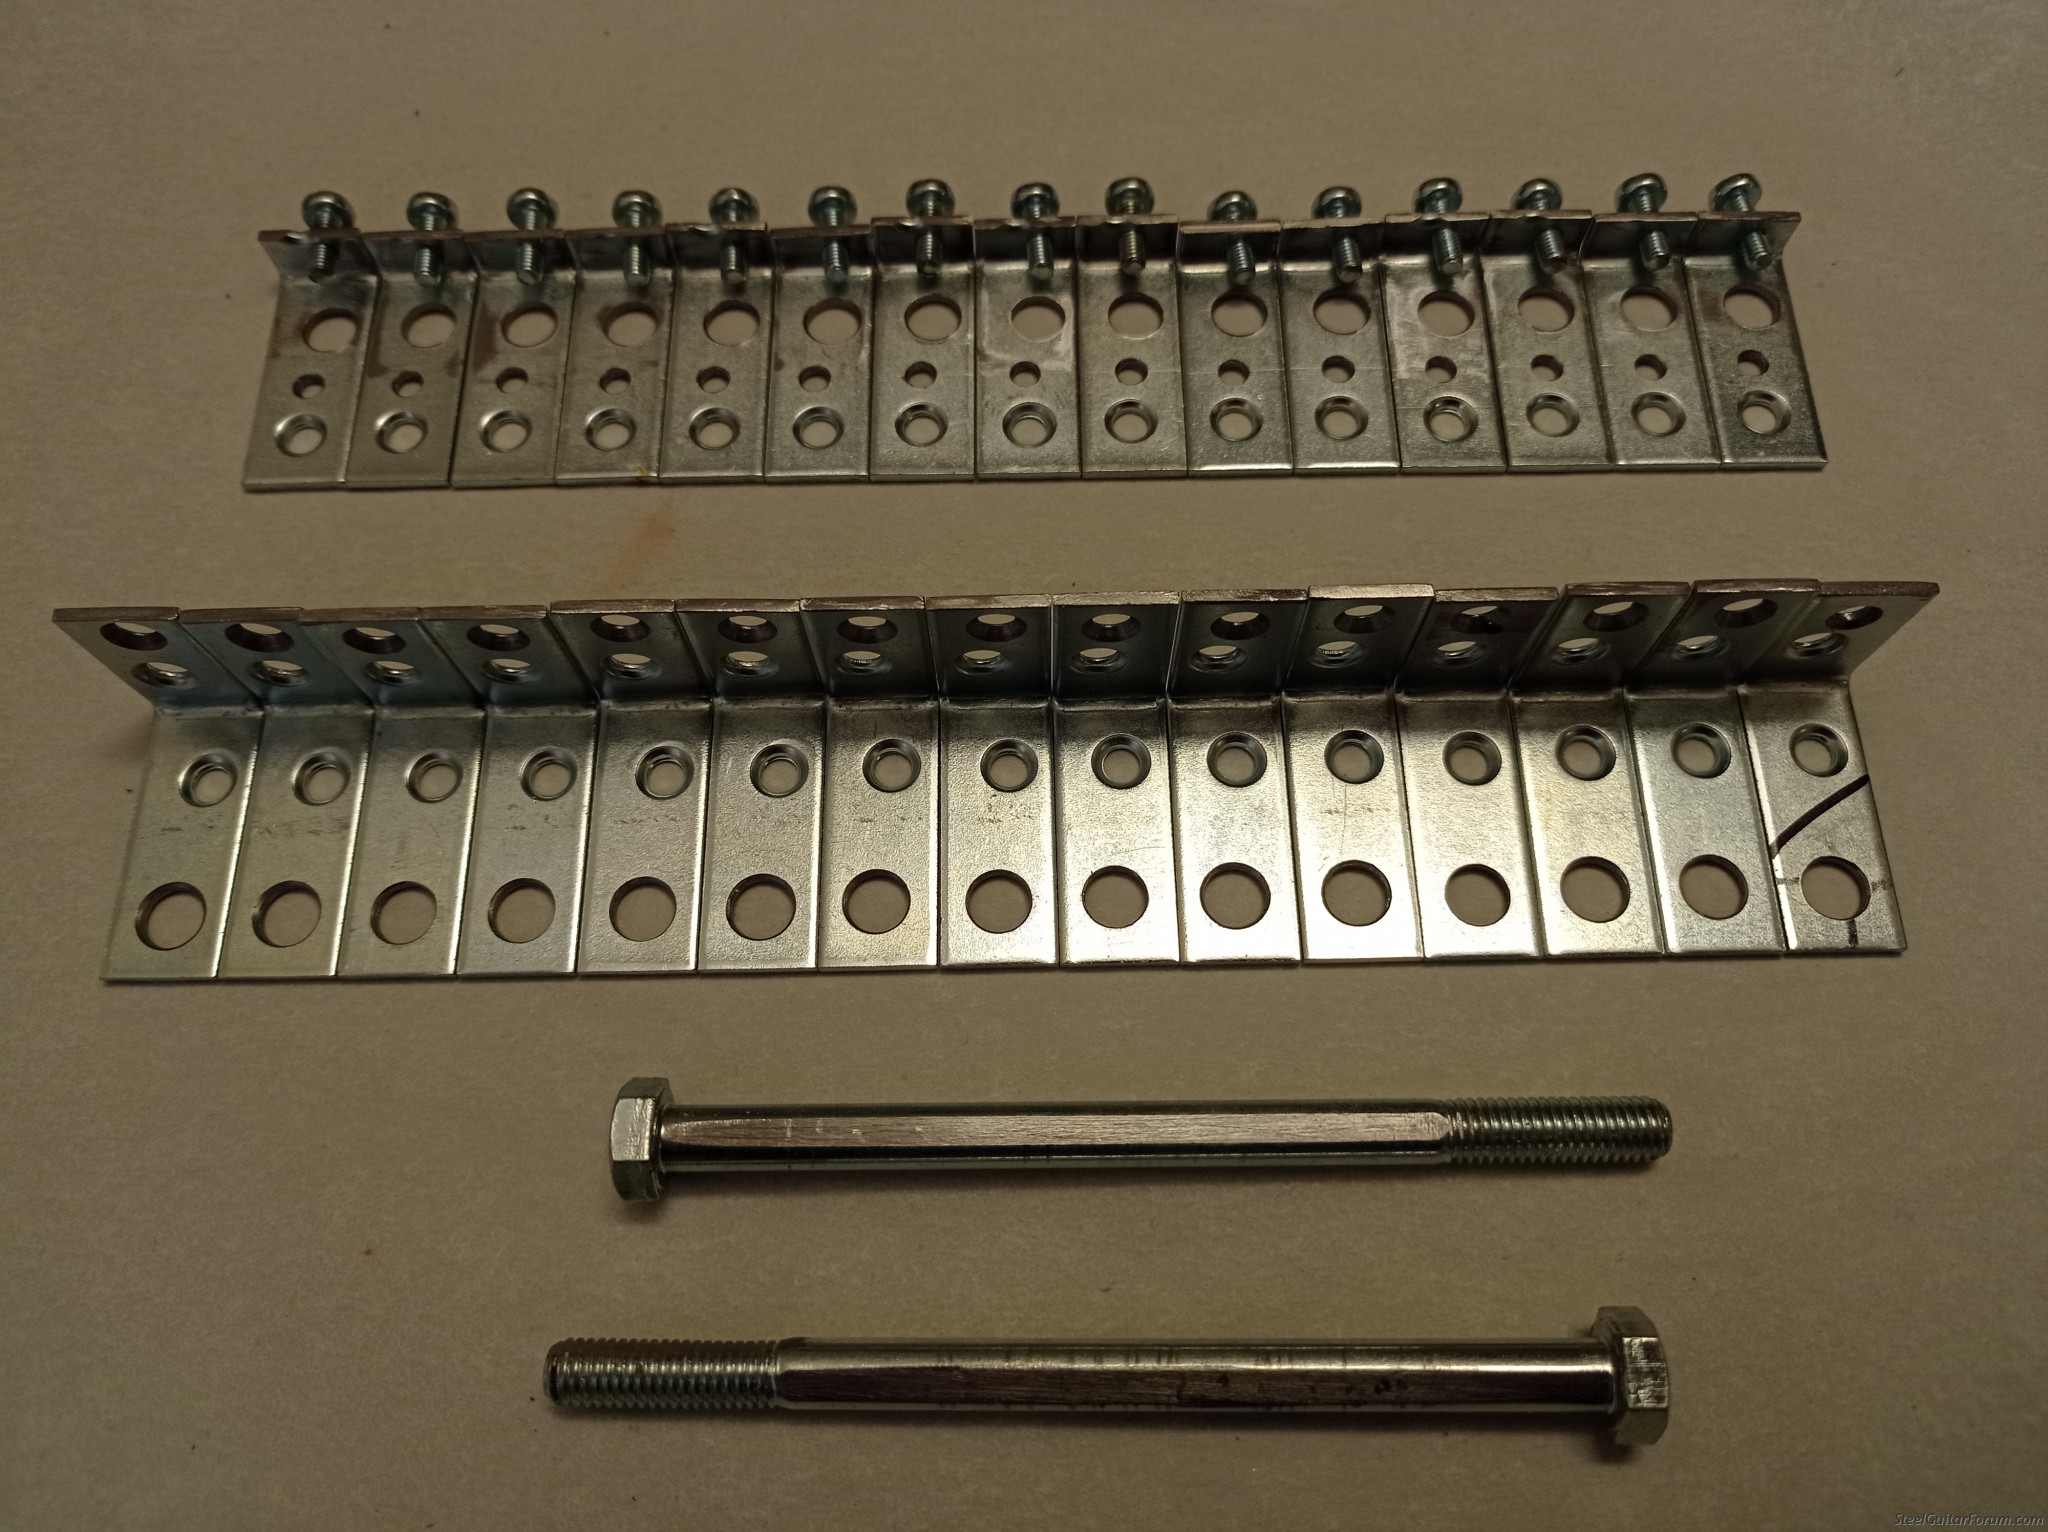
The pull/release rods will be 3mm steel welding rods which turned out to be very easy to thread by hand
The tuning will be a 3x4 E9 10 string with Nashville tuning or a modification thereof. I will add to this during the coming months or so as I slowly progress. Feel free to correct me on my vocabulary
Cheers,
Javier Schulenburg
Last edited by Javier Schulenburg on 6 Jul 2023 2:34 am, edited 2 times in total.
-
- Posts: 289
- Joined: 6 Sep 2021 10:45 pm
- Location: South Australia
-
- Posts: 10
- Joined: 15 Feb 2022 2:50 pm
- Location: Austria
-
- Posts: 605
- Joined: 23 Oct 2021 11:58 am
- Location: Nebraska, USA
This guy has a bunch of great ideas for using off the shelf hardware store parts. Check out his changer, I highly recommend using 1/4" stock and fairly thick spacers between the fingers, 3/32 rods are sufficient. Binding and friction are the enemy! Good luck!
https://www.youtube.com/watch?v=nT6yEuZ1rEc
-
- Posts: 10
- Joined: 15 Feb 2022 2:50 pm
- Location: Austria
Thanks for the pointer, making the steel guitar using as many off the shelf hardware store parts! I had difficulties finding Aluminum past 5mm as anything thicker is unavailable at local retailers here in Austria or the bordering countries in my reach , but I've decided to go with 8x20 6060 Aluminum as I have just found an online supplier with reasonable shipping costs and prices so I just placed an order of enough material for at least one additional project. The spacers will probably be 2mm thick PA/Nylon 66 washers as I already have those and will only need to cut them to the right diameter. Since 3/32" thick rods seemed to be the general consensus I have found I've decided to go with the next size up available here which is the aforementioned 3mm thick welding rods. I of course have to make everything metric as the substantially higher costs of such parts makes it unfeasible, despite being the seemingly most common standard.
-
- Posts: 2235
- Joined: 17 May 2010 9:27 am
- Location: West Virginia, USA
Good Luck in your steel guitar project. I made that dive about 1970.
It is great that you picked out a setup that you can reach. 3 Pedals/4 Knee Levers is a very reachable goal. And a lot of music in a Guitar with 3P/4KL when finished.
I think you are going at it right. Use Metric materials and measurements in the build. That way you can use metric tools, Like Dies, Taps, Micrometers and Rulers for the build. Convert measurements 1 time and then work from there.
In 1963-64 I was a truck driver in a U.S. Army Construction Engineer Company in France. Everything we built in France, Had to be converted and built using Metric Measurements. It got confusing a lot of times with measurements. And bad mistakes was made, The result of miss converting between Yankee and Metric Measurements.
Some companies like Grover Tuning Keys, Have parts made using Metric Measurements. I replaced a set of Tuners in a 1973 MSA Steel Guitar, I Owned a few years ago. The original keys was 3/8 inch shaft. The new set I got was 10 mm. I had to drill out the holes to (25/64 inch) in the Key Head to replace them.
Have a great time, building your dream.
-
- Posts: 9
- Joined: 23 Apr 2023 9:45 am
- Location: Arizona, USA
Looks like you're off to a great start Javier!
I love piles of parts
Just chiming in on the metric/imperial issue, if the queen is going to build it I would totally go imperial, otherwise no!
I participated in overseas manufacturing for about 3 years, through that period I used metric exclusively, going back to imperial has been challenging since, despite it's being my native (US) format
True story: I was having a conversation with a delightful young sales rep once, she shared that she understood most fractions pretty well, but had trouble with "the ones in time"
I knew I was in for a good one, though I couldn't yet tell what it was
She followed with "I get the eighths and I get the sixteenths, but I don't get the thirty seconds"
Happened years ago and it still makes me laugh every time I recount it
-
- Posts: 10
- Joined: 15 Feb 2022 2:50 pm
- Location: Austria
Just a small update of how I am making the changer fingers.
I start off with a 12cm long pieces of the 8x20 mm aluminum to use as a blank to make two fingers out of and drill two 8mm holes centered 12mm from the end of the piece, and a few 3mm holes about 30 mm and slightly further from the end to accommodate a hand saw blade to saw it, here with two partially finished fingers in their rough alignment
After filing the fingers to rough shape I attach a 608Z 8x22x7mm ball bearing on each side with an M8 bolt to use as a stop for filing the outer radius as their hardened surfaces remain largely unaffected, starting with a rough double cut file and finishing with a fine single cut file. Here the setup:
And here the finished surface for the string to ride on:
Of course several more steps remain to be taken; the axle diameter will be increased to either 10 or 12mm, the rest of the shape completed and the surfaces anodized as well as completing the whole set of 10. Due to my currently limited tool set and time I will take my time with it but I will hopefully report within a few weeks with a finished changer, nonetheless I just wanted to post an update to my ongoing project
-
- Posts: 605
- Joined: 23 Oct 2021 11:58 am
- Location: Nebraska, USA
This is how I rough the shape. https://www.youtube.com/watch?v=UWpnoKA64wk Then I put them all on the axle and file them together. I say whatever works!
-
- Posts: 10
- Joined: 15 Feb 2022 2:50 pm
- Location: Austria
That will probably be how I'll do it at some point in the future, but being restricted to a public workshop which I rarely have time to visit and basic tools at home I'll for now make do with the hand tools at hand. There is no doubt I'll get some of such tools once I that becomes an option. I'm not trying to sell anything right now, so I'm pretty happy with my current methods haha
-
- Posts: 2235
- Joined: 17 May 2010 9:27 am
- Location: West Virginia, USA
One thing I would suggest since you are using hand tools for a lot of things.
Something I learned many years ago. Have 2 files, Use a new file only to cut aluminum or brass, Then when you wear out your steel shaping file, Move your brass/aluminum file to shaping steel. And use a new file for Brass/aluminum.
Most new files will grab and cut soft metal quickly, Just a few strokes on steel will take the very sharp edge off the file teeth and slow the cutting of aluminum/Brass.
Good Luck in your building project. bj
-
- Posts: 10
- Joined: 15 Feb 2022 2:50 pm
- Location: Austria
This is the changer so far, it's still lacking the string pins and mounting bars and has yet to be anodized, the diameter is 22mm (~7/8") the string spacing 9.6 mm (~3/8") and the overall length of each finger is 9 cm (~3.5"), I opted for a 12mm (15/32") 8.8 bolt as the axle to minimize bending and as it is the largest locally available bolt size.
-
- Posts: 5857
- Joined: 4 Aug 1998 11:00 pm
- Location: Oceanside, Calif, USA
- Contact: