Custom Steel Build

For people who build steel guitars

Moderator: J D Sauser

User avatar
Wayne Brown
Posts: 1793
Joined: 3 Apr 2002 1:01 am
Location: Bassano, Alberta, Canada
Contact:

Custom Steel Build

Post by Wayne Brown »

Well folks here we go again. I'm going to start another guitar within couple of months.
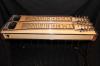
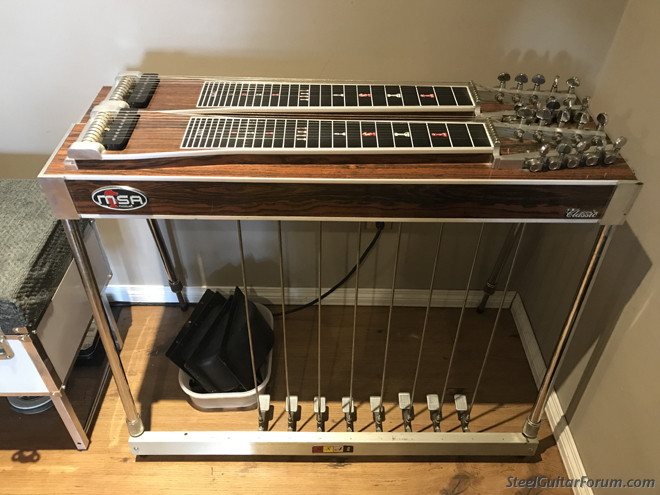
I still have some parts left over from the rare wood steel build and an old MSA D-10 guitar I would like to incorporate into this new build as all these parts are solidly made and would give a good basis for the guitar.
Image
So depending on what wood is available to myself, the ideas are being discussed as the possibilities are endless. And with any of my builds, all using lacquer of coarse... :D .
However before I start other than the wood, there are a few parts I still need, if anybody can help
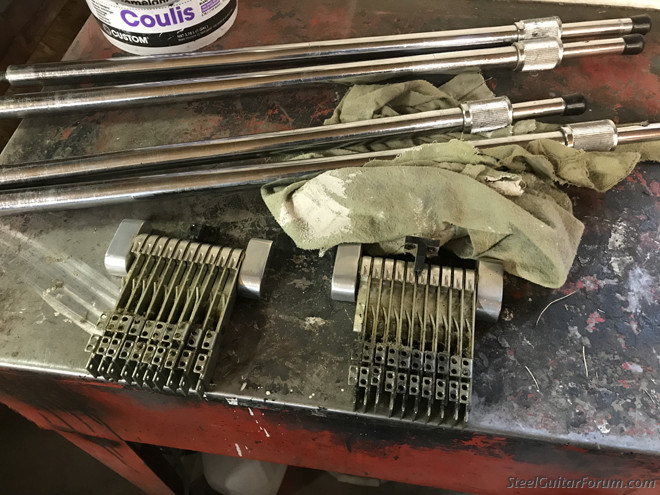
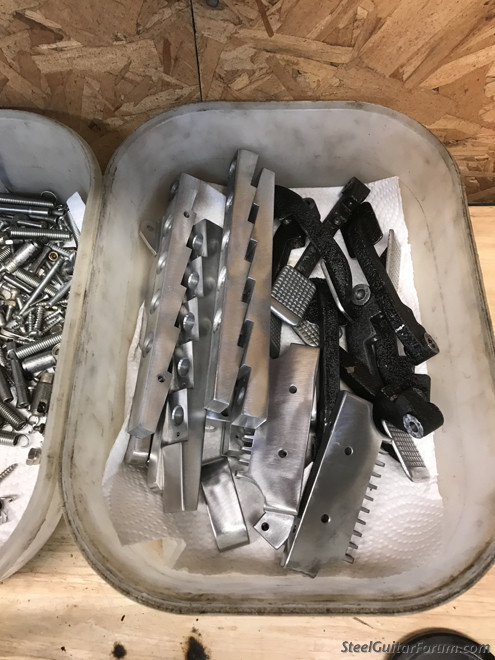
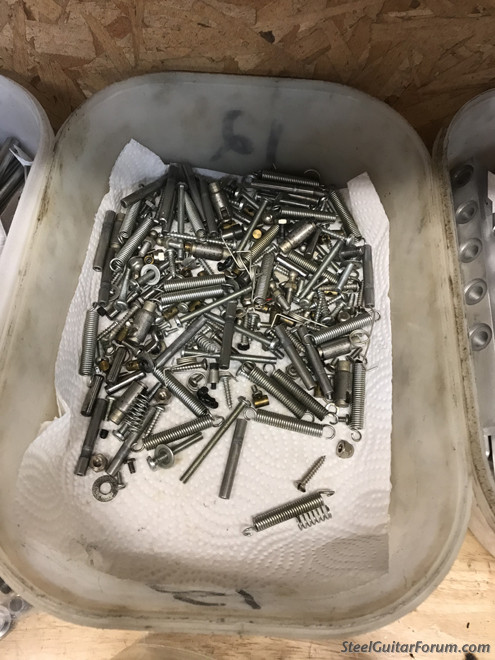
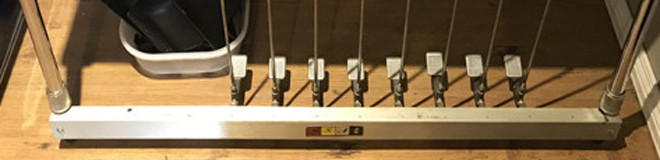
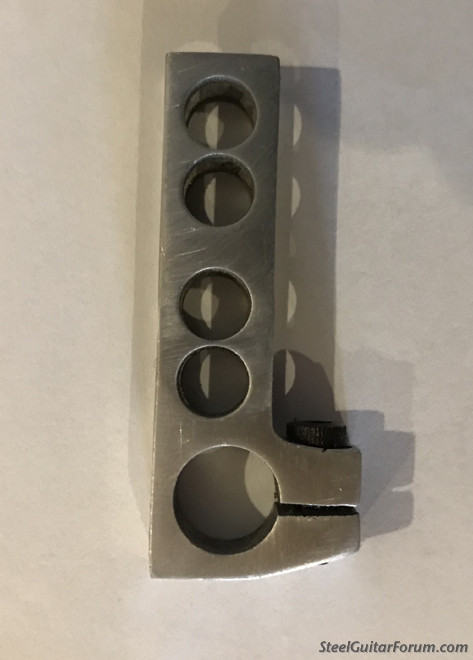
I need 6x MSA/Linkon 4 hole bell cranks/pullers. The old style with the 3/8 round shaft and locking screw.
Image
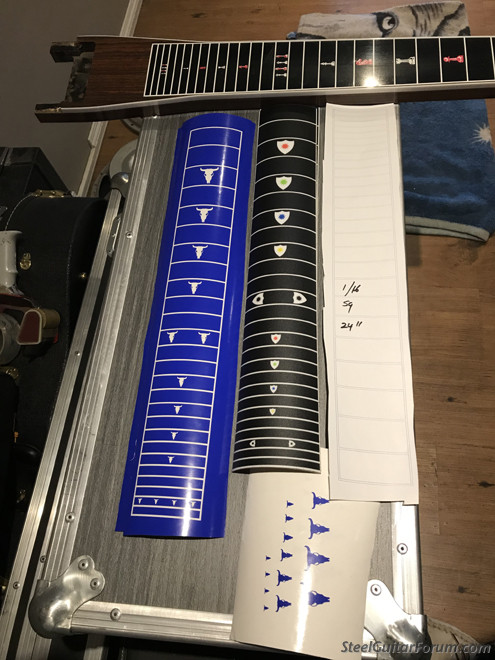
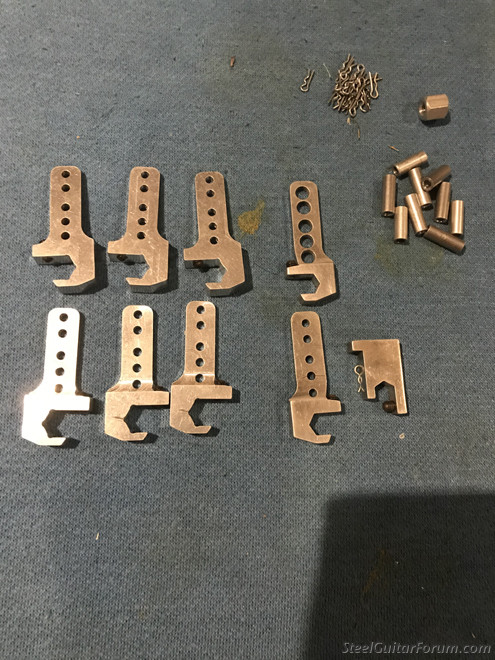
The rest of the parts I have found or had stashed away. I can buy them from you or I have some brand new Mullen bell cranks that have never been mounted. Six for a G2 or RP and a couple of older ones for a PRP plus all whats in the picture I could trade if anybody is interested.
Image
thanks
Wayne
Last edited by Wayne Brown on 15 Aug 2023 4:51 am, edited 12 times in total.
Owner Out West Seats,Cases
www.outwestcountry.ca
User avatar
Andy DePaule
Posts: 2576
Joined: 20 Jun 1999 12:01 am
Location: Saigon, Viet Nam & Springfield, Oregon
Contact:

Just a thought

Post by Andy DePaule »

Hi Wayne,
Just a thought and I'm not sure of the best way to remove the laminate, but with the high cost and poorer quality of fancy woods these days why not use a fancy veneer over the wood in the old body?

I've gotten some really nice veneers from a guy on E-Bay and this is his page;
https://www.ebay.com/str/thinwoodandoldtools
His prices are very good and th quality is just as shown on his listings.

Mike Scaggs did a really nice job on an Emmons replacing the mica with veneer.
If my memory serves me right I think he used two layers of veneer to equal the thickness of the mica?
This is a link to that project;
https://bb.steelguitarforum.com/viewtop ... ood+veneer
Good luck,
Andy
Inlaid Star Guitar 2006 by Mark Giles. SD-10 4+5 in E9th; http://luthiersupply.com/instrument-gallery.html
2017 Mullen SD-10, G2 5&5 Polished Aluminum covering. Custom Build for me. Great Steel.
Clinesmith Joaquin Murphy style Aluminum 8 String Lap Steel Short A6th.
Magnatone Jeweltone Series Lap Steel, Circa 1950? 6 String with F#minor7th Tuning.
1956 Dewey Kendrick D-8 4&3, Restoration Project.
1973 Sho~Bud Green SD-10 4&5 PSG, Restoration Project.
Greg Forsyth
Posts: 328
Joined: 3 Apr 2020 1:05 pm
Location: Colorado, USA

removing plastic laminate

Post by Greg Forsyth »

Lacquer thinner will loosen and release the p-lam and a glue scaper w/ lacquer thinner will clean up the contact cement remaining on the board.
User avatar
Wayne Brown
Posts: 1793
Joined: 3 Apr 2002 1:01 am
Location: Bassano, Alberta, Canada
Contact:

steel guitar

Post by Wayne Brown »

Thanks guys for the great suggestions. I have removed a lot of Formica from steel guitars over the years using lacquer thinner. Which seams to be the best way to do it without any damage to the wood. However i think I'll have to take this whole guitar apart to see which way would be the best way to go. I like Andy's idea of veneer. I never even thought of that. However if I change the wood completely the tone of the guitar would possibly change as well. I don't know if these old MSA's were plywood or real wood. Also this one is a 1974 in case inquiring minds wanted to know. And on another note the stock MSA pickups will not be used in the new build. I will be using a E-66 and a EON.
Thanks guys
Wayne
Last edited by Wayne Brown on 25 Sep 2022 10:22 am, edited 4 times in total.
Owner Out West Seats,Cases
www.outwestcountry.ca
User avatar
Barry Coker
Posts: 761
Joined: 22 Jun 2017 9:59 pm
Location: Bagley Alabama, USA

Post by Barry Coker »

If you can't find any orig. cranks I make these.

Image

Image

Barry
Zum-D-10, Webb 614-E, 65 Pro Reverb, Evans RE200, 69 Gibson Birdland, 89 Telecaster EAD Bad!!
User avatar
Andy DePaule
Posts: 2576
Joined: 20 Jun 1999 12:01 am
Location: Saigon, Viet Nam & Springfield, Oregon
Contact:

Re: removing plastic laminate

Post by Andy DePaule »

Greg Forsyth wrote:Lacquer thinner will loosen and release the p-lam and a glue scaper w/ lacquer thinner will clean up the contact cement remaining on the board.
Thanks for that info.
Inlaid Star Guitar 2006 by Mark Giles. SD-10 4+5 in E9th; http://luthiersupply.com/instrument-gallery.html
2017 Mullen SD-10, G2 5&5 Polished Aluminum covering. Custom Build for me. Great Steel.
Clinesmith Joaquin Murphy style Aluminum 8 String Lap Steel Short A6th.
Magnatone Jeweltone Series Lap Steel, Circa 1950? 6 String with F#minor7th Tuning.
1956 Dewey Kendrick D-8 4&3, Restoration Project.
1973 Sho~Bud Green SD-10 4&5 PSG, Restoration Project.
User avatar
Wayne Brown
Posts: 1793
Joined: 3 Apr 2002 1:01 am
Location: Bassano, Alberta, Canada
Contact:

steel guitar

Post by Wayne Brown »

Thanks Barry for the offer but if i can help someone out while it helps me out with a trade, I would like to try that 1st. Anybody interested in some Mullen G2 or RP bell cranks etc...
thanks
wayne
Owner Out West Seats,Cases
www.outwestcountry.ca
Steven Black
Posts: 1944
Joined: 27 Oct 2002 12:01 am
Location: Gahanna, Ohio, USA

Face-lift ideas on Steel guitars

Post by Steven Black »

I like using veneers, working on a couple of guitars using veneers, Roy Thomas used veneers successfully on his Pedalmasters, they look exactly like lacquers, how he got them to bend over edges is a secret I need to learn about.
User avatar
Andy DePaule
Posts: 2576
Joined: 20 Jun 1999 12:01 am
Location: Saigon, Viet Nam & Springfield, Oregon
Contact:

Re: Face-lift ideas on Steel guitars

Post by Andy DePaule »

Steven Black wrote:I like using veneers, working on a couple of guitars using veneers, Roy Thomas used veneers successfully on his Pedalmasters, they look exactly like lacquers, how he got them to bend over edges is a secret I need to learn about.
Hi Steve, Most wood will bend easy when heated just right. As a luthier I've been bending thin woods for guitar sides since 1969.
Guitar sides are about 3/32" thick. We used to bend them over a bending iron which was made from a section of exhaust pipe with a heating element inside.
Now days most of us use heating "Blankets" made of a rubber like material with heat in them. We use those with a form in the shape of the guitar sides.

For hundreds of years boat builders have bent woods 3/4" thick and thicker after steaming the planks in a long large tube for 30 minutes or longer.

For veneer which is usually very thin at about 28/32" thick I'd just use a heat gun on low heat or maybe even a hair dryer would do the trick quite well.

I got an old Sho~Bud Maverick from Jimmie Hudson. It's one of those that had some kind of a contact paper like deal but this one had already been stripped.
I intend to sand it down to account for the end plates opening.
Then veneer it with some nice Birdseye Maple and figured Black Walnut.
Andy
Inlaid Star Guitar 2006 by Mark Giles. SD-10 4+5 in E9th; http://luthiersupply.com/instrument-gallery.html
2017 Mullen SD-10, G2 5&5 Polished Aluminum covering. Custom Build for me. Great Steel.
Clinesmith Joaquin Murphy style Aluminum 8 String Lap Steel Short A6th.
Magnatone Jeweltone Series Lap Steel, Circa 1950? 6 String with F#minor7th Tuning.
1956 Dewey Kendrick D-8 4&3, Restoration Project.
1973 Sho~Bud Green SD-10 4&5 PSG, Restoration Project.
User avatar
Wayne Brown
Posts: 1793
Joined: 3 Apr 2002 1:01 am
Location: Bassano, Alberta, Canada
Contact:

steel guitar

Post by Wayne Brown »

still looking for 6 MSA bell cranks. Anybody want to do a trade for the Mullen parts shown :)
thanks
Wayne
Owner Out West Seats,Cases
www.outwestcountry.ca
User avatar
Wayne Brown
Posts: 1793
Joined: 3 Apr 2002 1:01 am
Location: Bassano, Alberta, Canada
Contact:

steel guitar

Post by Wayne Brown »

OK all parts that were needed for this build have been sourced and we will be ready to start the new build soon. I will be using new wood and completely redesigning a new body, as i like the idea of building something fresh with all the challenges that come with that. I did look at veneer however that is not for me, because we want to do more with this build. My wife and I have been throwing around a lot of ideas for this guitar which is why i have not gone in any direction on it yet. Everything from different color schemes to different designed fret boards. We are even looking into a Laser cutter to maybe insert my logo's and frets into the wood. I am just so excited. So as always i will keep updating this post with pictures so you folks can follow a long.
Thanks
Wayne
Owner Out West Seats,Cases
www.outwestcountry.ca
User avatar
Wayne Brown
Posts: 1793
Joined: 3 Apr 2002 1:01 am
Location: Bassano, Alberta, Canada
Contact:

steel guitar

Post by Wayne Brown »

I have now taken the MSA apart today, and what I found I did not care for...(in my personal opinion only). The guitar is a complete plywood guitar. I know to a lot of folks that does not matter much... as MSA is known to have great tone, and to a point I agree with that assessment. However I also believe that good wood also makes for good tone as well that is why I am a Takamine fan. I am not trying to start a tonal war here. Its just my opinion. So please ( no one get huffy). This was stated so you folks would understand one of the reasons why I do custom builds. I like things that are quite unique. All of the aluminum including The end plates on this guitar are top notch and very well built. The mechanics also on this guitar other than outdated are solid and quite usable. So with that said this will be the basis for the build. I now have put out some emails for rare wood starting with my 1st choice being quilted maple. My 2nd choice is Birds eye Maple. We shall see what happens on that front. I guess while I'm waiting for the parts that I have ordered to arrive I will start the polishing process.
Image
Image
And were off...
more pictures to follow.
Last edited by Wayne Brown on 22 Jan 2023 4:50 am, edited 1 time in total.
Owner Out West Seats,Cases
www.outwestcountry.ca
User avatar
Wayne Brown
Posts: 1793
Joined: 3 Apr 2002 1:01 am
Location: Bassano, Alberta, Canada
Contact:

steel guitar

Post by Wayne Brown »

Well I have been pulled off doing a few other jobs around here as winter hit us hard. I had to build some front end speakers for a customer that had some old SP-2s that needed updating.
Image
Also had to build a case for the previous rare wood steel guitar. Then I will be back on this build.
The wood has arrived and 98% of the needed stock and new parts have arrived. I still have to pick up some ods and ends this week, I like to have everything available here so i don't run into any supply problems in the middle of a build.
I have got a lot of the cleaning and polishing done on the undercarriage stuff done.
I am still getting things ready for the experimenting with the lacquer, with different colors and designs for this wood. That will be fun and of course i will post pictures of that process as well. Also as an added bonus I will have a cool extra surprise being done with this build...stay tuned.
Image
Image
Image
Image
thanks
Wayne
Last edited by Wayne Brown on 14 Nov 2022 5:46 am, edited 2 times in total.
Owner Out West Seats,Cases
www.outwestcountry.ca
User avatar
Wayne Brown
Posts: 1793
Joined: 3 Apr 2002 1:01 am
Location: Bassano, Alberta, Canada
Contact:

steel guitar

Post by Wayne Brown »

So it's time for a little experimenting. I made some vinyl templates to use. I am going to try some different paint schemes to see what looks cool. I'll be using clear lacquer, White tinting agents, Candy apple blue tinting agents, and black tinting agents. I will also be using Ice Blue pearl. We will also be entertaining African Black wood (Ebony) again...as this wood looks so fantastic under lacquer. I will also be looking at different color vinyl's for the fret markers. Here is a couple of pictures of the templates. I will ad more as the experimenting continues. As well it is time to start the cleaning process for all the aluminum parts.
Image
Image
thanks
wayne
Owner Out West Seats,Cases
www.outwestcountry.ca
User avatar
Wayne Brown
Posts: 1793
Joined: 3 Apr 2002 1:01 am
Location: Bassano, Alberta, Canada
Contact:

steel guitar

Post by Wayne Brown »

I have updated this post in this thread...
Due to the guitar getting a color change I have put back the session amp to original state with some updates because I am not as young as I used to be. I have added wheels and side handles so two people can carry the amp to where it needs to be. However I have not forgotten about a special build along with this guitar.

Image
Image
Image
Last edited by Wayne Brown on 24 Dec 2022 7:04 am, edited 4 times in total.
Owner Out West Seats,Cases
www.outwestcountry.ca
User avatar
Wayne Brown
Posts: 1793
Joined: 3 Apr 2002 1:01 am
Location: Bassano, Alberta, Canada
Contact:

steel guitar

Post by Wayne Brown »

Well this guitar build just took a couple really Sharpe left turns. The 1st is that the rare woods guitar sold and I really did not want to sell it. However a gentleman contacted me off of Kijiji up here in Canada and now it's sold and delivered. My problem is, with that build I really liked the color scheme of blonde natural wood and the black ebony inserted fret boards, and was a pleasure to play. So there are 2 ways this build is now going to go. We (my wife and I) have bought a laser cutter/engraver. We are going to try to laser in the wood our new fret board with my company logos. Then fill them in with 4 coats for black lacquer, then 2 coats of clear with sapphire blue pearl mixed in, then continue the clear coats over the whole guitar to finish the guitar off. Here is the painting test piece picture done with a table saw.
Image
The 2nd way is sort of a rare woods 2.0 type of guitar. Changing the fret board to a normal looking tapered one, from 2.75" at the front to a 3.5" at the back, rather than going completely across. Inserting real African black wood (ebony) as fret boards again.
The other thing I have found... is on the pedals...
A little while back a gentleman on this forum was looking for the old style MSA pedals with the "black crinkle finish" as he put it. I took a closer look at this and found out what he was talking about. It seams they are a sand cast pedal and instead of spending the time to polish them out they just painted the arms and polished the pedal face itself...well now that's been rectified as well. The pedal bar and pedals have all been polished and the inside of the pedal bar has had the paint they used removed, and then been bead blasted.
Image
Image
Image
Image
So on with the build...and of course more pictures to come.
thanks
wayne
Owner Out West Seats,Cases
www.outwestcountry.ca
User avatar
Wayne Brown
Posts: 1793
Joined: 3 Apr 2002 1:01 am
Location: Bassano, Alberta, Canada
Contact:

steel guitar

Post by Wayne Brown »

About that special build... I'll just put this picture here for now. You folks can look at it and see if you can figure out what is going to be. :D
Thanks
Wayne
Image
Owner Out West Seats,Cases
www.outwestcountry.ca
User avatar
Wayne Brown
Posts: 1793
Joined: 3 Apr 2002 1:01 am
Location: Bassano, Alberta, Canada
Contact:

steel guitar

Post by Wayne Brown »

OK were into to it now. The body is almost fitted and should be complete in the next couple of days. I also found a really cool way to add the divider chrome trim to the body, so if you can blow up the picture you might be able to see the trim temperately set into the guitar. When i go back out to the shop today I will take some pictures on how I did this before I join the 2 half's and insert the pictures here later today.
Image
Here are the pictures that I promised.
Image
Image
On another note here are some preliminary tests with the laser engraver of our logo and name, and also a test to see how a fret board would look. Next we'll have to insert some paint to see how color will work on the wood. Onward and Forward.
Image
Image
Owner Out West Seats,Cases
www.outwestcountry.ca
User avatar
Wayne Brown
Posts: 1793
Joined: 3 Apr 2002 1:01 am
Location: Bassano, Alberta, Canada
Contact:

steel guitar

Post by Wayne Brown »

Well the body is 98 percent done being built. here is a picture of it in my sound room while i do some other jobs that need taking care of. The reason it looks so pale is that it is covered with sign transfer tape which is fantastic for protecting the wood without leaving any glue residue behind.
Image
Here are the necks getting laser testing done on plywood 1st and then engraving the guide lines for the physical routering of the fret grooves themselves in the maple necks. The frets made out of ebony, will be inlayed into the maple.
Image
Image
Once routering starts I will take some pictures of that.
Last edited by Wayne Brown on 22 Jan 2023 4:26 am, edited 3 times in total.
Owner Out West Seats,Cases
www.outwestcountry.ca
Greg Forsyth
Posts: 328
Joined: 3 Apr 2020 1:05 pm
Location: Colorado, USA

Post by Greg Forsyth »

Thanks for the photos Wayne, and keep them coming.
User avatar
Wayne Brown
Posts: 1793
Joined: 3 Apr 2002 1:01 am
Location: Bassano, Alberta, Canada
Contact:

steel guitar

Post by Wayne Brown »

A couple of months ago I had to buy a 3/32" router bit. Which was not easy to find being so small and with a 1/4" inch shank to fit a normal router. But I did find two and bought them both just in case one burned up. I made up a jig to move the neck blanks back and forth so I could router the fret grooves and in this build proper fret edging. These necks will also be completely bound with Ebony as well. As for the fret markers, my wife and I decided to use my company logos again butt, with an addition. We will add three different blue colors as the eyes and nose to make it a little more noticeable of where you are on the neck. Anyways all the frets and fret grooves were cut and routered yesterday. Today I will be routering for the new pickups. Cutting the neck blanks to the proper length. Then doing the shaping of the necks. I have a old pair of modified MSA necks that i use as a jig to get the basic shape i need then a power sand to get the final shape....more to come...thanks
Image
Image
Image
Image
Image
Image
Image
Owner Out West Seats,Cases
www.outwestcountry.ca
User avatar
Bill Duncan
Posts: 1123
Joined: 10 Jul 2008 1:53 pm
Location: Lenoir, North Carolina, USA

Post by Bill Duncan »

I have an MSA D10 like that one I bought new. Mine was built 10/1975. I still have it and still play it. I keep it set up in my studio. They are heavy, but the mechanics are bullitt proof. Should a tornado hit, I will get under the old MSA.

I hope your build goes well.
You can observe a lot just by looking
User avatar
Wayne Brown
Posts: 1793
Joined: 3 Apr 2002 1:01 am
Location: Bassano, Alberta, Canada
Contact:

steel guitar

Post by Wayne Brown »

Thanks Bill
This guitar build is going a lot smoother than the last one did. Probably due to all the engineering problems were worked out in the last build, and this one is sort of a 2.0 of the last guitar. Here are some pictures of the fret runners being inlayed. I also found a cool way to do the glue without a big mess. I found these blunt syringes in bulk on Amazon and have been invaluable on this build. I should have the frets all inlayed tomorrow I hope. Then I can router for the neck binding...
Image
Image
Image
And here are the frets all installed...tomorrow i will sand them flush and start on the neck bindings...
Image
Image
Owner Out West Seats,Cases
www.outwestcountry.ca
User avatar
Wayne Brown
Posts: 1793
Joined: 3 Apr 2002 1:01 am
Location: Bassano, Alberta, Canada
Contact:

steel guitar

Post by Wayne Brown »

Here are the pictures of the necks in there final stages of being completed...
Image
Image
Image
And now here is the guitar on it's legs temporarily. I have a few more dry fitting things to do..for example changers, pickups, neck selector switch, etc. Then I will disassemble it and do a final sand. Then it will be ready to completely seal the guitar body and necks to get it ready decals and then for lacquer.
Image
Image
Owner Out West Seats,Cases
www.outwestcountry.ca
User avatar
Wayne Brown
Posts: 1793
Joined: 3 Apr 2002 1:01 am
Location: Bassano, Alberta, Canada
Contact:

steel guitar

Post by Wayne Brown »

OK here is the guitar just after being sealed today to take all the lacquer coats that will be sprayed next week. So basically this guitar build is finished, except the decals and spraying and polishing. Also here is the extra special build I promised. I have built a matching deluxe OutWest Pac-seat that will match the guitar. As you can see it here being sealed as well. It is maple veneer over plywood, ( Thanks Andy) of course lacquered with polished aluminum trim all the way around, satin polished welded aluminum legs, and black carpet on the inside, also with extreme high density 2 inch foam. I actually enjoyed making this special seat. And with that said I have talked it over with my wife and we are going back to building two new style of seats, with and without backrests, steel guitar cases standard and flight, leg bags, amp and seat covers. and other accessories for the music industry. We are in the middle of building the web page now and should be up soon. If you like info on this please email or PM myself...thanks. The web site can be now found here www.outwestcountry.ca I hoped you enjoyed following along with this build as I had fun posting it. If you would like any technical information on anything I have done here please reach out and I will do my best to answer any and all questions.
More pictures to follow as they are completed.
Image
Image
Image
Last edited by Wayne Brown on 24 Feb 2023 4:00 am, edited 1 time in total.
Owner Out West Seats,Cases
www.outwestcountry.ca
Post Reply