Need to remove push pull changer
Moderator: Shoshanah Marohn
-
Brian Spratt
- Posts: 159
- Joined: 6 Dec 2021 9:19 am
- Location: Oklahoma, USA
- Contact:
Need to remove push pull changer
I’ve decided I need to remove and disassemble and clean the changer on my Emmons push pull. Multiple rounds of naphtha, compressed air, and tri-flow just aren’t cutting it at this point. I have Clem’s book and video as a guide but one question - can I expect to keep much of the rods and collars etc in place and still get the changer out. Or do I just need to bite the bullet and remove pretty much everything underneath? Any advice?

You will need to disconnect every pull rod hook and loosen all the collars and pull the push rods back. One thing I’d recommend is keeping all the fingers and spacers in the same order - I run a wire through them as I disassemble, and tie it off while I clean (thanks Lynn Stafford) because they tend to wear a certain way against each other. Good luck!
Mostly Pre-1970 guitars.
-
Bill Sutton
Hello Brian Bill Sutton here. I pulled my Emmons Legrande Guitar down to clean the Changer...but before I did I made notes on everything...like what holes the pull rods were in on the changer for raise and lower...and what holes they were in on the bell cranks...so when I putt everything back I would put back in the correct position. Everything that is connected to the changer will have to come off. After I got it apart I noticed the Changer axle was worn A little on one side. When I put back together I turned it just A little to A better position...now I used A fine Gun oil...but I dont know if that was the right thing to do. Billy Knowles or Ricky Davis would be the Folks you could trust on that Info. After I gave everything A good cleaning...I put everything back together using my notes...and thank God it was all good. The Guitar pedal action was much better...and everything was very smooth. Its A very tuff job but well worth the time. Good luck.
-
Brian Spratt
- Posts: 159
- Joined: 6 Dec 2021 9:19 am
- Location: Oklahoma, USA
- Contact:
-
Kelcey ONeil

- Posts: 327
- Joined: 1 May 2018 11:42 am
- Location: Sevierville, TN
- Contact:
-
Brian Spratt
- Posts: 159
- Joined: 6 Dec 2021 9:19 am
- Location: Oklahoma, USA
- Contact:


-
Mike Vallandigham
- Posts: 705
- Joined: 28 Apr 2005 12:01 am
- Location: Martinez, CA
If I have to de rod a guitar one thing I do is take a pencil or a fine sharpie and mark where the collar sits on each rod. Then you can get them back close to the same position as a starting point fir fine tuning upon reassembly. A pencil works..just don't wipe it off by accident.
That and all the other great suggestions above.
And like said above..don't take the rods all the way out, just pull them back enough to get them out of the changer.
That and all the other great suggestions above.
And like said above..don't take the rods all the way out, just pull them back enough to get them out of the changer.
-
Kelcey ONeil
- Posts: 327
- Joined: 1 May 2018 11:42 am
- Location: Sevierville, TN
- Contact:

-
Tony Glassman

- Posts: 4470
- Joined: 18 Jan 2005 1:01 am
- Location: The Great Northwest
-
Bobby D. Jones
- Posts: 2235
- Joined: 17 May 2010 9:27 am
- Location: West Virginia, USA
Be sure to take pictures and mark everything.
Use a magic marker, and a sharp tool to mark exact spot, where sliding adjusted parts and collars must be set exact, For proper operation.
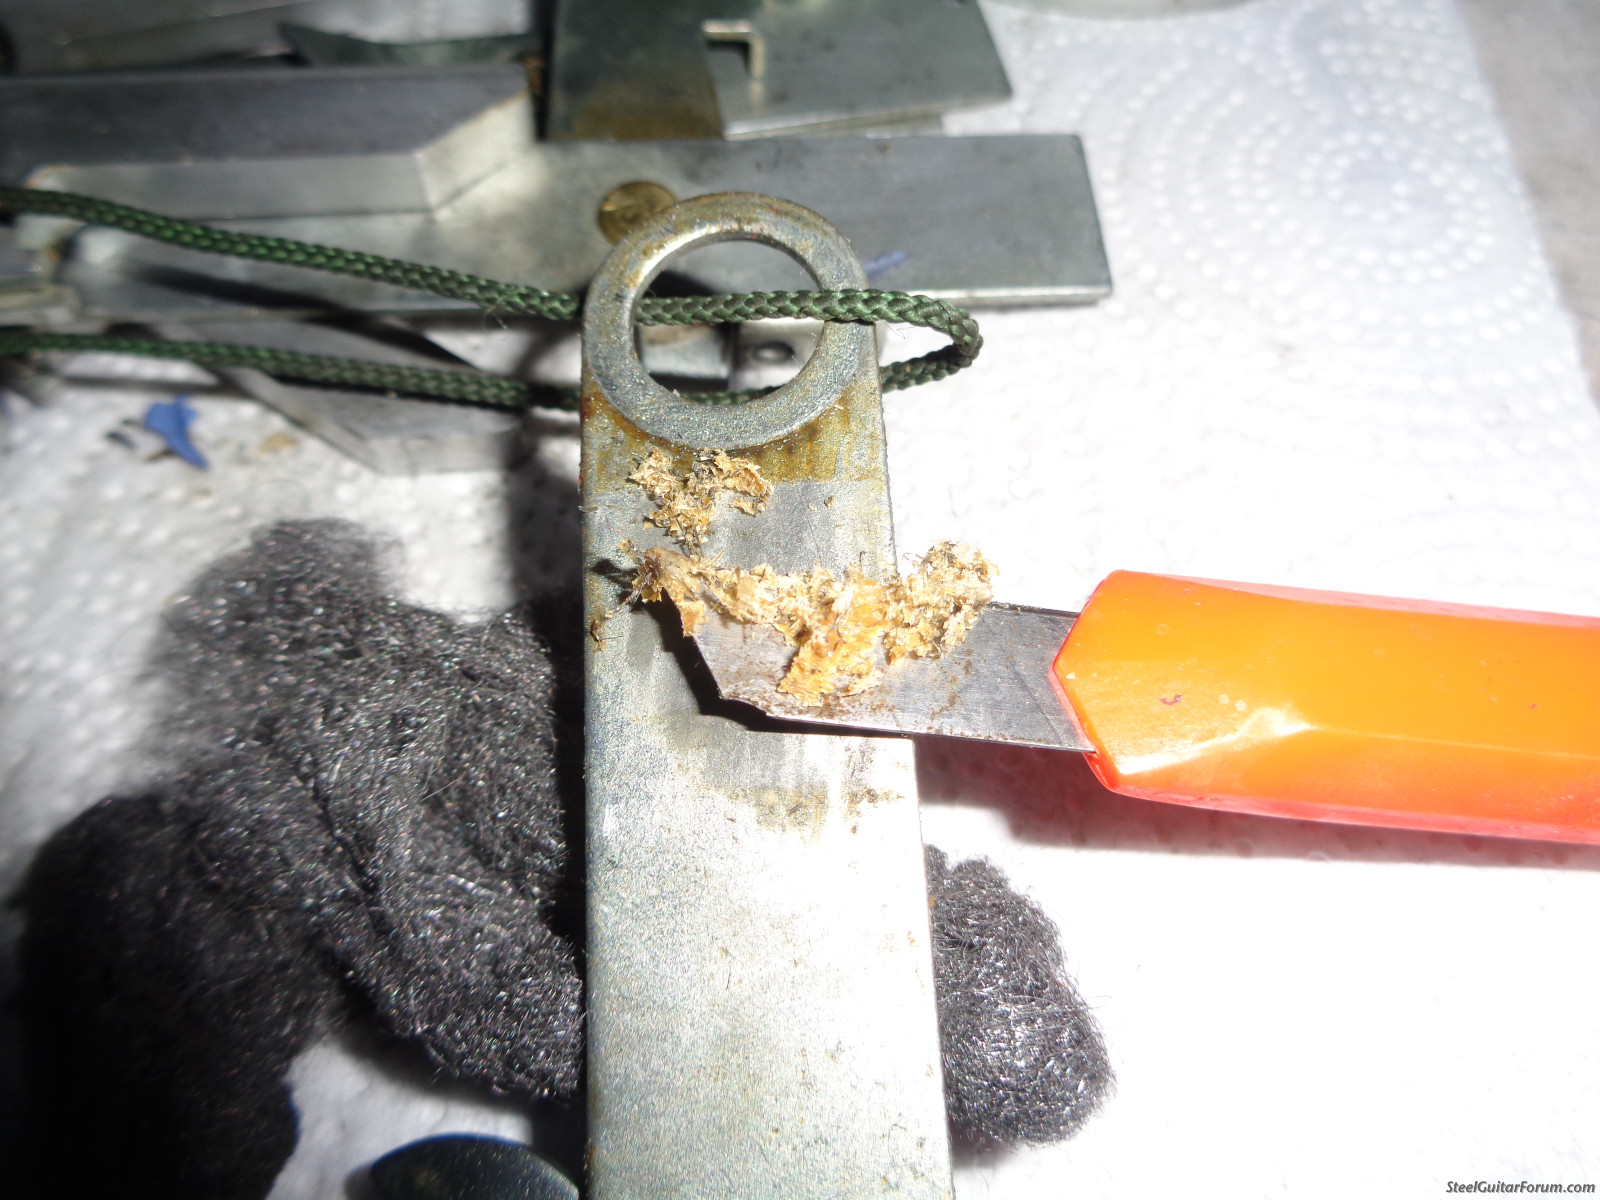
About 2 months ago I took both changers out of a MSA Classic
and cleaned and fixed some problems in the changer. I actually strung all the parts in order on a nylon string. Put a key ring in the loop so everything stayed in order. What you may find is Lube that has turned into near dry paint. It may take knife scraping and steel wool to clean proper.

Took some work to give this MSA Classic its 50 year bath, But it was worth the effort.
Good Luck in this project, And Happy steelin.
Use a magic marker, and a sharp tool to mark exact spot, where sliding adjusted parts and collars must be set exact, For proper operation.
About 2 months ago I took both changers out of a MSA Classic
and cleaned and fixed some problems in the changer. I actually strung all the parts in order on a nylon string. Put a key ring in the loop so everything stayed in order. What you may find is Lube that has turned into near dry paint. It may take knife scraping and steel wool to clean proper.
Took some work to give this MSA Classic its 50 year bath, But it was worth the effort.
Good Luck in this project, And Happy steelin.
-
Andy Gibson

- Posts: 151
- Joined: 7 Mar 2021 7:31 am
- Location: Tennessee USA
Cleaning parts
Has anyone ever used an ultrasonic cleaner for this kind of job?
https://en.wikipedia.org/wiki/Ultrasonic_cleaning
https://www.harborfreight.com/25-liter- ... 63256.html
https://en.wikipedia.org/wiki/Ultrasonic_cleaning
https://www.harborfreight.com/25-liter- ... 63256.html
-
Bobby D. Jones
- Posts: 2235
- Joined: 17 May 2010 9:27 am
- Location: West Virginia, USA
I have a Ultra sonic cleaner. I hit it with Carb Cleaner, Put the changer parts in the U S Cleaner. It removed part of the old goop. But I had to take it out and actually scrape the 50 year old hardened lube off some of the parts and 0000 steel wool to remove all hard lube. After scraping and steel 0000 steel wool, It went back in the Sonic Cleaner. Picture below is result.
If I was pulling another changer for full service, I would find and buy or machine out a set of rivets. Would make cleaning easier and replacing any worn rivets would make the changer closer to factory specs.
Picture file
If I was pulling another changer for full service, I would find and buy or machine out a set of rivets. Would make cleaning easier and replacing any worn rivets would make the changer closer to factory specs.
Picture file
-
Bobby D. Jones
- Posts: 2235
- Joined: 17 May 2010 9:27 am
- Location: West Virginia, USA
-
Brian Spratt
- Posts: 159
- Joined: 6 Dec 2021 9:19 am
- Location: Oklahoma, USA
- Contact:
I got the changer out and tore apart. I sprayed it with degreaser and soaked it in Berryman carb cleaner for a half hour. The fingers are pretty clean now. I did notice that the degreaser I used caused some discoloration of the polished aluminum at the top of the fingers. I had pretty good success buffing it out with California Customs polish but it wasn’t quite perfect. Has anyone else had this problem? Did I just use a bad degreaser?


-
Bobby D. Jones
- Posts: 2235
- Joined: 17 May 2010 9:27 am
- Location: West Virginia, USA
The changer looks great, Sorry to hear the cleaner hurt the aluminum fingers.
Some of the cleaners have caustic materials in them to cut grease, Caustics will eat on aluminum.
When I worked for Westinghouse in the Sealed Beam section. My Job at lunch time, Was to pull the Aluminuumizer liners out. Take them to a large vat filled with hot Caustic Soda. Leave them in till no bubbles, Rinse and lay them on annealer oven to dry and reinstall.
-
Brian Spratt
- Posts: 159
- Joined: 6 Dec 2021 9:19 am
- Location: Oklahoma, USA
- Contact:
Here you can see the results of using California customs polish on the changer ends. It’s pretty close to perfect but looking really close you can see it’s not perfect.
Question: what should I lube the axle with? Slick 50 (which I bought to use lightly between the fingers during reassembly)?
Also, would 0000 steel wool be a good idea on the finger contact surfaces and the axle? Seems like it would smooth out some minor irregularities without doing anything drastic. Thoughts?
Old saying... "when the bottom falls out" Learned the hard way, mixed red devil powered lye in an aluminum pot to do some paint removal, started boiling, bottom of pot literally disintegrated, was outside, no injuries, lesson learned.Bobby D. Jones wrote:The changer looks great, Sorry to hear the cleaner hurt the aluminum fingers.
Some of the cleaners have caustic materials in them to cut grease, Caustics will eat on aluminum.
When I worked for Westinghouse in the Sealed Beam section. My Job at lunch time, Was to pull the Aluminuumizer liners out. Take them to a large vat filled with hot Caustic Soda. Leave them in till no bubbles, Rinse and lay them on annealer oven to dry and reinstall.
Aluminum and caustic don't play well.
Bill Ford S12 CLR, S12 Lamar keyless, Misc amps&toys Sharp Covers
Steeling for Jesus now!!!
Steeling for Jesus now!!!
-
Brian Spratt
- Posts: 159
- Joined: 6 Dec 2021 9:19 am
- Location: Oklahoma, USA
- Contact:

-
Bobby D. Jones
- Posts: 2235
- Joined: 17 May 2010 9:27 am
- Location: West Virginia, USA
-
Dave Magram
- Posts: 597
- Joined: 10 Jan 2003 1:01 am
- Location: San Jose, California, USA
Abe,Abe Levy wrote:I was told long ago that white lithium grease is what was used on the changer axle by the factory, so that is what I use as I assemble, but I lubricate the changer with tri flow.
White lithium grease has a reputation of drying up and hardening over time. The caked-on stuff in the photos that Bobby Jones posted looks like it might be white lithium grease.
If you really want to use a grease on the changer axle, you might consider Teflon grease instead.
Or, since Kelcey co-owns the present-day Emmons Guitar Co. and has a lot of experience repairing pedal steel guitars, you may want to consider his recommendation of "Slick 50".
- Dave
-
Kelcey ONeil
- Posts: 327
- Joined: 1 May 2018 11:42 am
- Location: Sevierville, TN
- Contact:
It is true that Emmons and several others used white lithium grease, particularly in the late 70s/ early 80's; it is also true that it may be one of the worst products to use because it deteriorates with age. I've had closet queen guitars in completely original condition be basically non functional because the grease had dried and hardened. It's pretty easy to tell where white lithium was used because, well... it's white!Dave Magram wrote:Abe,Abe Levy wrote:I was told long ago that white lithium grease is what was used on the changer axle by the factory, so that is what I use as I assemble, but I lubricate the changer with tri flow.
White lithium grease has a reputation of drying up and hardening over time. The caked-on stuff in the photos that Bobby Jones posted looks like it might be white lithium grease.
If you really want to use a grease on the changer axle, you might consider Teflon grease instead.
Or, since Kelcey co-owns the present-day Emmons Guitar Co. and has a lot of experience repairing pedal steel guitars, you may want to consider his recommendation of "Slick 50".
- Dave
On the other hand, I've encountered guitars from the 60s that were also closet queens where oil or perhaps some other type of grease was used, that were completely free after more than 50 years.
Co-owner and operator: Emmons Guitar Co.