Fred,
Looks to me like you're doing a good job and should reasonably trust your own judgement of what you see / find / do; Especially since you're seeking info prior to the fact rather than learning by hard-knocks like I've done too many times in the past.
Pardon any typos herein; I worked all night long on this and at 10:00 AM now, am pretty mung and punchy in editing; But I wanted to get it done before going to bed as it looks like your work is in regular progress.
-------
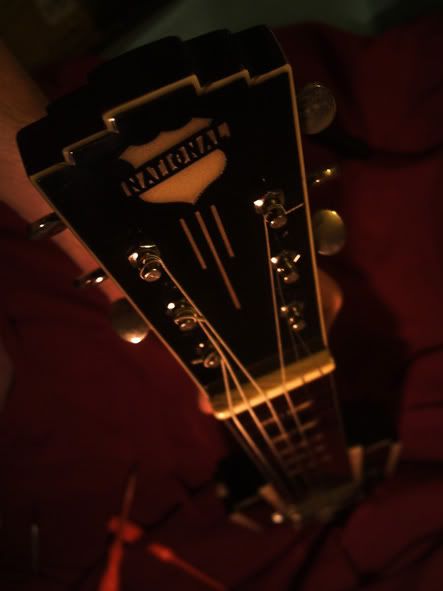
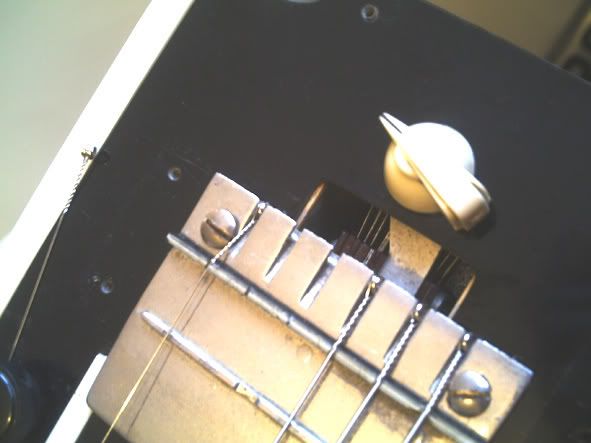
....the saddle on this model is made from the same three-ply laminate (celluloid or some early plastic?) that covers the body....
I think you meant to say the
NUT (the headstock-end's "bridge") rather than 'saddle'?
(I have some autism that's pee-poor at guessing and prone to error if it ain't spelled out for me

).
Nut:
 Bridge / saddle:
 If so
If so, ...then for the discussion's previous "questioning" the durability of the black / white body & headstock laminate material ....both in removing the glue and it's resistance to cleaners, lubes, etc: If the nut is indeed the same material as the laminate material, then the nut / material holding up under string pressure and vibration is a decent gauge / testiment to the material's durability, ...compared to, say, Danelectro guitars' aluminum nut (and other guitars' plastic nuts) which it is not uncommon to see the smaller strings having considerably migrated / cut their way down into the aluminum via string pressure, vibration and the sawing action of the strings being tuned and bent in playing. Also, nuts and their string slots get a considerable amount of hand oils & salts etc in them over the years as well as a reasonable expectation that a nut has been deliberately oiled a few times over it's lifetime as a natural / intuitive cure for string ping during tuning (although pencil lead / graphite is MUCH better to use). MEANING that if the nut is made from that laminate material and has held up well, ....further evidenced by a lack of related complaint history from Players, ....then I think it fair to say that the laminates' nominal & periodic exposure to contact cleaner wouldn't do much more than taking shine off, if that; And that the laminate would hold up reasonably well to "soft" chemicals, tools and techniques to remove the glue from the headstock. And as previously said in the discussion, I found the laminate material to be rather stout the few times I've repaired it. I THINK the material is called Lucite (an early common brand product of
acrylic glass evolution), or is something similar to Lucite (acrylite, plexiglas, lexan, polyglas, etc); I think RICK AIELLO would be The Man to ask.
-------
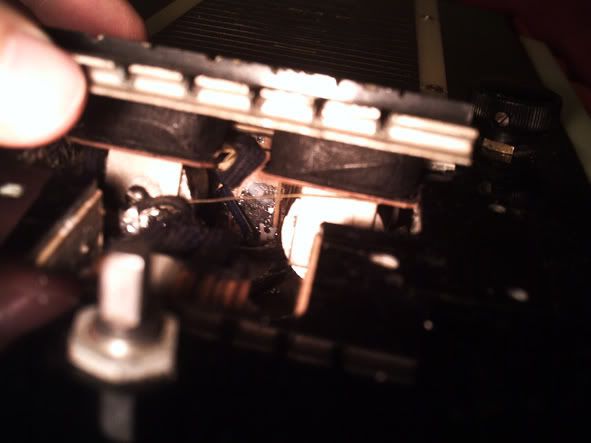
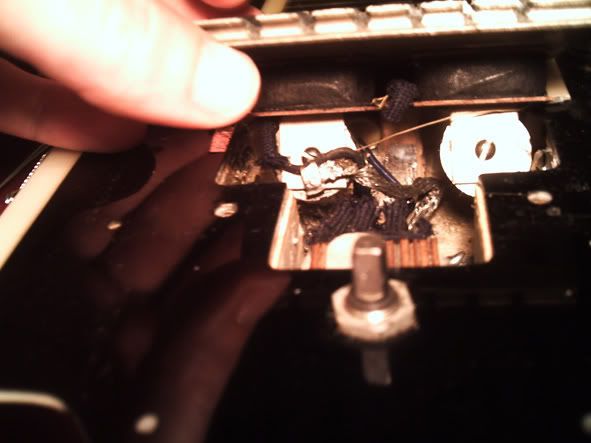
I also see pretty good indications that the guitar and it's routed cavities had sealer applied prior to sanding and deburring the machining chatter ...and thus the cavity itself likely protected somewhat from soft chemicals, oils etc, because: Doing a good job of deburring and good fine-finish sanding, especially to apply a laminate, calls for a sealer for a best job. We can see pretty good indications that the laminate was cut / routed separate from routing the guitar's cavities, and thereafter glued onto to guitar; MEANING that the guitar's cavity is likely sealed and further protected from invasion of reasonably safe maintenance chemicals such as electronic contact cleaner / lube. See the fine and realteively druable wood edge noted *1* in the pic below, as well as the laminate and body cavities' mis-matched routing (maybe to provide an extended wood shoulder to support and protect the laminate's edge).
Another thing we can see in the picture, noted as *2*, is what a history of standing oils, moisture, chemicals, etc can do when it gets into / under parts. And areas like that might be a good / inconspicuous place to test whatever you experiment with to clean the glue off the headstock; Better for something to make a mark there where it's covered up and can be dealt with later if desired.

-------
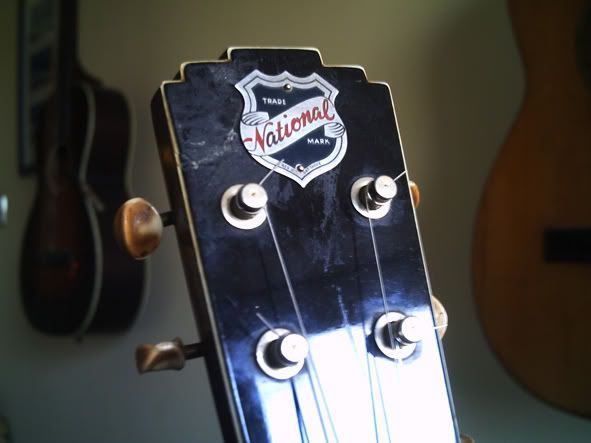
Would you guys have any qualms about making a new hole to get (the logo emblem) straight? Would I run the risk of cracking the overlay?
THIS IS LENGTHY INSTRUCTIONS FOR DOING SUCH A JOB; Just in case something might be desired in describing the process. ANYONE NOT INTERESTED MIGHT WANT TO SKIP THIS SECTION:
To do a good job of the glue removal and covering up the crack in the laminate repair, ...the logo emblem should be removed to do the work IF the emblem brads and emblem plate can be removed without scarring them. If the brads & emblem can be safely removed, then why not fix the emblem's tilt:
It's often difficult to get a good enough grip on the brad head to pull it out without scarring the brad heads. Small scars can be taken off with super-fine sandpaper or emory cloth. That you apparantly installed the new plate & brads makes successful removal of the brads more likely (a looser hole). Before I unneccesarily remove brads, I make sure I can find exact replacements should I scar one ...or god-forbid break the head off with the shank left in the hole. To eliminate the risk of losing an original or correct brad in the search for a new exact match: Keep the old brads in a conspicuous container kept in the work area. If there's any chance you might lose an old original brad while finding a new replacement, then put a chunk of modeling clay or melted candle wax in a small box (such as a matchbox drawer) level with the top (and cooling wax back to solid); And press it onto the brad head to make & have an exact size and shape to compare where-ever you look for a replacement; A too-long length can be trimmed off and filed to a point, ...a bit too short no biggie, only the head is going to show.
IF you can successfully remove the plate for drilling a new mounting hole(s):
Measure the depth of the hole with the small end of a FLAT toothpick, marking the depth on the toothpick with a pencil while the toothpick is in the hole, ...and set it aside; It will be used to put a piece of masking tape around the drill bit to STOP the drill from going any deeper than the original holes.
Fill the old hole(s) with a round toothpick. If the toothpick hits bottom loosely, pull it out and break off a small amount of it's tip until it will fit tight tapped into the old hole. Further tightening will occur when you put the final seating taps on the toothpick dowel later on. The toothpick dowel will reinforce the wood and laminate when drilling a new hole in close proximity, ...and will remain as filler to be capped later with black nail polish (explained further below). Clip off the toothpick with wire dikes placed flush with the top of the hole; It will leave a bit sticking up higher than the hole, which is good at this point of the repair; Tapping it further down as said later will tighten the toothpick dowel in it's hole.
Now apply a strip of masking tape down the center of the headstock from it's top to the strings nut. Carefully measure a centerline at the top of the headstock and the nut, and draw that line down the tape with a sharp pencil. Then rub around the brad holes with a match, or a blunted toothpick or such to find and mark the existing holes, to make sure which of the old holes are out of alignment, and use the old hole marks to align one or both new holes properly. The tape will also
help (but not fully) protect the laminate from scratches and boo-boos during the drilling process, and help stabalize the drill bit starting a new hole. Using a hand-cranked drill works best, ....or a SPEED CONTROLABLE dremel motor drill set at it's slowest speed. The hole through the laminate MUST be slightly larger than the brad size to ensure that the brad doesn't crack the laminate while being tapped back in (the laminate is probably not as strong as it was when new); So you can either use a drill bit slightly larger than the brad (tightening a loose hole for the brad is said further below) or better-yet use a drill bit exactly the size of the brad and later simply ream the laminate out just enough for the brad to pass freely through the laminate into a correct size hole in the wood. Use the hole depth measure toothpick you made earlier, to wrap the drill bit with about 1/8" thickness of masking tape, to PREVENT the drillbit from going any deeper than the original hole; Better the hole is slightly shallower rather than deeper than original. Drill the new hole(s) at slow speed and light hand pressure, stopping the penetration when the depth prevention masking tape shows the depth is perfect, ...and allow the drill to spin down to a stop before carefully removing it. Rub the masking tape that's protecting the headstock to make sure it's still seated around the hole. Coat the new hole inside with a kiss of Elmer's general purpose white glue, using a toothpick or paperclip wire or such to push the glue in the hole and work it around inside; Remove the toothpick / tool. This glue priming will narrow the hole slightly when it dries and provide some soft grip for the brad and will seal the holes wood.
Now it's time to fix the old hole(s). ACRYLIC nail polish is generally made out of the same material that the laminate is; So get a bottle of the blackest acrylic nail polish at your local "Wally-world". Get a bottle of THINNER specifically for the type nail polish you bought (NOT cleaner / remover) ...usually co-located on the rack with each brand and type of nail polish.
Back at yer workbench lay out these additional tools: Hairdryer, ...round toothpicks, ...roll of paper towels, ...cup saucer for a pallet, ...nail polish and thinner, ...2 or 3 wood chopsticks, ...a finish nail smaller than the brad hole(s), sharp end filed off flat, to later use like a mini center punch to seat the old brad hole's toothpick filler dowel.
Use a small hammer to tap the wood chopstick like a center-punch to tap down the toothpick filling the old brad hole(s), carefully tapping the toothpick down level with the laminate. Hitting the laminate too hard, even with the chopstick, can chip or crack the laminate around the hole; So just tap the toothpick. Now use the filed down finish nail "center punch" to tap the toothpick down about 1/16" deeper into the hole to provide a receptacle for an adequate depth of nail polish to cap the hole (said later).
Remove the masking tape that's down the center of the headstock. Clean off around the old holes to ensure they're flat, clean and free of any burrs; AWAY FROM THE GUITAR, put a few DROPS of the nail polish thinner on the tip of a piece of paper towel folded into a small point, making the tip DAMP and NOT WET, and gently rub the rim of the hole with that paper towel TIP to make sure it's clean; This preps for capping the old holes with nail polish. WET NAIL POLISH OR IT'S THINNER WILL INDEED MELT INTO ACRYLIC, so damp is the trick not wet.
Now cut a 1/4" hole in a strip of masking tape and place it over the old brad hole, centering the tape hole over the old brad hole. Press the masking tape down firm and mask around it with more masking tape. This will protect the area that's not going to be worked on, and reduce the area that will need to be compounded and polished.
Set your acrylic nail polish mixing / work area up far enough away from the guitar so that if any spills are made it won't be made on the guitar. Nail polish thinner IS ACETONE and THE THINNER AND POLISH WILL DAMAGE A GUITAR'S FINISH AND PLASTICS. Use a cup saucer for a pallet. Put 5 or so round toothpicks on your work area to be used as nail polish applicator tools. Place and keep a roll of paper towels on your work area ...for the job and for cleanup and any boo-boos. Place the bottles of nail polish and thinner so they won't fall or get knocked over, ...farther than arms reach is a good rule, ....then open BOTH. Place a puddle of the nail polish about the size of a dime onto the saucer pallet and close the bottle up, then without delay place about 1/2 teaspoon of thinner alongside it in contact with the nail polish; This will create a puddle of different thicknesses of nail polish to get the feel of, especially as the nail polish will start getting thick rather quickly but can be thinned by stirring a little into that puddle of thinner. You will likely have to make new puddles before the job is done, because they get thick rather quickly. Don't make a new puddle over an old one; Use a fresh clean spot on the saucer pallet. Use a toothpick to pick up SMALL DROPS of nail polish and practice placing them elsewhere on the pallet. When you get than hang of it, pick up a SMALL DROP of nail polish and place it over the toothpick sealing the old brad hole; You can tease it into the hole with the toothpick point if the drop doesn't want to go in there by itself. Repeat with more drops if neccessary until the wet or soft nail polish forms a convex dome cap over the hole; The dome cap will shrink / deflate during the drying phase. Now use the hairdryer on warm to accelerate the polish drying ...or take a break for 20 minutes or-so. Repeat the process until the hole is capped with a DRY and SLIGHTLY convex DOMED cap of polish. Let it cure OVERNIGHT in at least room temperature or higher. An unshaded electric lamp with a 60 watt bulb placed 18" above the work will help cure the nail polish; Lesser or greater wattage can be used but you MUST check the temperature of the guitar OFTEN to get the right bulb distance to WARM the work area never letting it get HOT. I also use a sheet of aluminum foil laid over the guitar, with a hole cut in the aluminum foil to let light only hit around the work area, ...but that's overkill Murphy protection. When the nail polish is thus cured with a slight convex dome intact, then the dome can be CAREFULLY leveled with light pressure upon 800 grit fine sandpaper, emory cloth or emory paper, then compounded with rubbing compounds or toothpaste slightly thinned with water. Go slow and careful because rubbing pressure can warm-up and resoften the nail polish cap and cause more filling & curing to be needed. When it looks like a good job, remove the masking tape and you will likely discover that additional compounding and polishing will need to be done around where the masking tape hole perimeter was.
-------
The above nail-polish filling technique can also be used to fill-in / hide the crack in the headstock laminate repair ...after the glue residue there is removed. The top of the crack should be cleaned out with the tip of a pointed-tip exacto knife, blown out with compressed air or by mouth blowing through a drinking straw, to clean out glue and dust and provide a tiny nano-trench to receive and secure the nail polish filler. Even work-thinned nail polish is too thick to go into a tight untrenched crack, and thinning it too much will melt some plastic along the crack seal it without an adequate / durable dose of the nail polish (thinner = weaker; thicker = stronger; Although it can't be very thick sealing a crack). Very small drops of the nail polish, as thin as will form drops on the toothpick, can be applied into the trench by dragging the thinned drops along the trench with the tip of toothpicks; The toothpick should not touch the laminate surface but only touch the drops to drag and tease the drops along and into the trench surface. If you make a small boo-boo, then run your writing hand index finger across your forehead; It will pick up just the right amount of body oil and sweat on your finger; Rub the boo-boo TOWARDS the work with a forward rolling motion of the finger, lifting the finger when the boo-boo is thus led back to the crack. Let the work dry good ...hairdryer is a charm ...before resuming the work. Let the fill cure overnight, lamp again helps, ...then compound smoothe the next day or thereafter.
-------
THERE IS A GOOD FUTURE FOR FOLKS INTERESTED IN DETAILED GENERAL MAINTENANCE OF VINTAGE GUITARS (and certainly in repair) ....imho:
We are dealing with instruments 50 or more years old, and I suppose they're quite dear to most of us. With the exponential growth of population, and continued atrition of these old wonderful instruments, ...those of us that treasure them, and even those that just play them, should be evermore careful and comprehensive in preserving them, ...which discussions such as we're having here will help allot in the fine details important to keeping these old instruments in the best condition plausible. In that vein I hope more and more Players realize that it doesn't take much more than being even nominally talented with hand tools, and slow & careful attention to details, and research BEFORE executing work, and some nominal education from even just a few of the many good books, and by combing info from internet forums and searches (even just right here on the SGF!), including even-BASIC electronics, .........for a person to be able to even go into small business keeping old instruments in good condition and at least troubleshooting them if not repairing them. And even though I don't know for a fact, I'll bet that a number of Luthier schools are picking up on the current and future importance of guitar general maintenance as opposed to full-on luthiery, ....and are including general maintenance courses in their corriculums for that reason; Something for "young-uns" to consider (anyone under 40 is a "young-un" to my wrinkled / weary 60!).

 Yes - it worked!)

