The Restoration of a Fender Stringmaster D8
Posted: 17 Aug 2007 10:43 am
My friend and fellow Brummy (that's someone from Birmingham, England), Basil Henriques, bought a Fender Stringmaster from Lark-in-the-Morning in San Francisco recently. As this is local for me I picked it up and brought it back to Oakland, just across the San Francisco Bay.
I've been doing some work on this instrument, and sending Basil regular progress reports. Basil suggested that other members might be interested in learning from what I'm uncovering, and benefit from the information, so I should post regular progress on the Forum.
This will be a long post, because I'm also in the process of modifying a a Harlin 8-string Multi-Kord to take regular pedals and knee levers, and scratch building four lap steels. Maybe I'll run another thread on the Multi-Kord, but for now, to the Fender....
The case, which was not the original, but which fits well, was in really bad shape. It was split in several places, off its hinges, and the lining smelled like monkeys had been living in it. I threw the lining out, reglued all the joints, fitted new brassware, and now I am waiting until I can find some suitcase-type material to cover it with. I've searched all the hardware and fabric stores within miles with no luck. If anyone knows where I can get cover material please let me know. In the meantime, since this is not original Fender I'll not bother people with details of the case restoration, so back to the Stringmaster....
The Machine head was in poor shape. One of the pans has a tuner completely missing, while one of the "lollipop" tuners has been replaced by an unmatched tuner with a white knob. Someone has taken cutters to the pan, and cut a notch, The other pan is in pretty good shape.


Chromed hardware is worn, but there is no rust or chips.

The Fender logo looked like it was rusty..

..but on removing it I realised that it was pressed brass. The raised letters are plated, and there is none of the plating missing, only some scratching from some past polishing. What looked like rust was actually the brass showing through the flaking paint.
I applied paint stripper to it...

When it's completely cured I shall clean it with alcohol, paint it black, and remove the paint from the chromed letters and border.
The body had had some sort of letters or stickers on, which had pulled off the paint in many places.


The back of the guitar shows how bad the paintwork was. It looks like it was painted with a tar brush. Notice the dripped paint round the edges...


The original colour of this instrument was off-white. The blue had been added at some later date.

The serial number stamped on the control plate is 0189. If anyone has any information about this number please let me know. Likewise, if anyone recognises this instrument please let me know because we are very interested in learning what we can about its history...

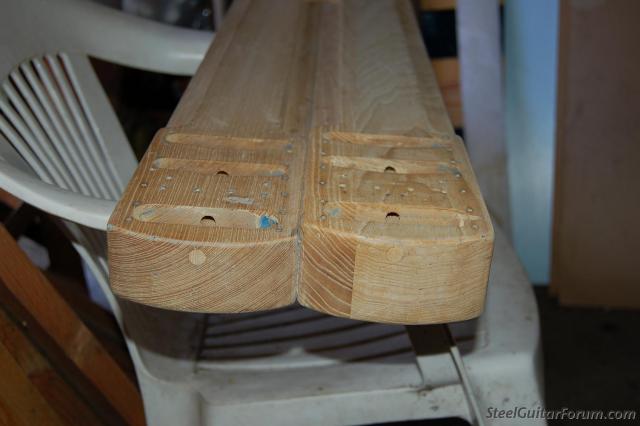
Notice the two holes between the string retainer and the the control plate. They go right through the instrument. Basil suspects that at one time someone may have added two pedals. I can see no other reason why anyone would have drilled holes here.
Three of the legs are original, albeit without the rubber feet. The fourth seems to have been made out of plumber's pipe.


A quick general cleaning of the instrument showed that the hardware is in pretty good shape. No replating will be necessary. Indeed, if you replate worn parts it often highlights the wear !

I couldn't resist including this picture...

No, I'm not planning on adding Harlin pedals to it, but since both instruments are being worked on simultaneously I thought a pose like this would cause some mind boggling !
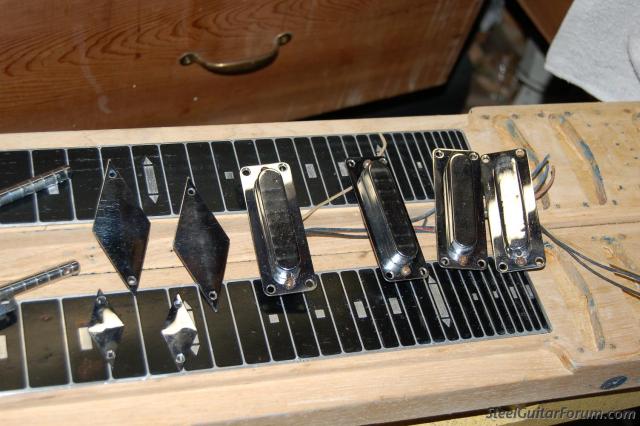
Removal of all the harware came next. Notice that the chrome diamonds are not just there for decoration, they cover up the bolts which connect the two necks. Whoever applied the blue paint forgot to mask the bolts.

Strangely, on the other side there seems to have been a rectangular plate at some stage. Very mysterious !

Examination of the removed harware shows how one of the machine plates has been cut. It also shows that the tuners are soldered or welded into place. I didn't realise that Fender did that. It certainly makes replacement a big job. I regard this machine fixture as completely wasted.

I was hoping to find some sort of identification beneath the pick-ups. This was all I found, and it's unreadable...

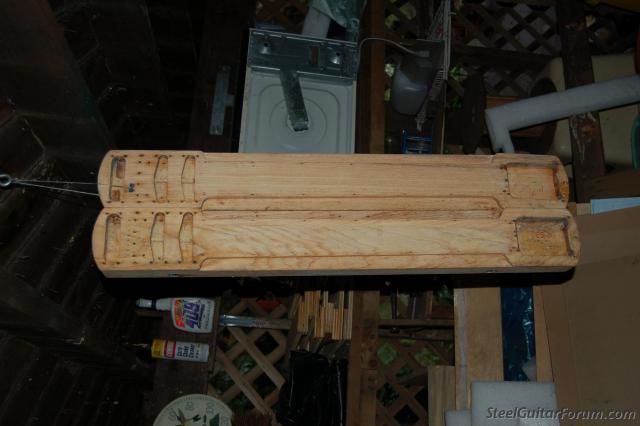
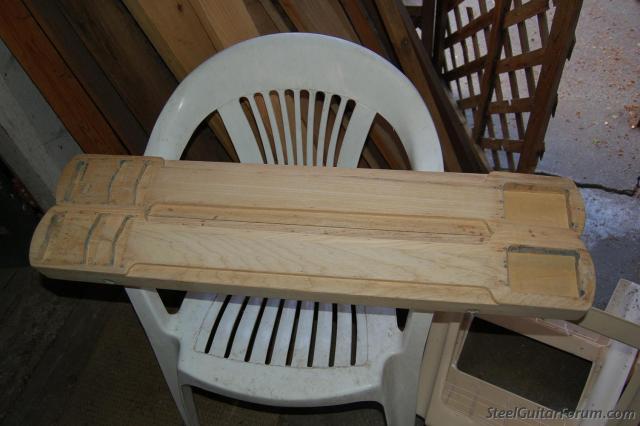
Now the instrument, stripped of fittings, is starting to look bare...


The Fender logo was painted over. One last look before stripping...

This is a good place to take a break. The instrument is in pieces...
I've been doing some work on this instrument, and sending Basil regular progress reports. Basil suggested that other members might be interested in learning from what I'm uncovering, and benefit from the information, so I should post regular progress on the Forum.
This will be a long post, because I'm also in the process of modifying a a Harlin 8-string Multi-Kord to take regular pedals and knee levers, and scratch building four lap steels. Maybe I'll run another thread on the Multi-Kord, but for now, to the Fender....
The case, which was not the original, but which fits well, was in really bad shape. It was split in several places, off its hinges, and the lining smelled like monkeys had been living in it. I threw the lining out, reglued all the joints, fitted new brassware, and now I am waiting until I can find some suitcase-type material to cover it with. I've searched all the hardware and fabric stores within miles with no luck. If anyone knows where I can get cover material please let me know. In the meantime, since this is not original Fender I'll not bother people with details of the case restoration, so back to the Stringmaster....
The Machine head was in poor shape. One of the pans has a tuner completely missing, while one of the "lollipop" tuners has been replaced by an unmatched tuner with a white knob. Someone has taken cutters to the pan, and cut a notch, The other pan is in pretty good shape.


Chromed hardware is worn, but there is no rust or chips.

The Fender logo looked like it was rusty..

..but on removing it I realised that it was pressed brass. The raised letters are plated, and there is none of the plating missing, only some scratching from some past polishing. What looked like rust was actually the brass showing through the flaking paint.
I applied paint stripper to it...

When it's completely cured I shall clean it with alcohol, paint it black, and remove the paint from the chromed letters and border.
The body had had some sort of letters or stickers on, which had pulled off the paint in many places.


The back of the guitar shows how bad the paintwork was. It looks like it was painted with a tar brush. Notice the dripped paint round the edges...


The original colour of this instrument was off-white. The blue had been added at some later date.

The serial number stamped on the control plate is 0189. If anyone has any information about this number please let me know. Likewise, if anyone recognises this instrument please let me know because we are very interested in learning what we can about its history...

Notice the two holes between the string retainer and the the control plate. They go right through the instrument. Basil suspects that at one time someone may have added two pedals. I can see no other reason why anyone would have drilled holes here.
Three of the legs are original, albeit without the rubber feet. The fourth seems to have been made out of plumber's pipe.


A quick general cleaning of the instrument showed that the hardware is in pretty good shape. No replating will be necessary. Indeed, if you replate worn parts it often highlights the wear !

I couldn't resist including this picture...

No, I'm not planning on adding Harlin pedals to it, but since both instruments are being worked on simultaneously I thought a pose like this would cause some mind boggling !
Removal of all the harware came next. Notice that the chrome diamonds are not just there for decoration, they cover up the bolts which connect the two necks. Whoever applied the blue paint forgot to mask the bolts.

Strangely, on the other side there seems to have been a rectangular plate at some stage. Very mysterious !

Examination of the removed harware shows how one of the machine plates has been cut. It also shows that the tuners are soldered or welded into place. I didn't realise that Fender did that. It certainly makes replacement a big job. I regard this machine fixture as completely wasted.

I was hoping to find some sort of identification beneath the pick-ups. This was all I found, and it's unreadable...

Now the instrument, stripped of fittings, is starting to look bare...


The Fender logo was painted over. One last look before stripping...

This is a good place to take a break. The instrument is in pieces...

