Rescuing a Stringmaster Quad
Moderator: Brad Bechtel
Rescuing a Stringmaster Quad
A few people have said they would be interested in seeing the rebuild of my Quad Stringmaster so here we go...
The full story of how this came about is on another thread but the short version is that I went looking for a selecter switch and a strip of tuners for my 24.5" Stringmaster Triple and ended up buying all the hardware from another Stringmaster triple and the necks of a quad.
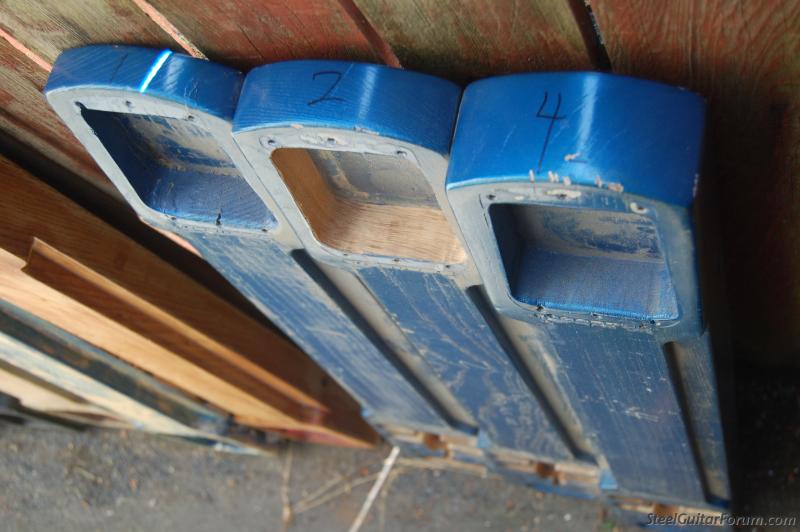
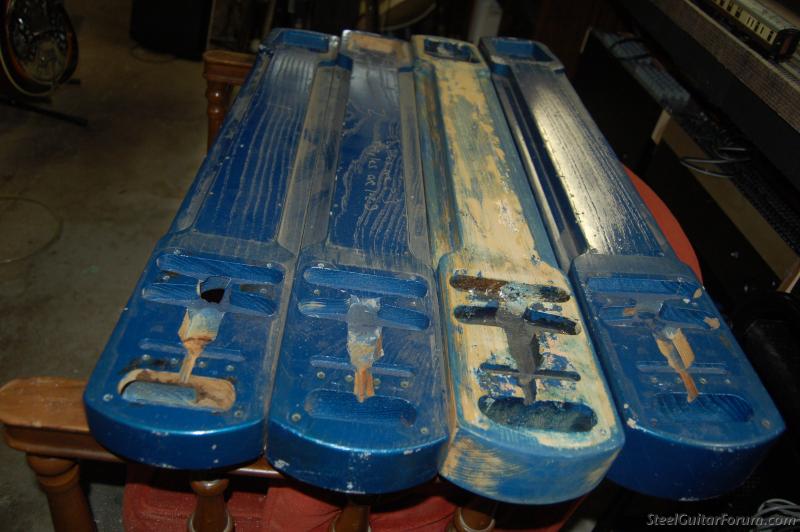
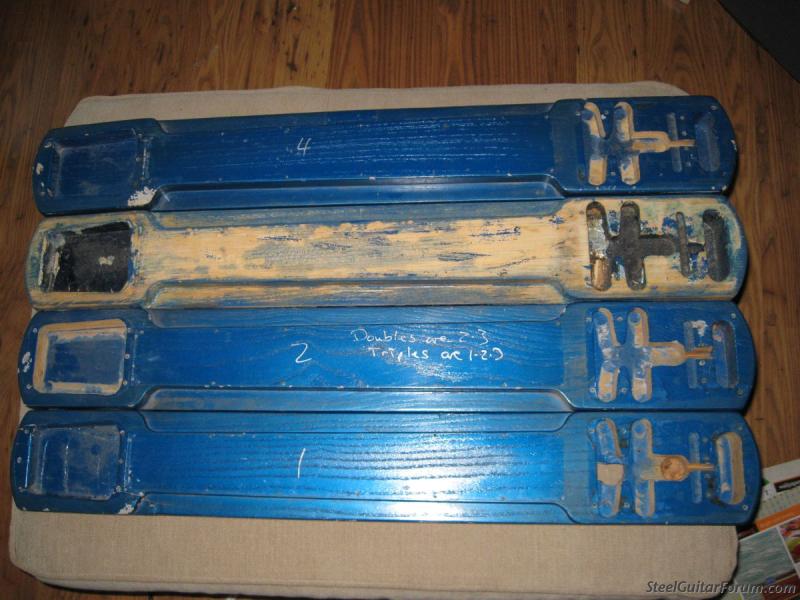
Here are the necks as I recieved them. What is it with that blue colour? - this is at least the 3rd rebuild I have seen where the guitar had been painted that colour. I was delighted to find that it was a 22.5" - the same as my Custom triple and Dual Professional steels which I love.
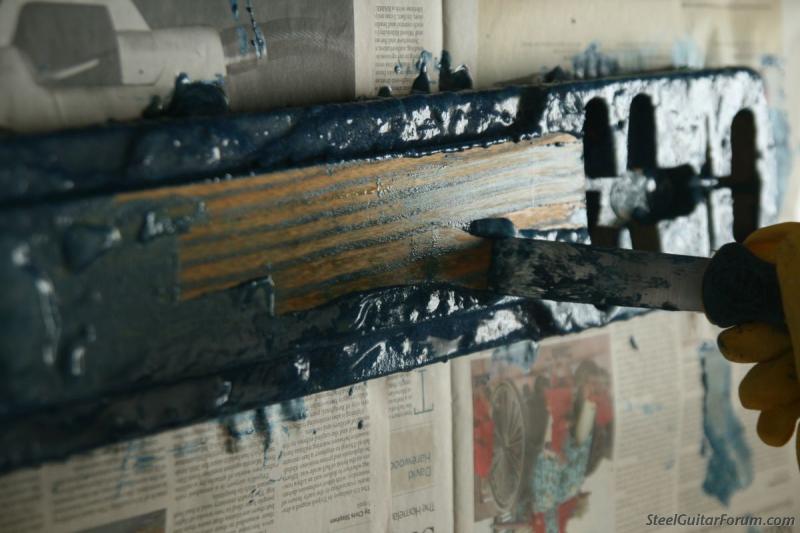
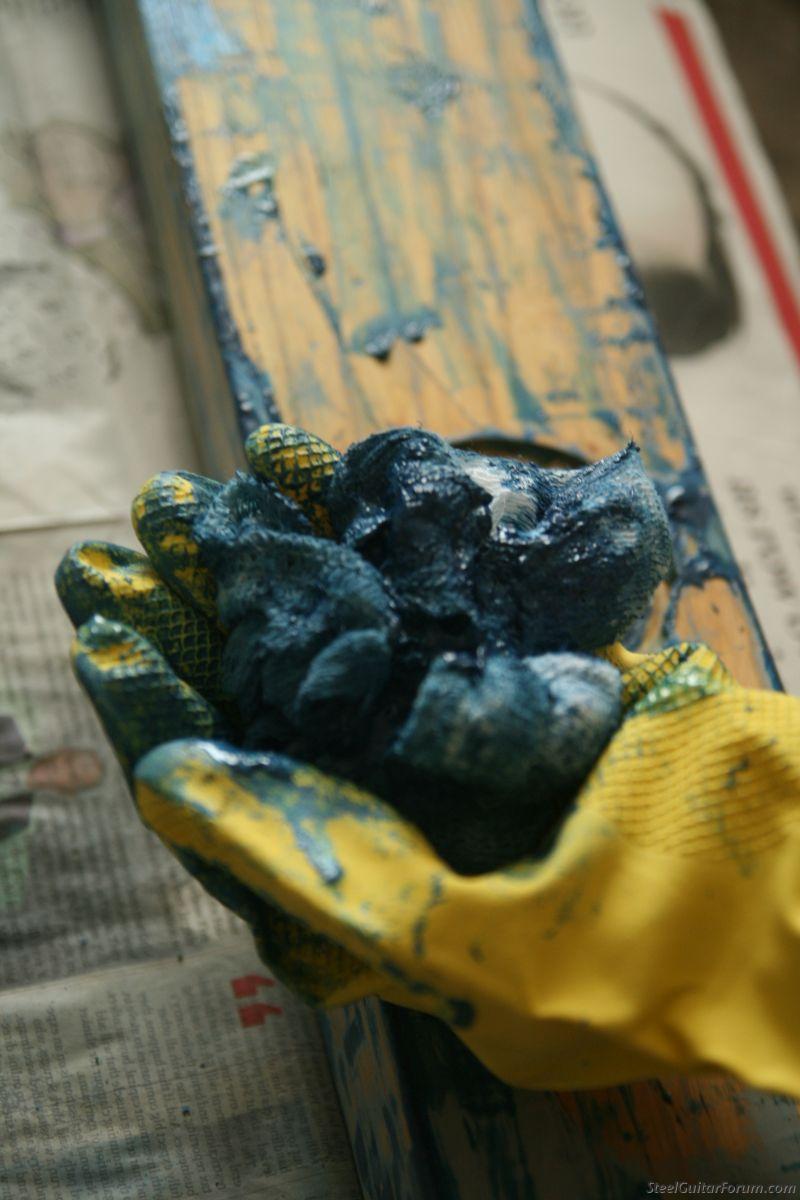
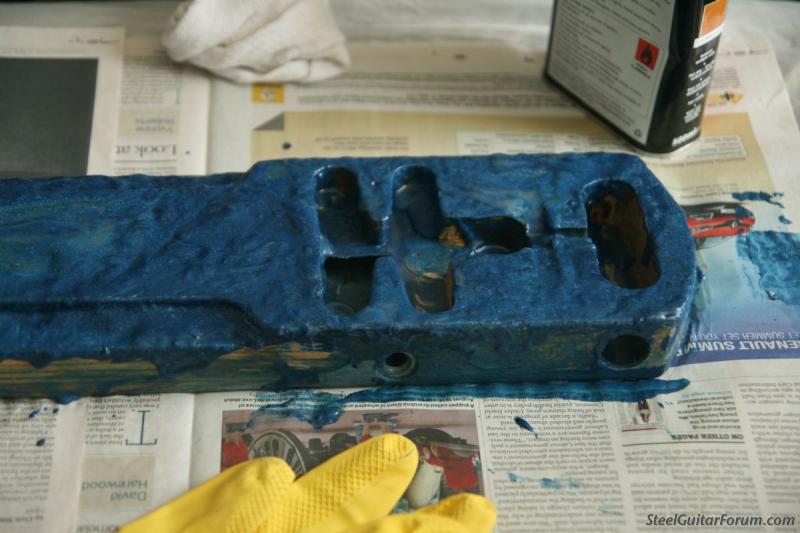
So, getting to work removing some of that paint. Not a pretty sight, I'm afraid.
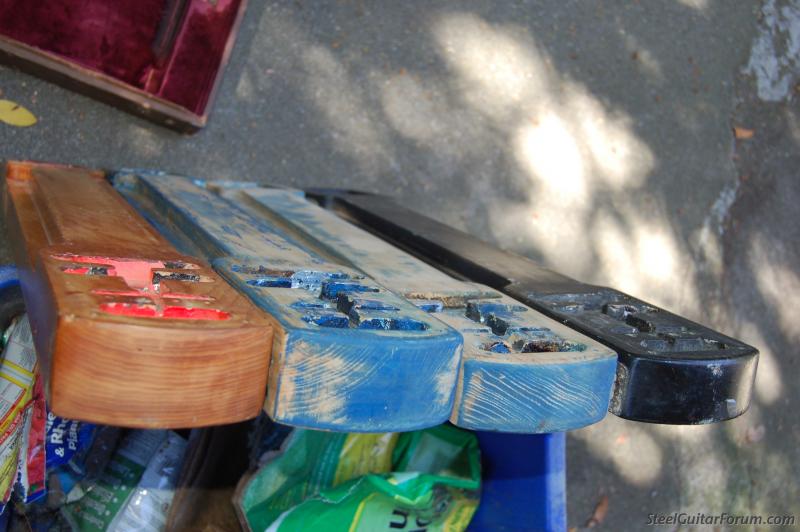
Here they are with most of the paint removed, ready to go off to be sprayed. Luckily for me, I have a friend who is a vintage steel guitar nut who also owns a garage and was keen to take on the job of spraying it for me. He'll be putting on a primer coat anyway and spraying it a solid colour so I wasn't worried about removing every trace of blue, just making it as smooth as I can.
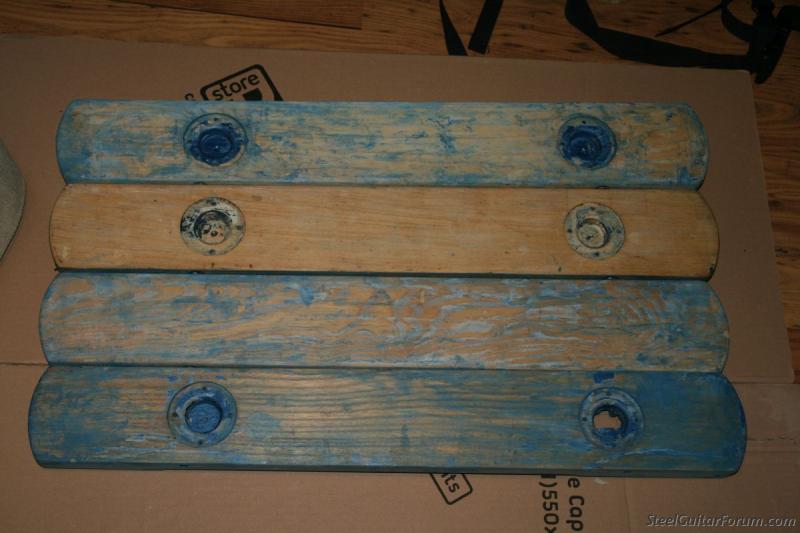
As you can see, although all 4 necks appear to have been used together for at least part of the guitar's life, it started out as a triple - neck 3 has leg sockets and the outline of the diamonds on the front, so the 4th neck was added at a later date.
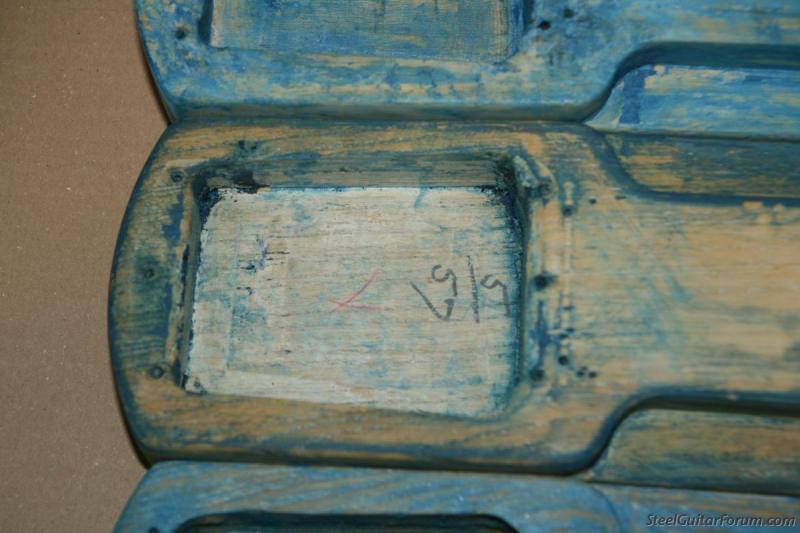
Getting rid of the paint revealed a date of 5/57 on the third neck but no trace on any of the others.
I dropped off the necks to my friend who promised to send me some pictures showing its progress so next time I'll start looking at the hardware.
The full story of how this came about is on another thread but the short version is that I went looking for a selecter switch and a strip of tuners for my 24.5" Stringmaster Triple and ended up buying all the hardware from another Stringmaster triple and the necks of a quad.
Here are the necks as I recieved them. What is it with that blue colour? - this is at least the 3rd rebuild I have seen where the guitar had been painted that colour. I was delighted to find that it was a 22.5" - the same as my Custom triple and Dual Professional steels which I love.
So, getting to work removing some of that paint. Not a pretty sight, I'm afraid.
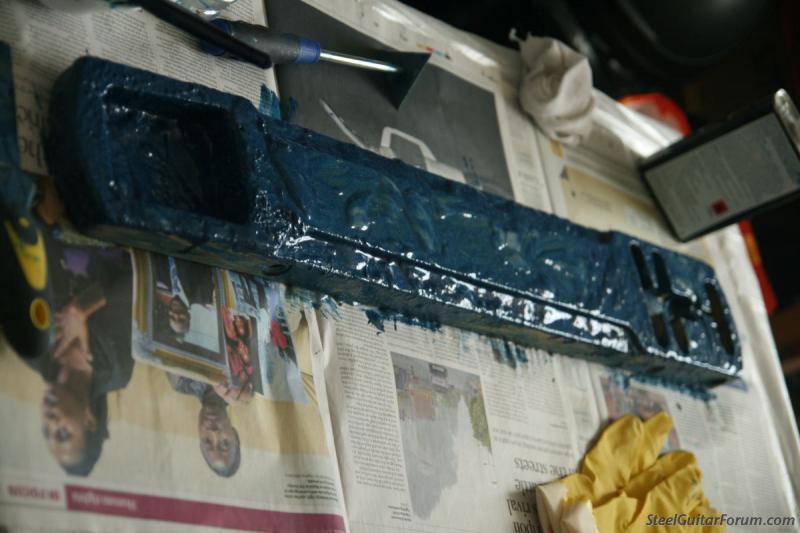
Here they are with most of the paint removed, ready to go off to be sprayed. Luckily for me, I have a friend who is a vintage steel guitar nut who also owns a garage and was keen to take on the job of spraying it for me. He'll be putting on a primer coat anyway and spraying it a solid colour so I wasn't worried about removing every trace of blue, just making it as smooth as I can.
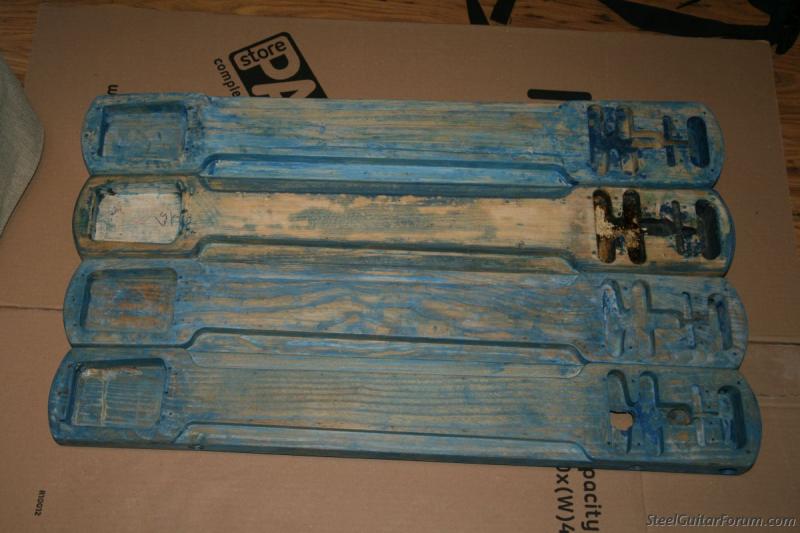
As you can see, although all 4 necks appear to have been used together for at least part of the guitar's life, it started out as a triple - neck 3 has leg sockets and the outline of the diamonds on the front, so the 4th neck was added at a later date.
Getting rid of the paint revealed a date of 5/57 on the third neck but no trace on any of the others.
I dropped off the necks to my friend who promised to send me some pictures showing its progress so next time I'll start looking at the hardware.
Last edited by Jeff Mead on 20 Sep 2014 11:43 pm, edited 2 times in total.
- Alan Brookes
- Posts: 13218
- Joined: 29 Mar 2006 1:01 am
- Location: Brummy living in Southern California
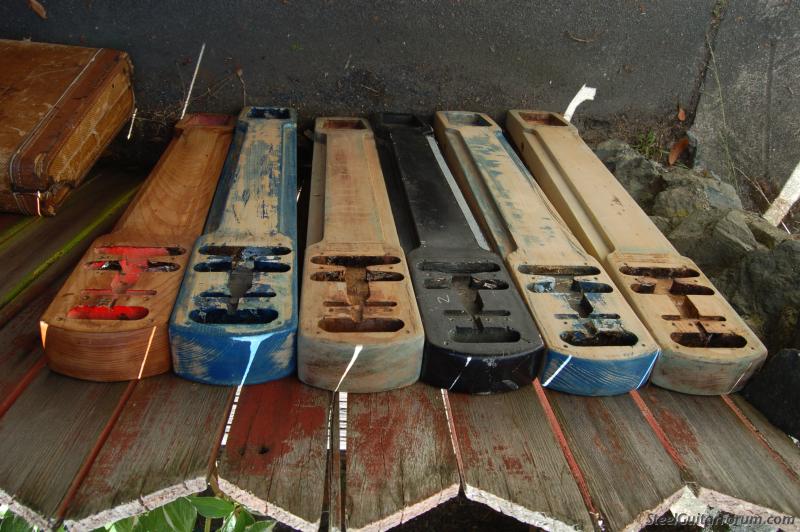
I guess you could call this a prequel. This is how they looked when I bought them several years ago in a batch transaction which included several console steels with parts missing. I subsequently sent them across the Atlantic to Basil, who was the one who pointed to the deal in eBay which brought my attention to it.
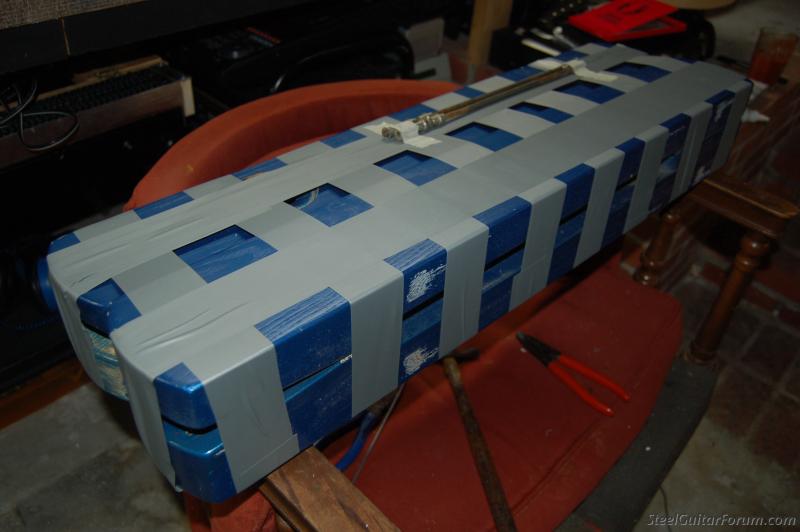
...and here they are in my workshop ready for shipment.
Now we've brought the story up to date, let the restoration continue...
...and here they are in my workshop ready for shipment.
Now we've brought the story up to date, let the restoration continue...
- Bob Gibler
- Posts: 188
- Joined: 16 Apr 2013 8:30 am
- Location: Kansas, USA
Quad Stringmaster Resto,
Jeff, I am very excited to see How the restoration on the Stringmaster is coming. Please keep us posted. These old Quads interest me very much.
- John Billings
- Posts: 9344
- Joined: 11 Jul 2002 12:01 am
- Location: Ohio, USA
Thanks Alan. I really enjoyed your thread about the (blue!!!) doubleneck you restored for Basil and I hope I can achieve something similar with this one. How many of those bodies have now become playable instruments?Alan Brookes wrote:Now we've brought the story up to date, let the restoration continue...
So, while the necks are away being sprayed, let's take a look at the hardware...
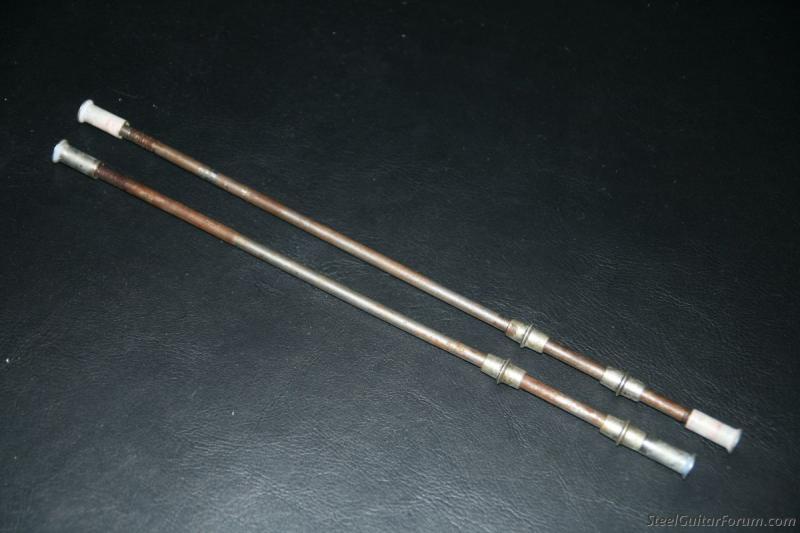
The quad necks came with two steel tie-rods, spacers and end nuts but they were actually for a triple so weren't long enough to go through the 4 bodies.
The rods came with only two spacers per neck (which go between the necks) so I would need another two.
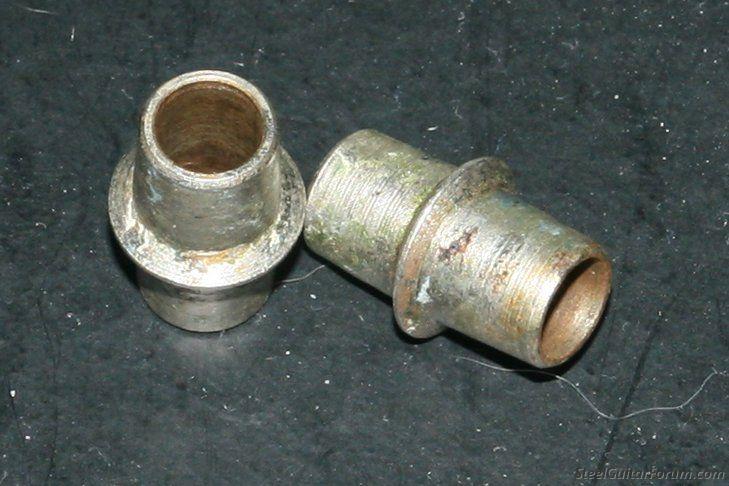
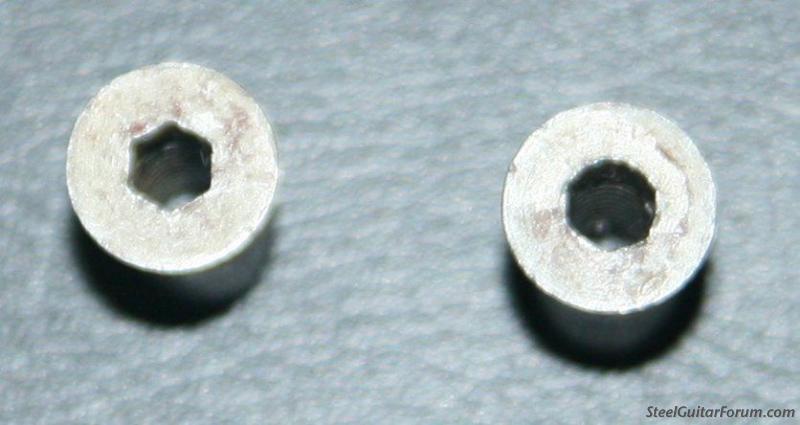
Also, two of the end nuts had their hex sockets stripped (like the one on the right), leaving more of a round hole in them which would be fun when it came to assembling it all.
The rods looked to be 1/4" thick and the "standard" non-metric thread for this size of rod appeared to be 20 threads per inch, so I ordered a sample piece of threaded steel rod of that spec and, yes, it fitted the thread on the nuts perfectly.
I ordered a piece long enough to make the 2 tie rods and started thinking about how I could make a couple of spacers.
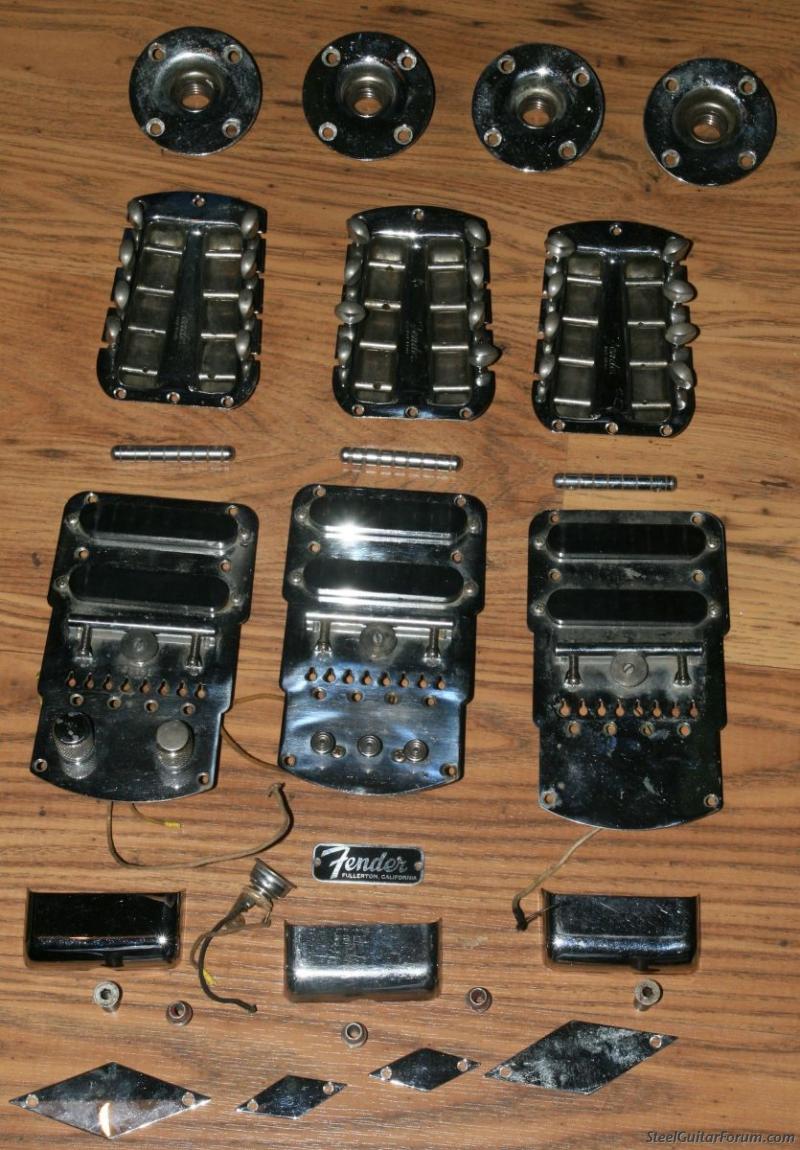
By now, the hardware from the triple had arrived from America. I wasn't sure exactly what I would be getting - I knew it included tuner pans with tuners, the control plates, pickups and even the bridge covers but wasn't sure about any of the other bits I'd need like the nuts and the diamonds for the front and back.
Well, I needn't have worried because not only did it include those items but also the metal Fender logo and, best of all, 3 spacers and 2 end nuts for the tie rods - with perfect hex sockets. Exactly the right number - what were the chances of that? I really think the steel guitar gods must be smiling on this project.
-
- Posts: 468
- Joined: 27 Apr 2012 8:59 am
- Location: Michigan, USA
I'm following this thread with much interest! I might be building my own SM-style D8 this winter, so this will be a good source of info and inspiration.
First question - can someone explain why the spacers are neccesary? Why can't the necks just be flush with one another (which is what I always assumed was the case until just now)?
- Doug Beaumier
- Posts: 15642
- Joined: 4 Aug 1998 11:00 pm
- Location: Northampton, MA
- Contact:
I'd never had one in pieces before either and, until now, assumed the same as you.Andy Henriksen wrote:First question - can someone explain why the spacers are neccesary? Why can't the necks just be flush with one another (which is what I always assumed was the case until just now)?
One thing I noticed is that, as the spacers taper a little, when they are pushed into the body and the other neck pushed on to the other side, they are firm enough that they just about hold the guitar together on their own - the rod and nuts on the end seem to push the necks together to make sure that they stay on the spacers. I was a bit suprised to find nothing else holding the necks together apart from the rods and spacers. The spacers seem to act a bit like little dowel rods that you get on furniture.
I'm guessing that if there were just the 2 rods holding the necks together, they might start to sag a bit in the middle after a few years (especially on triples and quads).
But this is all speculation on my part and, despite a bit of googling, couldn't find any discussion on the web about either the tie rods or the spacers.
- Erv Niehaus
- Posts: 26797
- Joined: 10 Aug 2001 12:01 am
- Location: Litchfield, MN, USA
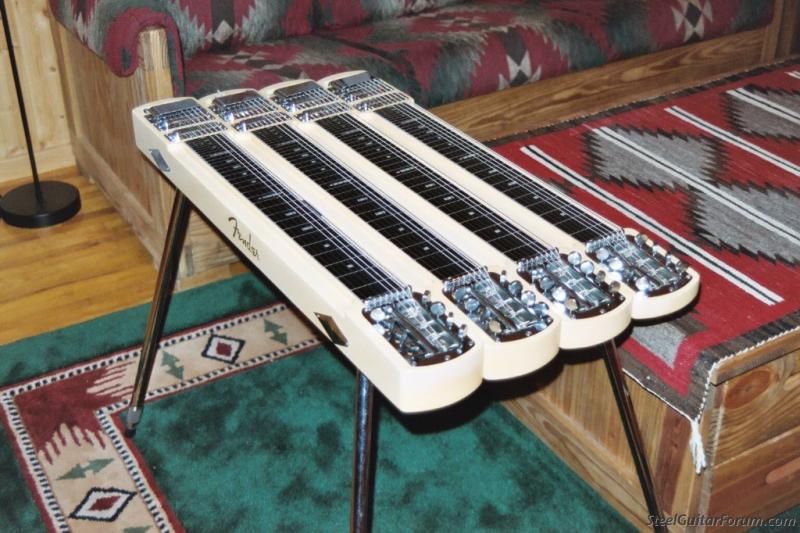
Yes, I don't know what it is about blue Quads. The guitar I am going to show you a picture of was also blue when I received it. In the process of stripping it down for re-finishing, I discovered that it had been painted blue TWICE! Anyway, I am quite satisfied at how it turned out.
Incidently, the Serial No. on the guitar is: #0002
- Bob Gibler
- Posts: 188
- Joined: 16 Apr 2013 8:30 am
- Location: Kansas, USA
Quad Stringmaster Resto,
Jeff, Now that is the best way to get started on a project like this. I am very interested in it. I have a chance to purchase a Quad Stringmaster in pretty bad shape, although it has all of the hardware to it. No strings and No legs. I will be watching this thread to see how yours is coming. Keep up the good work.
- Alan Brookes
- Posts: 13218
- Joined: 29 Mar 2006 1:01 am
- Location: Brummy living in Southern California
For those who haven't read it, this is the thread that Jeff was referring to...Jeff Mead wrote:Thanks Alan. I really enjoyed your thread about the (blue!!!) doubleneck you restored for Basil and I hope I can achieve something similar with this one. How many of those bodies have now become playable instruments?Alan Brookes wrote:Now we've brought the story up to date, let the restoration continue...
http://bb.steelguitarforum.com/viewtopi ... ion+fender
How many of the bodies have now become playable? None as yet. I've been looking around for many years for the required parts. You have no idea how lucky you are to have found someone selling them so quickly. You could have waited a lifetime.
Amongst the bodies that I bought in the job lot were some pretty rare ones, but I won't divert this thread. Maybe I'll start a new thread about them.
Last edited by Alan Brookes on 19 Aug 2014 8:38 am, edited 1 time in total.
Believe me, I know exactly how lucky I've been with this. I'm still shaking my head with how unlikely this all is. On top of it all, if my friend hadn't called out of the blue to say he had brought home my old triple neck (that I really thought I'd never see again) none of this would have happened.Alan Brookes wrote:You have no idea how lucky you are to have found someone selling them so quickly. You could have waited a lifetime.
Something went wrong with your link - it should be this:
http://bb.steelguitarforum.com/viewtopi ... ion+fender
This is one of the blue ones I was talking about.
I'd certainly be interested in reading more about that job lot and, you never know, you might end up finding some of those parts. Stranger things have happened (as I can say from personal experience!).
Last edited by Jeff Mead on 19 Aug 2014 12:41 am, edited 1 time in total.
Here's where I would really appreciate some input from you guys.
I need to think about how the pickup selecter is going to work.
Even with all the amazing luck and co-incidence I've had so far, I'm really not expecting a 4 switch control plate to fall into my lap!!!
So I have a 3 button plate to work with and need to work out the best way to convert this to take 4 switches.
I think I'm going to need 4 separate on/off switches (rather than multi-way selecters) so I can have any combination of necks and one thing I am sure of - I really don't like mini-toggles and want something retro looking, in keeping with a 50's instrument.
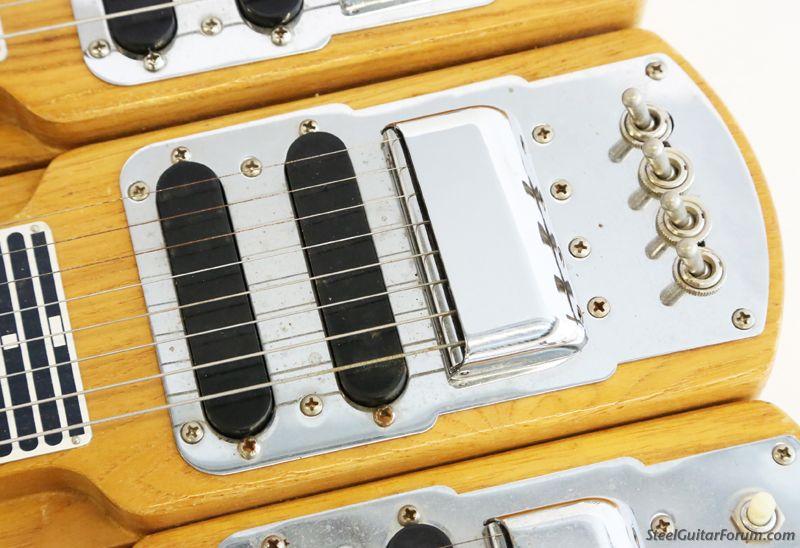
Here is what I would ideally like to do but I just can't source any switches of that style that are small enough to fit into the control cavity. There really isn't a lot of room in there.
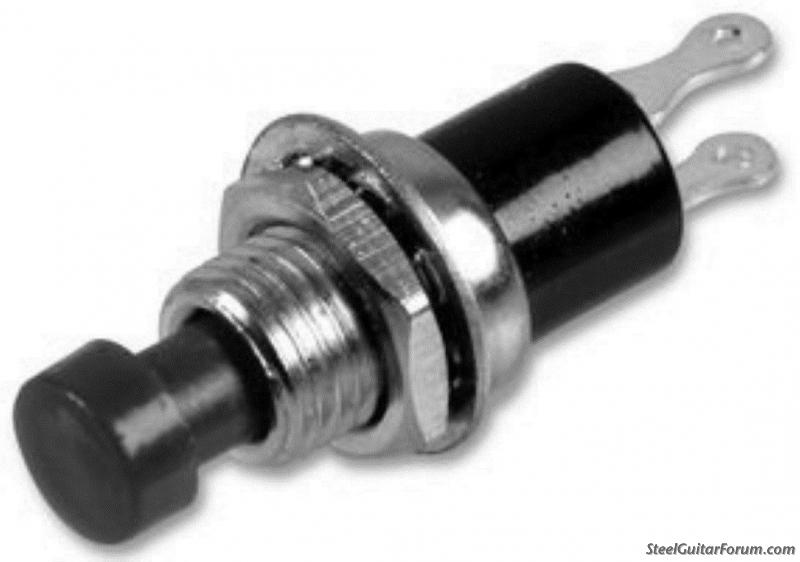
I found these little push button switches that might work and look OK, I think.
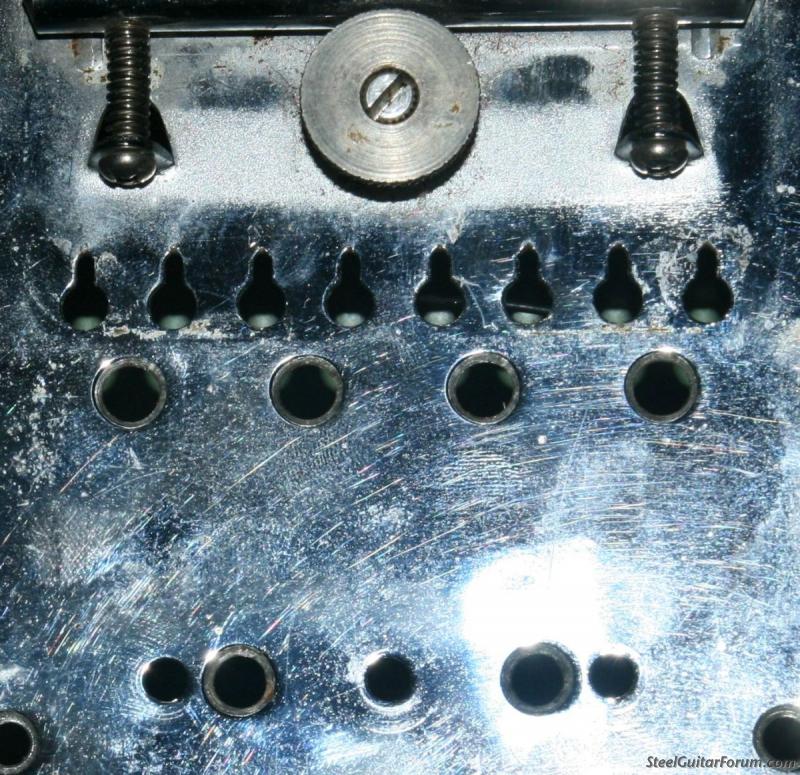
The other problem is drilling the plate. Here is the plate I have - how do I drill it to make it suitable for 4 switches? - I think I might need to make a small plastic control plate or something with the switches mounted on it.
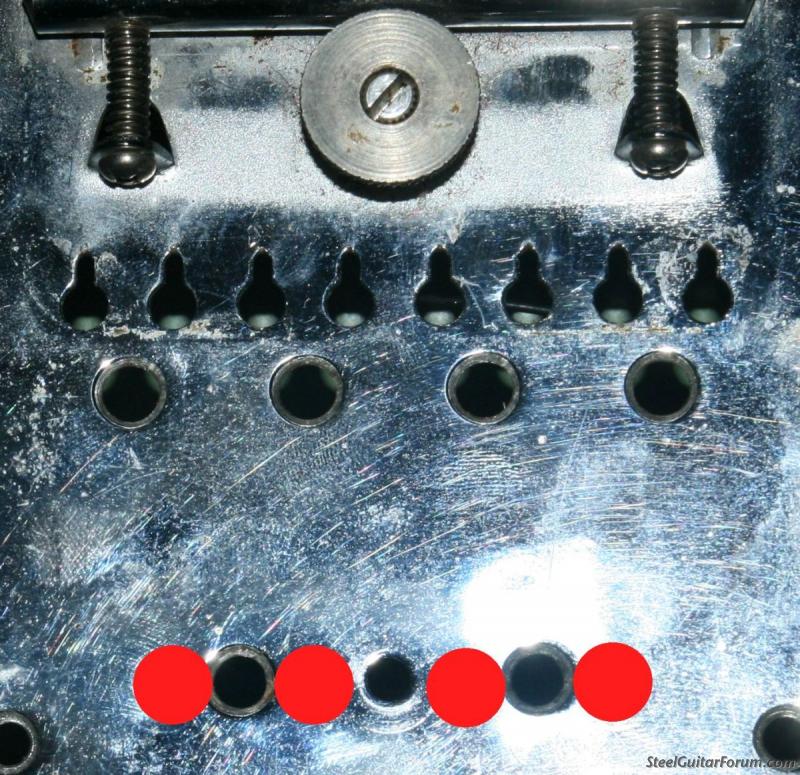
This is where I reckon the switches will need to go. Enlarging the holes on the end and putting the new ones where I have indicated with the other red dots.
Even though the new holes overlap with the existing ones slightly, I was wondering if I could strengthen it with a plastic panel underneath the chrome? The bushells around the switch should help hide the untidiness a bit.
So if anyone has any comments or suggestions I haven't thought of, please let me know.
- Alan Brookes
- Posts: 13218
- Joined: 29 Mar 2006 1:01 am
- Location: Brummy living in Southern California
Hi Alan,Alan Brookes wrote:Jeff: What parts are you still short of?
For the quad, I now have everything I need to get it up and running, although this means bodging the pickup selector and using modern replacements for the tie rods (although I can't see a problem with that).
However, in order to do this I've had to "borrow" one complete neck's worth of hardwarefrom my triple and so I am looking for the parts to put that back together as it should be - 1 tuner pan and tuners, nut, bridgeplate/pickup assembly.
- Michael Maddex
- Posts: 1141
- Joined: 18 Apr 2007 5:02 pm
- Location: Northern New Mexico, USA
- Contact:
It's hard to say for sure from just looking at the photos, but here goes: I think that if I were going to use the small switches shown in your photo, I might put the switches in a small switch box and use the existing holes in the plate to mount the switch box and to route the wires into the guitar. Now, if I saw the project in the flesh, I might have a different idea.Jeff Mead wrote:... So if anyone has any comments or suggestions I haven't thought of, please let me know.
Anyway, it sure looks like a good project to me. Good luck and enjoy!
"For every expert, there is an equal and opposite expert." -- Arthur C. Clarke
- John Billings
- Posts: 9344
- Joined: 11 Jul 2002 12:01 am
- Location: Ohio, USA
- Bill Sinclair
- Posts: 1545
- Joined: 23 Apr 2014 7:39 am
- Location: Waynesboro, PA, USA
Are you sure that small push button is toggling? It looks like a momentary switch to me. Even if it is toggling, how will you know if the neck is on or off until you play it? You might have to get past your aversion to modern mini-toggles. Or try to find out what other piece of vintage electrical equipment used the same 4-way that Fender used.
- John Billings
- Posts: 9344
- Joined: 11 Jul 2002 12:01 am
- Location: Ohio, USA
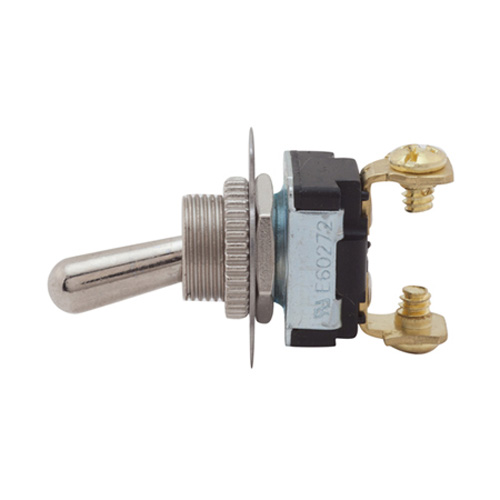
I'd use something like these. Not mini.
http://www.delcity.net/store/Medium!dut ... l/p_789134
Ack!
http://www.delcity.net/store/Medium!dut ... l/p_789134
For some reason, the addy is being cut short! Don't know why! Even if I copy and paste the whole thing, it still doesn't go to the right page! Maybe this one
?
http://www.delcity.net/navi?action=home ... aQodsXAARA
Okay. That takes you to the Carling toggle switch page. Check them out@!
http://www.delcity.net/store/Medium!dut ... l/p_789134
Ack!
http://www.delcity.net/store/Medium!dut ... l/p_789134
For some reason, the addy is being cut short! Don't know why! Even if I copy and paste the whole thing, it still doesn't go to the right page! Maybe this one
?
http://www.delcity.net/navi?action=home ... aQodsXAARA
Okay. That takes you to the Carling toggle switch page. Check them out@!
Thanks for your replies everyone - lots of things to think about.
Michael - I think a control box on top of the existing plate would look a bit out of place - I'd rather mount swithches directly onto the plate although I wouldn't rule out a plastic plate (like a small pick guard) to mount the switches on if I need to hide any holes.
Bill, yes, these are definitely latching switches (although they do the same switch as a momentary switch too). I know what you mean about the visual clue about its status - I'm not sure if the switch stays a bit lower when it's engaged - if it does, it probably won't be much worse than the original Fender switch in that respect. Definitely something to consider.
John - those are about the smallest "proper" toggle switches I've seen but they still look slightly too big for the control cavity. The smallest I've found are 25mm long below the plate - the width of the control cavity is about 23mm. The ones you found look the same (measuring the picture onscreen). I could enlarge the control cavity my a couple of mm but don't want to unless there is no other choice. I'm guessing that's what they did on the example I posted.
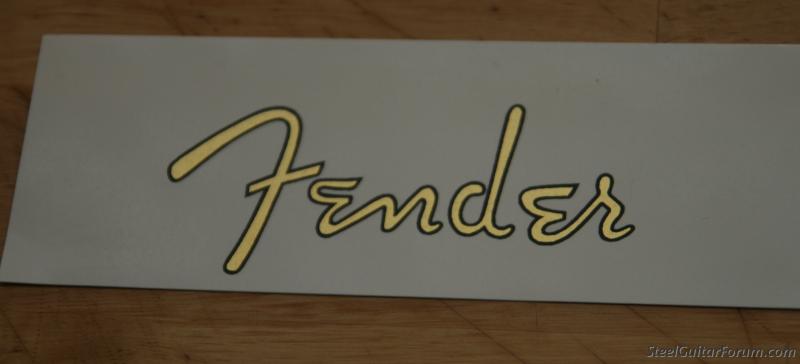
Anyway, my Fender logo arrived today.
Last edited by Jeff Mead on 3 May 2017 10:41 am, edited 1 time in total.
- Keith Glendinning
- Posts: 378
- Joined: 9 Mar 2014 2:38 pm
- Location: United Kingdom
- John Billings
- Posts: 9344
- Joined: 11 Jul 2002 12:01 am
- Location: Ohio, USA
"I wouldn't rule out a plastic plate (like a small pick guard) to mount the switches on if I need to hide any holes. "
That's eggs ackley what I was suggesting! You could probably bend that connector tab at the back of the switch down, or cut most of it off, leaving just enough to solder to?
BTW; I was looking through my steel parts last night, and found two of those Fender decals. Got 'em from Coop!
That's eggs ackley what I was suggesting! You could probably bend that connector tab at the back of the switch down, or cut most of it off, leaving just enough to solder to?
BTW; I was looking through my steel parts last night, and found two of those Fender decals. Got 'em from Coop!
- Tom Pettingill
- Posts: 2246
- Joined: 23 Apr 2007 11:10 am
- Location: California, USA (deceased)
A little trim plate on top would clean things up nicely. I'd probably opt for using a thin piece of stainless steel as it can be polished up to a chrome like shine and is electrically conductive so you don't have any potential ground issues.
For a switch, there are literally thousands of options. Not sure what supply houses you have there, but over here, something like Mouser is one source. They may even have a usable push button switch too. http://www.mouser.com/Electromechanical ... /_/N-5g30/
From John's DelCity link, these look like they might be close to what you are looking for in a toggle. http://www.delcity.net/store/Mediumduty ... s/p_789133
http://www.delcity.net/store/Mediumduty ... l/p_789135
.