Replacing tuner buttons on old lap steels

Lap steels, resonators, multi-neck consoles and acoustic steel guitars

Moderator: Brad Bechtel

Post Reply
User avatar
Steve Ahola
Posts: 1004
Joined: 26 Jan 2010 3:45 pm
Location: Concord, California
Contact:

Replacing tuner buttons on old lap steels

Post by Steve Ahola »

Stew-Mac sells replacement buttons for under $2.00 apiece. I was looking for instructions on the internet and found this interesting article:

http://frets.com/FRETSPages/Luthier/Tec ... utton.html

NOTE: Many people disagree with the method in this article from Frank Ford's FRETS website and recommend using heat.

Bottom line: you probably need to drill out the square holes in the replacement buttons to 9/64". Although the author recommends holding the buttons in your hand while you drill out the holes I would never suggest that to anyone. (I am surprised that he had any fingers left to type up his article! :lol: )

This is what I did: I used the chuck in my drill to hold the drill bits but made sure that the drill would stay off. And then I screwed the buttons onto the drill bits. I started with an 1/8" bit and then graduated to the recommended 9/64" bit.

Although the author said that the existing depth in the button was "just right" I found that it was a little deeper than the originals for the buttons I was replacing today. (You could use masking tape on the drill bits as a marker to keep a uniform depth for all of the buttons.)

While the author used a vise to install the replacement button onto the tuner I just tapped them in lightly with the plastic handle of a screwdriver.

Voila! Tuning keys that work! (The seller mentioned that the tuning buttons were starting to crumble so I ordered some from Stew-Mac so that I would have them on hand when I got the package from Fed-Ex. 6 of the buttons crumbled just looking at the cross-eyed; the other needed a little persuasion with my mini needlenose pliers.)

Steve Ahola

P.S. The Stew-Mac stock number for cream colored buttons is #0111 and black buttons is #011-B; the number for white buttons is #0113. (The ivoroid and ebony buttons come with a 3/32" round hole so these instructions do not apply to them.)

Image

There are instructions at Stew-Mac but they are way too complicated for me.
Last edited by Steve Ahola on 12 Jan 2012 12:28 pm, edited 1 time in total.
User avatar
Frank James Pracher
Posts: 601
Joined: 8 Nov 2010 7:51 am
Location: Michigan, USA

Post by Frank James Pracher »

You didn't have to heat tuner shafts? Are they on nice and solid?

I tried the method where you heat the tuner shaft and I didn't have any luck. I will give this method a shot.

Thanks for posting.
"Don't be mad honey, but I bought another one"
User avatar
Mark Roeder
Posts: 895
Joined: 25 Sep 2007 11:22 am
Location: Milwaukee, Wisconsin, USA

Post by Mark Roeder »

I found heating the shaft was the way to go. Drilling out the hole will reduce the gripping strength while heating makes the plastic conform to the shaft giving it more holding strength. I have run across this topic before and heating the shaft was the most often suggested method.
www.deluxe34.com lap steel stands, Clinesmith, Gibson Console Grande, Northwesterns, The Best Westerns
https://www.facebook.com/TheBestWesterns
User avatar
Peter den Hartogh
Posts: 1001
Joined: 27 Mar 2010 12:49 pm
Location: Cape Town, South Africa
Contact:

Post by Peter den Hartogh »

The Ivoroid buttons #0112 do not melt at all for some reason.
And the Gibson tuner shafts had little wings on them.
So I ground (grinded :D ) little slots with a Dremel tool in the buttons to accommodate the shaft.
I also increased the size of the hole slightly.
Pushed them on with a small vice. No slippage due to the wings.
1977 Sho~Bud D10 ProIII Custom; Sho~Bud SD10 The Professional ; ETS S10 5x5;
Fender 1000; 1993 Remington U12; 1978 Emmons S10 P/P; GeorgeB Weissenborn;
Fluger Cat-Can; Asher Electro Hawaiian; Gibson BR4; Fender FS52; Guyatone 8str;
Fender Resonator ; Epiphone Coronet 1937; Rickenbacher Ace; Rickenbacher NS;
Dynalap 8string; Harbor Lights 8string; Aiersi Tri-Cone; Fender Stringmaster
User avatar
Steve Ahola
Posts: 1004
Joined: 26 Jan 2010 3:45 pm
Location: Concord, California
Contact:

Post by Steve Ahola »

Mark Roeder wrote:I found heating the shaft was the way to go. Drilling out the hole will reduce the gripping strength while heating makes the plastic conform to the shaft giving it more holding strength. I have run across this topic before and heating the shaft was the most often suggested method.
Thanks for the heads up- I will watch for problems with the tuners I just fixed. (It did seem to me that it would be a good idea to add a drop of something, like a glue that is very hard after it cures. Perhaps the Gorilla version of "krazy glue.")

So what is the recommended method of adding heat? Soaking the buttons in boiling water and then putting them onto the tuner shaft heated with a high wattage soldering iron (I have an 80 watt iron that I use for removing humbucker covers, etc. but I guess most people are using soldering guns- which I believe can screw up the magnets on your pickup so watch were you aim it! :lol: )

Steve Ahola

Here are more links on using heat:

http://www.premierguitar.com/Magazine/I ... uners.aspx

http://fretsnet.ning.com/forum/topics/h ... ment-tuner
Last edited by Steve Ahola on 12 Jan 2012 12:31 pm, edited 1 time in total.
User avatar
Mark Roeder
Posts: 895
Joined: 25 Sep 2007 11:22 am
Location: Milwaukee, Wisconsin, USA

Post by Mark Roeder »

I used a sodering iron the first time. It worked but took sometime to get the post hot enough to melt into the button. The quickest was a torch....but..it was too easy to get too hot for the button. I got the hang of it though. I wanted a little resistance as I slide the button on the hot post. Then I knew it wasn't too hot.
www.deluxe34.com lap steel stands, Clinesmith, Gibson Console Grande, Northwesterns, The Best Westerns
https://www.facebook.com/TheBestWesterns
User avatar
Steve Ahola
Posts: 1004
Joined: 26 Jan 2010 3:45 pm
Location: Concord, California
Contact:

Post by Steve Ahola »

In reading through other threads it seems like a good idea to make up a rig to hold the tuner, from either wood or metal. (Metal would act as a heat sink to keep the heat on the shaft from damaging the tuner itself- if not the actual tuner then whatever grease was used for lubrication.)

They do have the tiny butane torchs at Harbor Freight for just a few bucks (the better ones usually run around $20 at a "real" hardware store).

Steve
John Dahms
Posts: 555
Joined: 14 Feb 2005 1:01 am
Location: Perkasie, Pennsylvania, USA

Post by John Dahms »

Over the years I have tried various methods and have settled on using a micro butane torch. With a standard propane torch if you are tempted to heat them without removing them you are inviting disaster. Remember MOTS is flamable as is nitro-cellulose.
With a micro torch a damp washcloth positioned correctly and the very controllable flame can make this a very easy repair. But BE CAREFUL & TAKE YOUR TIME. No one has invented a time machine yet to get a do-over. Wear gloves and push the button into place once the shaft is hot enough and it will go on like butter.
Time flies like an eagle
Fruit flies like a banana.
User avatar
Papa Joe Pollick
Posts: 1968
Joined: 4 Mar 2005 1:01 am
Location: Swanton, Ohio

Post by Papa Joe Pollick »

Very interesting thread..I've got a set of tunners off of an old National Chicagon steel that I was gonna try and sell but the buttons are history...Maybe I'll give this a shot and then sell 'em...Thanks for the post and info...
User avatar
Joe Snow
Posts: 127
Joined: 8 Jan 2010 9:32 am
Location: Argyle,Texas, USA

Post by Joe Snow »

I've always used heat on the posts with no problem, using a little butane torch.
User avatar
Steve Ahola
Posts: 1004
Joined: 26 Jan 2010 3:45 pm
Location: Concord, California
Contact:

Post by Steve Ahola »

Joe Snow wrote:I've always used heat on the posts with no problem, using a little butane torch.
I guess the one advantage with the "heatless" method I used is that you don't have to remove the tuners from the headstock- or even remove the strings from the tuner. (I had to remove half of the tuners on my newly acquired Valco Alkire E Harp 10 string anyway to enlarge the holes to accommodate the strings for first the Billy Robinson tuning and then with the Morrell tuning when I decided that Robinson tuning wasn't such a big step up from 8 string C6 at least for me.)

The headstock on the Valco Alkire model is 3/4" and with the increased thickness the holes for the strings are pretty much flush with the top of the bushing. Most of the strings would fit through the holes with the tuners removed. With this design there is room for just a single wind or two under the string hole and the string is held tightly against the bushing. I have never seen a tuner that was so hard to turn because of all the friction so this will be an acid test for Frank Ford heatless method (I will order more buttons so I will have them on hand when these start slipping.)

So why not wrap the strings on top of the string hole? Well this is how these were strung and my guess is that they were the original 50 year old strings... The Eddie Alkire tuning is so weird that I think that the previous owner played it like an autoharp. Most people never change the strings on their autoharp- they just scrape off the crud. :lol:

Steve
Bill Brunt
Posts: 204
Joined: 23 Feb 2011 2:34 pm
Location: Texas, USA

Post by Bill Brunt »

Thanks for this thread.
I bought a '47 Rickenbacker with all tuning knobs broken.
I ordered the white buttons to match the black and white guitar.
I had a set of small files from Harbor Freight I had previously used to butcher a nut on my Melbert 8 string.(thankfully, he will allow you to purchase a replacement)
Anyway, I used the very small rectangular file to 'waller' out the hole just a tad. Not quite enough for it to slide on to the post. I then used some channel-loc pliers to coax them onto the post.
One jaw on the white knob, the other on the back side of the tuner.
Easy as pie. No heating, no epoxy. They feel very secure.

Don't worry if you forget to put some electrical tape on the jaws of the pliers. If you scuff up the tuner knobs a bit, your wife has all the tools you will need to make them good as new in her fingernail care kit.

Emery board, extra fine emery board, buffer, and you can even finish it off with a dab of clear polish.

Really, you wouldn't do that, would you? :o
User avatar
Hugh Holstein
Posts: 136
Joined: 30 Apr 2011 5:46 pm
Location: Rohnert Park, California, USA

Post by Hugh Holstein »

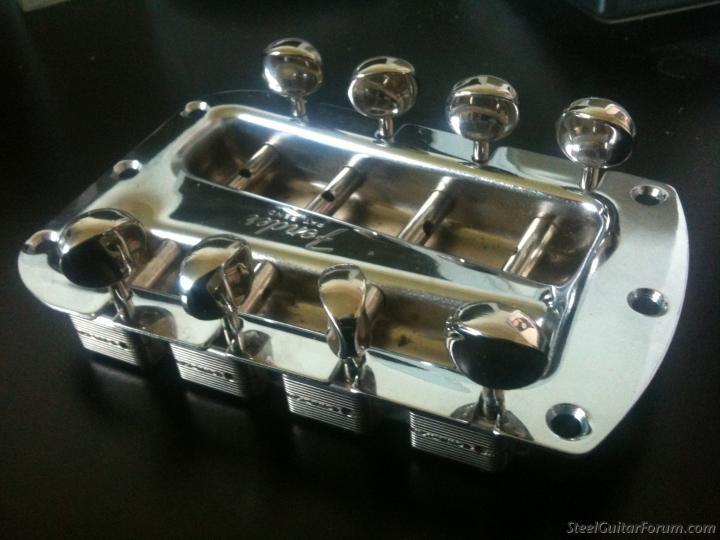
This doesn't completely apply, but I was able to replace the buttons on a 56 Stringmaster that were really beat up by taking them apart and changing them with ones I took out of NOS 12 string Klusons.
:)
Image
These are the ones with the bigger holes for lower tunings.
Michael Lee Allen
Posts: 4540
Joined: 28 Jan 2004 1:01 am
Location: Portage Park, Chicago, Illinois

Post by Michael Lee Allen »

Deleted
Last edited by Michael Lee Allen on 2 Aug 2012 9:53 am, edited 1 time in total.
Tom Baylis
Posts: 55
Joined: 6 Apr 2005 12:01 am
Location: Portland, Oregon

Post by Tom Baylis »

One of my staff recently found this gem of a Dual Pro during some barn picking in central Oregon, the boxcars need rewinding but otherwise it's in pretty good condition except for a missing metal tuning button on one tuner. The shaft & gear work fine, so the challenge is finding a similar metal button. Any ideas or suggestions?
Image[/img]

Thanks,
Tom
Glenn Uhler
Posts: 839
Joined: 31 Jan 2011 2:33 pm
Location: Trenton, New Jersey, USA

New Button

Post by Glenn Uhler »

Maybe not the cheapest, but the most straight forward: Have a local machine shop make a new button for you. They look like simple metal lathe work.
1974 Marlen S-12 1968 Tele 1969 Martin D-35H
User avatar
Mark Bridge
Posts: 16
Joined: 23 Jan 2012 3:32 pm
Location: Tempe, Arizona, USA
Contact:

New video by Stewmac on this subject...

Post by Mark Bridge »

Stewmac just posted a great video on this (2/29/2012) so I wanted to add that link to this thread, cool stuff, here's the URL...

http://www.youtube.com/watch?v=SB3RVVye-gw
Butch Pytko
Posts: 452
Joined: 21 Jul 2004 12:01 am
Location: Orlando, Florida, USA

Post by Butch Pytko »

WOW!!!, excellent info & most excellent PRODUCTION of that video!!!

By the way, if anyone has any info on a replacement tuner for Stringmasters, please see my post--FENDER STRINGMASTER TUNER. Thanks.
Gary S. Lynch
Posts: 361
Joined: 8 Jan 2012 9:22 am
Location: Maryland, USA

Replace tuners

Post by Gary S. Lynch »

Hi, i followed the directions on the Stew Mac site.
I put copper wire in my soldering gun.
I' ve done two guitars and they came out great.

It helps with 2 people i had someone applying heat while i kept a nice even presure as the button slid on.
You have to clean the shafts to a shine for the heat to transmit to the plastic.
Good luck!
Post Reply