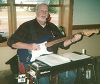
To all my steel friends. I have been a mechanical engineer for nearly 30 years. I have been playing country music for 46 years starting in 1963 at the age of 4. I play most country instruments and enjoying working on them. There in lies the problem, WORKING ON THEM. My 34 year old D-10 steels was worn out. Cracked Mohogany, worn finish and some other mechanical issues. 2 months ago, I decided to build - thats right BUILD a new body for my precious steel. I got some birdseye maple from a local mill and went to work. After all was said and done, I will admit that my woodwork was flawless. So happilly I started to assemble the mechanics. All went well until these little *#@$%&$* rod end clips (these rod end clips are the work of the Devil himself and are the pay back for all the bad things I have ever done in my past and a few in the future) made all my hair fall out and I am now on blood pressure medication. I could not for the life of me figure out the best way to install the rods with the clips. It took me at least an hour and 20 minutes to install 5 of them. I just can't wait for the C6th side. I think the best way is to put the rod clip on the bent part of the rod, clip it and then BEND it onto the changer flat and slide it to the hole until it snaps in. I am 75 years old, 63, OK OK I am 50 years old but tonight I felt like 84. I am actually tired.
Is this the best way to install these man killers???
Hard time in E9thville
Moderator: Shoshanah Marohn
-
Clint Jones

- Posts: 22
- Joined: 11 Oct 2009 8:36 pm
- Location: Riverview, Florida USA
-
John Groover McDuffie

- Posts: 1459
- Joined: 16 Feb 2006 1:01 am
- Location: LA California, USA
-
Clint Jones
- Posts: 22
- Joined: 11 Oct 2009 8:36 pm
- Location: Riverview, Florida USA
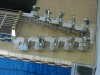
Rod Clip

It was a Linkon D-10 from 1974. Now it is a ClinCher Pedal Steel Guitar. All Blonde. The pictures show the clip and the new blonde look.
-
Stan Schober

- Posts: 611
- Joined: 19 Aug 2009 3:05 pm
- Location: Cahokia, Illinois, USA
-
Clint Jones
- Posts: 22
- Joined: 11 Oct 2009 8:36 pm
- Location: Riverview, Florida USA
Rod Clips
I had already mounted the levers and pull bars to the undercarraige. It was really much easier after I attached the clip to the rod and then just slid it down the flat part of the changer pull. On the C6th side there is many more rods but I suspect they will go much quicker than tonight.
From a mechanical engineering point of view, the clips are a great design but only have one mode of proper installation. Well now 2.
I will post more finished pics after a few days. But here is one of the new fret board design. I prototyped these and will complete when the new stock arrives on Wednesday. The new model of the steel is called the Signature Series Golden D-10.
-
Danny Bates
- Posts: 1723
- Joined: 5 Jan 2001 1:01 am
- Location: Fresno, CA. USA

-
chris ivey

- Posts: 12703
- Joined: 8 Nov 1998 1:01 am
- Location: california (deceased)
-
George McLellan
- Posts: 2527
- Joined: 4 Aug 1998 11:00 pm
- Location: Duluth, MN USA
Why not contact Wayne Link, the builder of these fine guitars. He'd probably walk you right through it. Here's his website.
Geo
http://www.mts.net/~linkon/
Geo
http://www.mts.net/~linkon/
-
Bobby Burns
- Posts: 757
- Joined: 7 Apr 2009 10:02 am
- Location: Tennessee, USA
-
Don Brown, Sr.
- Posts: 1419
- Joined: 11 May 2004 12:01 am
- Location: New Jersey
Clint, that should be a pretty easy hook up.
What you have there is the type of clip used for hooking the linkage up to the throttle plate shaft, on Carburetors. (back in the day)
If there isn't two holes, alongside one another, with a space between the two holes, (suspended by the little flat piece of tin on the bottom) It's probably been modified.
The two side by side holes, allowed the metal piece on the throttle plate shaft (which also had a hole in it) to slide up and go between the two holes in the clip. Then, the bent end of the Pedal rod, went through all three holes, and you simply snapped the clip to the rod to hold it in place. They were usually bullet proof, and easy hookups.
I can't tell from your picture angle, if it's been modified or not. It has, if there isn't two pieces with holes. I'm only seeing one hole from the angle of your picture, although I do see the little flat piece that should be holding up the other side with a hole in it also.
They can be confusing, if you've never dealt with them before. Even more so if you're not old enough to be familiar with how they hook up. I've seen quite a few people who were not able to figure out how they were designed to work, in reference to their automobile linkage.
Another picture of the entire clip may be of help, as well, and, what it's hooking up to, since you said the Changer Assembly?
-
Clint Jones
- Posts: 22
- Joined: 11 Oct 2009 8:36 pm
- Location: Riverview, Florida USA
Rod Clip
Thank you Danny for the compliment and the pic. That would be alot easier than mine The one I am using is shown in the bottom of Don Browns reply. I think the new body is really well done and when all is said and done, I will have virtually a new pedal steel.
Thanks Don Brown for the advice. I have used those clips for a long time but in the correct way and yes on carb in the day. I said I felt old. Unfortunately the rods on my E9th side run under the bellcrank bars and cannot be rotated to clip in. The only way I saw to do this was to clip it onto the rod end and then have the end of the bent rod clear the flat part of the pull changer and slide the rod to the correct hole and then let snap in. 9 more rods tonight and then the guitar goes up right for strings and tuning as well as some undercarraige adjustments if need. Wish me luck guys. Pictures to come if you all would like to se her when she is done.
Thanks Don Brown for the advice. I have used those clips for a long time but in the correct way and yes on carb in the day. I said I felt old. Unfortunately the rods on my E9th side run under the bellcrank bars and cannot be rotated to clip in. The only way I saw to do this was to clip it onto the rod end and then have the end of the bent rod clear the flat part of the pull changer and slide the rod to the correct hole and then let snap in. 9 more rods tonight and then the guitar goes up right for strings and tuning as well as some undercarraige adjustments if need. Wish me luck guys. Pictures to come if you all would like to se her when she is done.
-
Clint Jones
- Posts: 22
- Joined: 11 Oct 2009 8:36 pm
- Location: Riverview, Florida USA
Almost There
Guys, here are some of the pics of the new ClinCher Pedal Steel Guitar. I am now ready to install the 8 pedal rods, install the pick-ups and electrics, final tweeks and then the all important artwork.
The rods and clips went in so easy tonight - all 10 in 40 minutes. Then the knee levers - still need adjustments. STAY TUNED to the final episode.
Thanks for looking, Clint


The rods and clips went in so easy tonight - all 10 in 40 minutes. Then the knee levers - still need adjustments. STAY TUNED to the final episode.
Thanks for looking, Clint
-
chris ivey
- Posts: 12703
- Joined: 8 Nov 1998 1:01 am
- Location: california (deceased)
-
Clint Jones
- Posts: 22
- Joined: 11 Oct 2009 8:36 pm
- Location: Riverview, Florida USA
Great looking body
Stop it Chris, you're making me blush 
-
Clint Jones
- Posts: 22
- Joined: 11 Oct 2009 8:36 pm
- Location: Riverview, Florida USA
Great Looking Body
Oh - You meant the Pedal Steel
Thank you. Even after tonight's work, I am still not done. The art work came today but have only tried it on some old work to see if it is compatible.
Thanks again
Thank you. Even after tonight's work, I am still not done. The art work came today but have only tried it on some old work to see if it is compatible.
Thanks again
-
Danny Bates
- Posts: 1723
- Joined: 5 Jan 2001 1:01 am
- Location: Fresno, CA. USA
-
Gary Preston

- Posts: 3995
- Joined: 8 Apr 2003 12:01 am
- Location: Columbus, Ohio, USA
-
Bent Romnes
- Posts: 5985
- Joined: 28 Feb 2007 2:35 pm
- Location: London,Ontario, Canada
- Contact:
Clint, your steel body is superb. The finish is second to none(in the pic anyway) Tell us the kind of finish you used and the procedure, like spray? brush? buff afterward?
About those spring clips: I see you have found your way to do it. However, I will be making my own out of the proper gauge music wire and winding the springs by hand.
With a talent like yours, you should pay us a visit here: http://steelguitarbuilder.com/forum/index.php
Hope to see you there, and good luck with your project!
BenRom Pedal Steel Guitars
https://www.facebook.com/groups/212050572323614/
https://www.facebook.com/groups/212050572323614/
-
Clint Jones
- Posts: 22
- Joined: 11 Oct 2009 8:36 pm
- Location: Riverview, Florida USA
Clips Issue
Actually Gary, because I could not rotate the rod after the initial insertion, I had problems with trying to install it with the rods already under the bellcranks. To install them this way, I found that if I cliped the clip in place and then sort of bent the rod end out of the way, I could slip the assembly linearly along the flat part of the pull changer until I reached the required hole. Unfortunately, I needed the second hole some of the time and it would snap into the first. I would then have to pry a little to get it to go to the second. After figuring this method out, it took much less time and almost became fluid while doing them. Keep in mind that the entire changer and spring system was already installed. It was tough at first but OK the second day.Gary Preston wrote:Clint i have installed these and found them to be no problem at all .Am i missing something here !
-
Clint Jones
- Posts: 22
- Joined: 11 Oct 2009 8:36 pm
- Location: Riverview, Florida USA
Tell us the kind of finish you used and the procedure, like spray? brush? buff afterward?
I am glad you asked.
Hours: Actual - about 65 hours over 2 months time
Wood: Birdseye Maple from Hardwood, Lumber and Millwork from Lakeland Florida at a cost of $150.00 for about 10 BF. (The eyes were not as plentiful as I would have liked but I was limited in my selection)
The hardest method I had to tachle was using a new Dado blade on an old table saw. The bearings were a little loose and wondered a little left to right. It made for a purfling nightmare.
The Purfling was purchased from Rockler.com (they call it inlay)The cost believe it or not was $10 each strip and I used 7. 3 for the body and 2 on each neck. I think the combination and color was right on to the finish color NATURAL.
Now to the finishing: I started my finishing with 120 on the bare wood to get a nice base to start with. I then shot 5 coats of "General Finish" Water Base PolyUrethane Satin(Purchased from again Rockler), each with a sanding between coats of 180 and 4000 micromesh. Each coat was light and hard to see. Water based urethane goes on clear and stays clear and does not show too wet when spraying. After the final 5th coat, I had enough thickness to sand with grades from 180 to 12000.
The top coats were Sherwin Williams Water Based PolyUrethane Top Coat Gloss. Here the problems started with the finishing. I had been using a buddies air powered spray gun (HVLP) with an .9 nozzle tip at work with nice open spaces and a large compressor. The top coats were done in my garage with 1 little dual floresant (sic) light fixture. I had just purchased an HVLP spray system YES from Rockler.com again. Cost was $125.00 plus S&H. The system is self contained. I was not used to it but quickly found out why that is a bad thing.
I sprayed the first top coat with a 1.8 nozzle tip (S/W reccommended 1.6. The coat was heavy and flowed evenly on the top and sides except where I angled the gun at the ends. Here it speckled at each end. After 45 minutes, I sanded 180 grit and recoated. It was getting late so I shot one more coat a little lighter than the first and let is sit until morning. It was all speckled and required much more sanding at 150, 180 and then 220 for the now third coat. I was a little frustrated at my immature spraying but settled down and then shot the 3rd coat heavier than the first which proved to be great on the top as it all flowed together like a bar top table. However the sides RAN like a waterfall all the way down both sides; the players less than the show side..
Sunday Morning: I sat outside with a POT of coffee and with a palm DA, sanded the show and players side with every grit from 180 all the way to 12000. Each side took 1 hr 30 min. I then sanded the two top boards with the same. Total sanding time that Sunday was 5 hours, 1 pot of coffee, a couple of cuss words and a hand that still vibrated after I stopped sanding. But there it was - My new baby.
Note: I love wood in it's natural finish. If I wanted a red wood color, I would get redwood, not stain it. Personally, I think Curly Maple is the most beautiful of all finishes. My next project might be of KOA.
The artwork is a different story for the next posting. Thank you so much for asking.
-
Clint Jones
- Posts: 22
- Joined: 11 Oct 2009 8:36 pm
- Location: Riverview, Florida USA
Bent,Bent Romnes wrote:Clint, your steel body is superb. The finish is second to none!
Thank you for the compliment - it was what I needed after all the work.
I have designed a new attaching method but probably could not get it down to manufacturing cost of $2 to $3 dollars per piece and at 20 - 30 per steel guitar, it is alot. I will photo it and send it to you to see what you guys think of it. I makes the movement between each changer arm absolutely quiet and smooth.
Thanks for the lead to the Steel Guitar Builders site. I will most definately go to it tonight.
I just finished the electrics after the turkey dinner. Now the strings and then a WHOLE LOT of setup. I can easily see 2 plus days as I have never setup a steel from scratch before. It will be a challenge for sure but worth every memory of it. I have taken over 250 pictures throughout the entire rebuild. The Name ClinCher is a conjunction of my Wife Cheri and my name. The funny thing is that my wife absolutely HATES the sound of a pedal steel guitar. She said it sounds like nails on a black board. That being said, she did sya that the new ClinCher Pedal Steel Guitar is very beautiful but I am forbidden to put any strings on it. She hid the first set I bought. (Kidding), but she does hate the sound. I just don't get how something so angellic sounding and emotion invoking could ever not be loved by all. The Pedal Steel Guitar is the quintisential country instrument. My fovorite of all.
Thanks again.
-
Bent Romnes
- Posts: 5985
- Joined: 28 Feb 2007 2:35 pm
- Location: London,Ontario, Canada
- Contact:
Clint, thanks so much for your detailed explanation. You definitely have what it takes and this being your first time, you can be sure of the fact that you 'have it in you', cranking out such a nice product.
I will write more later but today I am going to look at a milling machine. They say such tools are handy to have in the steel guitar production
later
Bent
I will write more later but today I am going to look at a milling machine. They say such tools are handy to have in the steel guitar production
later
Bent
BenRom Pedal Steel Guitars
https://www.facebook.com/groups/212050572323614/
https://www.facebook.com/groups/212050572323614/
-
Clint Jones
- Posts: 22
- Joined: 11 Oct 2009 8:36 pm
- Location: Riverview, Florida USA
Fret Boards
Good eveing all,
Bent - I was looking on the builders web site at the fret board threads. I wanted to make my own for this new ClinCher PSG. I chose the name of the PSG to be the Signature Series, Golden D-10. My favorite players are probably everyone elses as well. Lloyd Green, Dave Hartley, Bernie Kelley, (My all time favorite) - Tom Brumley and then Buddy Emmons. These are the names I chose for the fret boards I designed the dots on AutoCAD with the USA, made a metafile and transfered it to the boards.
I just thought all would like to see them. Again as always, I appreciate everyone looking. This forum and all that are members are just a great bunch of people and I enjoy it. Thanks.
Clint
-
Clint Jones
- Posts: 22
- Joined: 11 Oct 2009 8:36 pm
- Location: Riverview, Florida USA
Bent, Did you get the Milling machine? I have used the Bridgeports for some of my smaller pieces and love to machine on it. It is not a CNC tho.Bent Romnes wrote: I am going to look at a milling machine. They say such tools are handy to have in the steel guitar production
What kind if you did, did you get?
Clint
I pray that when I leave this world, that I'll had at least touched one person with my music. I don't know where I'll be going, but I hope I can bring my pedal steel along.
-
Andy Greatrix
- Posts: 1561
- Joined: 4 Aug 1998 11:00 pm
- Location: Edmonton Alberta
Has anyone ever considered removing the F# and D# from the first two strings and moving everything up so your first string is a G#?
You may have to sacrifice the lick of the month and the standard E9th licks, but now you can put a B and an E on the ninth and tenth strings and still keep the D. The trade off may steer you toward licks that may be pleasently surprising.
You may have to sacrifice the lick of the month and the standard E9th licks, but now you can put a B and an E on the ninth and tenth strings and still keep the D. The trade off may steer you toward licks that may be pleasently surprising.