Removing (old) glue residue from headstock overlay

Lap steels, resonators, multi-neck consoles and acoustic steel guitars

Moderator: Brad Bechtel

Post Reply
User avatar
Fred Kinbom
Posts: 1230
Joined: 28 Sep 2005 12:01 am
Location: Berlin, Germany, via Stockholm, Sweden.
Contact:

Removing (old) glue residue from headstock overlay

Post by Fred Kinbom »

Hi folks,

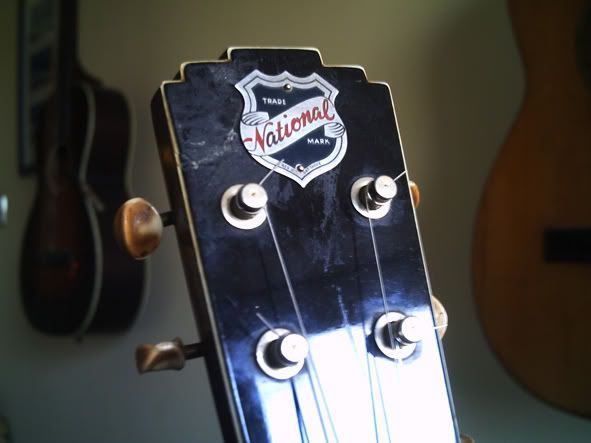
I am in the process of sprucing up my 1947 National New Yorker a bit as I've found a headstock logo for it (which was previously missing). The corner of the headstock overlay has been broken off sometime in the past and glued on again rather clumsily - apart from it not being completely level with the rest of the overlay, there is quite a bit of glue smeared around the damaged area, and this matte glue residue is sticking out like a sore thumb on the otherwise shiny celluloid (?) overlay surface. Like an even sorer thumb now that the shiny National logo is in place. ;)

How can I safely attempt to remove this glue residue? I don't have access to a buffing wheel or anything like that. Normally, lighter fluid of "white spirit" works to dissolve and remove unwanted glue smears. Could I try this on a piece of cotton or cloth without damaging the celluloid?

Thanks in advance!

Fred (who still remembers the relief when he - having made the Frensh polish finish on an old Oahu all cloudy with his ex-wife's nailpolish remover - received the good advice here on the SGF to restore the finish with... toothpaste! :D Yes - it worked!)
User avatar
Tom Pettingill
Posts: 2246
Joined: 23 Apr 2007 11:10 am
Location: California, USA (deceased)

Post by Tom Pettingill »

Is the overlay real celluloid?
Any clues as to what kind of glue it may be?
Is it soft, hard, clear, cloudy, etc?
User avatar
Sam Floyd
Posts: 61
Joined: 23 Aug 2007 10:40 am
Location: Virginia, USA

Post by Sam Floyd »

Fred

You might want to try "GlueGone". It is a very mild adhesive remover. I have used it a lot on my motorcycles and some wood products. You can pick it up in most auto parts stores.

V/r,

Sam :mrgreen:
User avatar
Fred Kinbom
Posts: 1230
Joined: 28 Sep 2005 12:01 am
Location: Berlin, Germany, via Stockholm, Sweden.
Contact:

Post by Fred Kinbom »

Tom Pettingill wrote:Is the overlay real celluloid?
Any clues as to what kind of glue it may be?
Is it soft, hard, clear, cloudy, etc?
Hi Tom,

I'm not sure about the celluloid - it is whatever material National used for the overlays (off-white/black two-ply, with the black shiny surface on the top).

The glue seems hard, pretty clear, but matte (and maybe a tad cloudy) so it sticks out from most angles in contrast to the glossy surface.

Thanks Sam! I will have a look around to see if that product is sold over here.

Cheers,

Fred
User avatar
Sam Floyd
Posts: 61
Joined: 23 Aug 2007 10:40 am
Location: Virginia, USA

Post by Sam Floyd »

Correction....

GueGone.
User avatar
Fred Kinbom
Posts: 1230
Joined: 28 Sep 2005 12:01 am
Location: Berlin, Germany, via Stockholm, Sweden.
Contact:

Post by Fred Kinbom »

A local guitar shop guy I know now adviced me to "stay off the chemicals" with old surfaces like this and "use a scalpell and patience" if I wanted to remove the glue. Any comments?

Thanks!

Fred
User avatar
Tom Pettingill
Posts: 2246
Joined: 23 Apr 2007 11:10 am
Location: California, USA (deceased)

Post by Tom Pettingill »

"stay off the chemicals" would be good advice until / if you can determine just what your working with.
I have no idea what National used and it could be irreversibly damaged by some compounds.
I'd add that any chemicals should be tested first on an small hidden, area first.

Heat will soften many glues, but again, without knowing what the overlay is made of, it too may damage it.

Scraping down any high spots is an option.
A single edge razor blade with the corners rounded off makes a good tool.
You blunt / round off the corners so as no not dig in on the edges.
Denny Turner
Posts: 1632
Joined: 4 May 2003 12:01 am
Location: Oahu, Hawaii USA
Contact:

Post by Denny Turner »

Some suggestions:

First get at least a half pint of Jack Daniels or George Dickel ...or good Coffee County or Swainsboro Ga. 'shine ...and set it aside close to the work area along with a soft rag. Next:

I've repaired 2 New Yorkers' chipped body tops. In both cases the material was a lucite / acrylic type laminate material, quite stout, with the chips' fractures popping the laminate glue at the chips. But I can't remember if the headstock is the same laminate, ...although I seem to remember it was. IF so then Ace hardware Lub-E (sprayed onto a rag and not the work), ...or Goo-B-Gone / Glue-B-Gone etc, ...or mild solvents such as lighter fluid (naptha) or mineral spirits, ...or moderate soaps (not strong soaps nor lye based nor simple green etc), ...(in that order of experimenting) ...could be SPARINGLY tried (ie. liberally dampened rag). "Never" apply wet oils, solvents or soap directly onto such guitar work, it can migrate onto screws or brads in wood and can seep down the brad shank or screw threads and soften the wood, ...can turn it to mush if allot gets in there; Apply it to a rag for application. A Popsicle stick works as a good and reasonably innocuous teasing tool ...break it to get a sharper teasing, scraping and "sawing" edge on that end and a thicker / stronger original other-end. A nylon type guitar pick is also a reasonbly innocuous teasing tool. When oil, solvent or soap starts getting under cured glue edges, sheering force often pops it right off ...while chipping or lifting forces can remove some of what it's glued to. If those don't work, the razor blade drag (blade tilted away from direction of movement) that Tom mentioned works good, especially when the glue can be softened, but extreme attention must be payed to what the blade is doing, ...it can scratch and gouge a finish in a heartbeat if yer not careful; NEVER move it in the direction the cutting edge is tilted; Even perpendicular is "dangerous". At the first hint of it reaching the original finish, get out the emory cloth or old tooth paste and toothe brush to lightly tease or compound the rest of the glue off. The toothpaste applied to liberally dampened folded brown grocery sack paper (about 2" x 2")will also work very good as a fine rubbing / polishing compound to take out any marks when the glue is gone.

Now open the bottle of Jack or George or 'shine, sip away and admire the work; Soft cloth right there to wipe yer chin. :)
Aloha,
Denny T~
http://www.dennysguitars.com/

Please help support humanity:
http://www.redcross.org/en/aboutus
User avatar
Sam Floyd
Posts: 61
Joined: 23 Aug 2007 10:40 am
Location: Virginia, USA

Post by Sam Floyd »

JB on the rocks works good to! :mrgreen: :mrgreen: :mrgreen: :mrgreen: :mrgreen: :mrgreen: :mrgreen: :mrgreen:

V/r,

Sam
Same tempo as before, and pray.
Sam Floyd Jr. 19??
User avatar
Fred Kinbom
Posts: 1230
Joined: 28 Sep 2005 12:01 am
Location: Berlin, Germany, via Stockholm, Sweden.
Contact:

Post by Fred Kinbom »

Denny Turner wrote:Now open the bottle of Jack or George or 'shine, sip away and admire the work; Soft cloth right there to wipe yer chin. :)
:D :D :D

Thanks a lot Denny for that in-depth advice! One thing you said got me a bit worried:
"Never" apply wet oils, solvents or soap directly onto such guitar work, it can migrate onto screws or brads in wood and can seep down the brad shank or screw threads and soften the wood, ...can turn it to mush if allot gets in there
I recently sprayed some pot lubricant in my other New Yorker, and I sprayed not loads but enough to feel "on the safe side", as the crackling switch in question was not directly visible. Could excess contact cleaner lube damage the wood inside the guitar? :eek: :(

Many thanks!

Fred
Denny Turner
Posts: 1632
Joined: 4 May 2003 12:01 am
Location: Oahu, Hawaii USA
Contact:

Oils, contact cleaners and such on guitars

Post by Denny Turner »

Fred,

re yer:
Could excess contact cleaner lube damage the wood inside the guitar?
I wouldn't worry too much about small amounts of oils and innocuous cleaners in the electronics cavities ...as long as they're cleaned up as much as possible / feasible. Some catch-22's to consider:

Quality electronic lube and cleaner is made to be generally kind to delicate parts of electronics around contacts to be cleaned / lubed, ...but contact cleaner, especially some cheap ones, are pretty active when wet ...commonly eating up old pot wipers a testiment if not specifically for that purpose, ...but their cleaning agents are made to evaporate innocuously rather quickly so don't pose a long-term problem to the cavity itself. But not to worry; Carefully working some rag or paper towel around in the cavity with a chopstick or such will likely do an adequate job of cleanup; Although preventing such "holidays" in the first place is likely wise ...imho:

Guitars' electronics cavities are pretty well protected: Except for a few oil-finished guitars, I don't think I've ever seen a production guitar that was not spray sealed at the factory; Doing so first makes sanding-off the wood's burrs and hairs easier, better and faster; And otherwise later protects guitars from Guitarists. Sometimes certain correct oil is used as a sealer and finish in amounts that spread evenly and innocuously into the whole wood rather than standing concentrated around, say, a screw in a screw hole. But when a Sealer is sprayed on, then one or more top coats of some sort are also most common, ...otherwise even normal-use hand oil and dirt would stain the instrument; Sealing & coating the wood allows cleaning the instrument without smearing oils and dirt and gawd-knows what else into raw wood. The sealer and top coat(s) are applied liberally and even the electronics cavities get a fair share of spray (just not sanded smooth). So the body wood itself is sealed from oils and such as part of normal care; BUT when screws or brads are installed after sealing / coating, they penetrate the sealer / coating barrier and thus oils can migrate down them into the wood's depth that's not protected.

But even as good habit for Murphy's Law, I "always" carefully place / stuff some rag or paper towel under pots and switches in their cavities or otherwise around them before squirting contact cleaner or lubricant into them. I take similar detailed precautions when applying wet oils that might get into / under any part that's in contact with another part that might be damaged even over time. That's probably the major reason we so often hear, "one or two small drops of oil" into a guitar's machine parts. Tuner mounting screws on older instruments are the most common place to see wood softened or turned to mush ...because that's the most common place oil is applied.

But to not "frighten" someone about using oils; I polish guitars with Ace hardware Lub-E aerosol light machine oil sprayed moderately onto a rag for application. I've been using Ace Lub-E for polish, finish renewal and lubrication for about 15 years and swear by it for not damaging anything if not allowed to stand wet (or get into / under any vulnerable thing wet). And on the can it says (sic) it's innocuous to most surfaces (common sense implied), ...and without a "test a small area first" disclaimer; Pretty stout claim for them to be assured about and advertise if it weren't true; Word gets around wide and fast with the internet, ...yet Lub-E is still one of Ace's bread and butter products. I keep a diaper misted with Lub-E over the strings of my personal guitars in their cases, folded to about 3" wide. Yea I know, some folks say oil deadens strings, ...but not as much as corrosion; And I can't afford to replace 10 or-so guitars' strings every week or so! The mist on the diaper stays mostly in the diaper for wiping the guitar after playing, keeps the strings free of corrosion longer and is not enough to migrate where it shouldn't.

The last year I've taken to Tri-Flow machine oil in the small squeeze bottle with small plastic hose applicator, for small parts lube ...(available on ebay if not locally). It leaves a slight teflon film and is great for tuners and machine parts. Forums and my own research indicates no known future problems with teflon accumulating over time; Such considerations called for after guitar techs on a large scale found about 10 years ago that guitarists using silicon based polishes popular in the 1970's-'80's is a nightmare to remove to make finish repairs and refinishing an instrument ....along with other no-no's that became better known from experiences and communication among a rapidly growing number of techs and folks learning tech stuff.

Should anyone desire: Dan Erlwine's 'Guitar Player Repair Guide' is a "bible" of great repair & maintenance info, ...and his / stew-mac's 'Trade Secrets' book an EXCELLENT supplement.

Gotta run; Been blabbering too long.
Aloha,
Denny T~
http://www.dennysguitars.com/

Please help support humanity:
http://www.redcross.org/en/aboutus
User avatar
Fred Kinbom
Posts: 1230
Joined: 28 Sep 2005 12:01 am
Location: Berlin, Germany, via Stockholm, Sweden.
Contact:

Post by Fred Kinbom »

Thanks again Denny for taking the time and sharing this knowledge so generously!

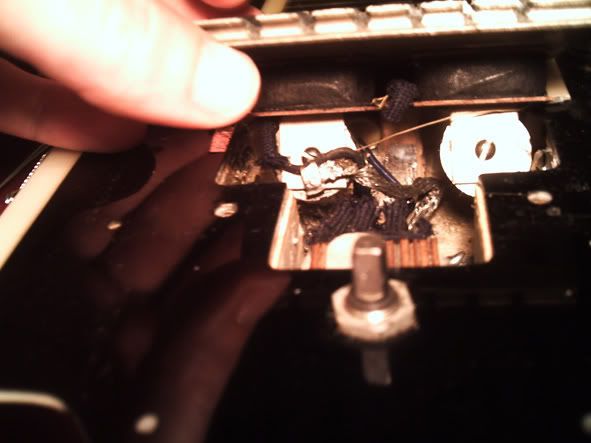
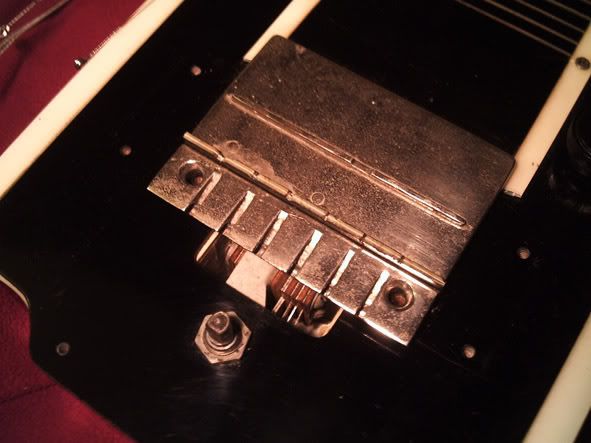
The problem was, I could not stuff any paper towel or anything below the switch. It's an old (1937) pickup selector that seems to operate by a chicken head knob that turns to make three different configurations of contact with 8 metal "tongues" that connect three different pickups). These metal "tongues" were in the way and the noozle of the lube spray can was about all I could get in there to apply the lube.

Here is a picture from the innards of an identical guitar:

Image

The switch is located under the shaft on the right hand side. This pic is from forumite David Siegler's New Yorker. His had had the shielding foil taken out - mine seemed all original inside and I saw a piece of foil sticking out at one place. Also, I don't see any sign of the metal tongues/springs in mine.

I sprayed the lube over a month ago. Do I need to try to clean it up (I don't know how - access is very limited. I had to unscrew and tilt the bridge/pickup unit in order to get the nozzle in. I do NOT wish to remove the metal tongues/springs as this would mean taking the entire guitar apart) or do you think it will be fine?

This is my favourite lap steel and I don't want to damage it in any way! :(

Many thanks again!

Fred
Denny Turner
Posts: 1632
Joined: 4 May 2003 12:01 am
Location: Oahu, Hawaii USA
Contact:

Post by Denny Turner »

Add to the tools for rubbing out glue, paint runs, etc:

Course, medium and fine rubbing compounds.

Remove the rubber end of a rubber cake spatula and use the rounded edge or tip corner at a shallow angle to work rubbing compound on specific spots without scratching surrounding material. Be careful, ...pressure with rubber tools makes rubbing compound work surprisingly well / fast. Similar tools can be made by cutting different size flat triangles from Tupperware and using the flat side of their points to rub with. Similar useful complex tool tips can be made from rims of Tupperware bowls and/or lids.
Aloha,
Denny T~
http://www.dennysguitars.com/

Please help support humanity:
http://www.redcross.org/en/aboutus
Denny Turner
Posts: 1632
Joined: 4 May 2003 12:01 am
Location: Oahu, Hawaii USA
Contact:

Post by Denny Turner »

Fred,

Boy I really know how to open cans of worms; But in your case I THINK it's a can of plastic fishing worms; Me getting off on tangeants that seem to be making a bigger deal out of things than actually exist in your case. If I HAD to bet money while not having any more info, I'd bet that newer / modern contact cleaner and/or electronic lube would not hurt that electronics cavity for the sealer / top-coat reasons previously said, ....unless (hoboy, here we go) you really hosed it down and flooded (shooting in the dark examples) some unknown part that might be delicate enough with age to sponge up enough to do harm, or flooded crevices such as between laminates that too with age could suck up and hold oil or caustic cleaner; BUT even then I'd give good odds that no harm would be done on a one-time affair ...but can't guarantee that. I'd have to be able to inspect the work closely and read the product can you used to see what went in where. If I were in doubt I'd try to carefully / lightly / slowly get Q-tips or SOFT (not metal burred) pipe cleaners SAFELY in there without force on parts, to soak up whatever they might. If a Q-tip gets snagged and doesn't want to pull out, ...no biggie, cut it off short and leave it there if it's not interferring with switching and such ....(good example reason to be slow / methodic / careful). There's also no harm in carefully / gently poking small pieces of paper towel in there even with a toothpick ...even if you can't get the pieces of paper towel back out ....IF it's obvious something foreign like that wouldn't work it's way into the switching. Better those little pieces of paper towel catch and hold what they might than not knowing. Small amounts (for this job) of baby powder will also soak liquids and hold them ...and most of the powder that remains dry can be sucked back out with a SMALL / WEAK battery powered electronics / computer vacuum cleaner ...so excess slippery stuff doesn't work it's way back out in the future ...although probably no biggie if it does, just good Murphy habit. Don't use other kinds of talc since they often have perfumes and other chemicals. Baby powder is cheap and innocuous to babies' raw skin (bad for their lungs though if they breathe it). Sometime in the future when someone takes that area apart they can remove the pieces of paper towel and/or wipe any baby powder still there (and wonder what the heck it is and for). Now for the kicker: More than a few times over the past 47 years or so ....working on / repairing / maintaining objects that were important / dear to me, I've said "Nah, it'll be alright", only to later find out it wasn't alright. Years of such experiences have made them evermore less frequent, but I still occasionally make a real boo-boo by not doing what I usually sense is right .....like taking the darn thing apart and doing it right.

Now, haven't I made you feel a whole lot better? Image
Aloha,
Denny T~
http://www.dennysguitars.com/

Please help support humanity:
http://www.redcross.org/en/aboutus
User avatar
Brad Bechtel
Moderator
Posts: 8146
Joined: 4 Aug 1998 11:00 pm

Post by Brad Bechtel »

Fred, can you post a photo of the area that you're trying to modify? That might make it easier to recommend options for what you want to do.
Brad’s Page of Steel
A web site devoted to acoustic & electric lap steel guitars
User avatar
Fred Kinbom
Posts: 1230
Joined: 28 Sep 2005 12:01 am
Location: Berlin, Germany, via Stockholm, Sweden.
Contact:

Post by Fred Kinbom »

Brad Bechtel wrote:Fred, can you post a photo of the area that you're trying to modify? That might make it easier to recommend options for what you want to do.
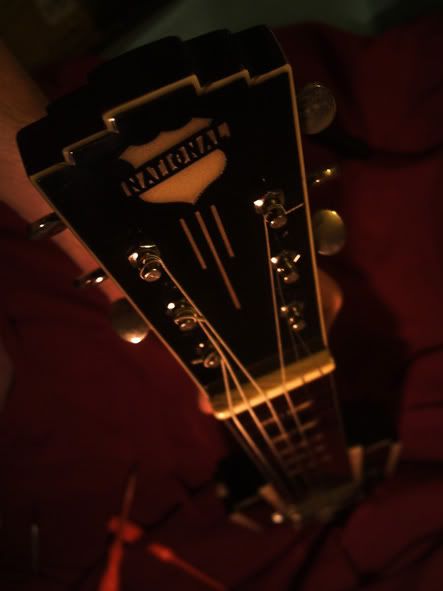
Here is the headstock with the repair and glue smears. Difficult to capture on a photo.

Image

Also, you may see that the logo shield is tilted a bit to the right. This is because the original upper hole for the brad is a bit off-centre. Would you guys have any qualms about making a new hole to get it straight? Would I run the risk of cracking the overlay?


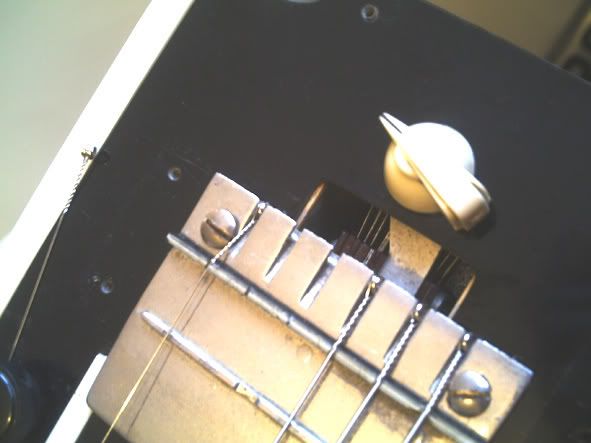
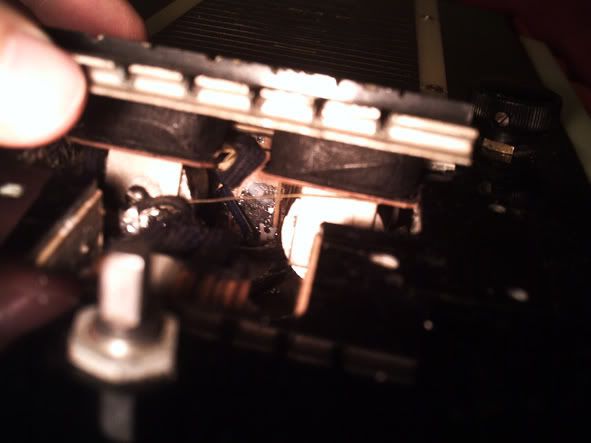
And then, the other (potential) issue with the older New Yorker - here is a photo that will give you an idea of the limited access to the area under the switch.

Image

I think I will try with the "Q-tips" like Denny suggested, to see if it's dry or not. Any other opinions on that?

Many thanks for all the good advice - this place is great! :)

Fred
User avatar
Fred Kinbom
Posts: 1230
Joined: 28 Sep 2005 12:01 am
Location: Berlin, Germany, via Stockholm, Sweden.
Contact:

Post by Fred Kinbom »

Denny,

I have now been in to have a look at the inside of the 1937 New Yorker - all was dry and well! :) I took a few photos of these 70-year-old electronics that I thought I'd share.

The bridge blade pickup's underside:

Image

Image

Of course the really fascinating part of this guitar's electronics are the other two pickups under the fretboard, but I think the entire fretboard must be taken off to access these, and as this guitar seems untouched on the inside, I will not open it up any further.

The three-way pickup switch's "metal tongues" that I mentioned before are partially visible here:

Image

Like someone here pointed out in a previous New Yorker-thread, the saddle on this model is made from the same three-ply laminate (celluloid or some early plastic?) that covers the body! This model has less sustain than later New Yorkers but a very warm and unique sound.

Image

8) :)

Thanks so much for all the info!

Fred
Denny Turner
Posts: 1632
Joined: 4 May 2003 12:01 am
Location: Oahu, Hawaii USA
Contact:

Post by Denny Turner »

Fred,

Looks to me like you're doing a good job and should reasonably trust your own judgement of what you see / find / do; Especially since you're seeking info prior to the fact rather than learning by hard-knocks like I've done too many times in the past.

Pardon any typos herein; I worked all night long on this and at 10:00 AM now, am pretty mung and punchy in editing; But I wanted to get it done before going to bed as it looks like your work is in regular progress.

-------
....the saddle on this model is made from the same three-ply laminate (celluloid or some early plastic?) that covers the body....
I think you meant to say the NUT (the headstock-end's "bridge") rather than 'saddle'?
(I have some autism that's pee-poor at guessing and prone to error if it ain't spelled out for me :? ).

Nut:
Image

Bridge / saddle:
Image

If so, ...then for the discussion's previous "questioning" the durability of the black / white body & headstock laminate material ....both in removing the glue and it's resistance to cleaners, lubes, etc: If the nut is indeed the same material as the laminate material, then the nut / material holding up under string pressure and vibration is a decent gauge / testiment to the material's durability, ...compared to, say, Danelectro guitars' aluminum nut (and other guitars' plastic nuts) which it is not uncommon to see the smaller strings having considerably migrated / cut their way down into the aluminum via string pressure, vibration and the sawing action of the strings being tuned and bent in playing. Also, nuts and their string slots get a considerable amount of hand oils & salts etc in them over the years as well as a reasonable expectation that a nut has been deliberately oiled a few times over it's lifetime as a natural / intuitive cure for string ping during tuning (although pencil lead / graphite is MUCH better to use). MEANING that if the nut is made from that laminate material and has held up well, ....further evidenced by a lack of related complaint history from Players, ....then I think it fair to say that the laminates' nominal & periodic exposure to contact cleaner wouldn't do much more than taking shine off, if that; And that the laminate would hold up reasonably well to "soft" chemicals, tools and techniques to remove the glue from the headstock. And as previously said in the discussion, I found the laminate material to be rather stout the few times I've repaired it. I THINK the material is called Lucite (an early common brand product of acrylic glass evolution), or is something similar to Lucite (acrylite, plexiglas, lexan, polyglas, etc); I think RICK AIELLO would be The Man to ask.

-------

I also see pretty good indications that the guitar and it's routed cavities had sealer applied prior to sanding and deburring the machining chatter ...and thus the cavity itself likely protected somewhat from soft chemicals, oils etc, because: Doing a good job of deburring and good fine-finish sanding, especially to apply a laminate, calls for a sealer for a best job. We can see pretty good indications that the laminate was cut / routed separate from routing the guitar's cavities, and thereafter glued onto to guitar; MEANING that the guitar's cavity is likely sealed and further protected from invasion of reasonably safe maintenance chemicals such as electronic contact cleaner / lube. See the fine and realteively druable wood edge noted *1* in the pic below, as well as the laminate and body cavities' mis-matched routing (maybe to provide an extended wood shoulder to support and protect the laminate's edge).

Another thing we can see in the picture, noted as *2*, is what a history of standing oils, moisture, chemicals, etc can do when it gets into / under parts. And areas like that might be a good / inconspicuous place to test whatever you experiment with to clean the glue off the headstock; Better for something to make a mark there where it's covered up and can be dealt with later if desired.

Image

-------
Would you guys have any qualms about making a new hole to get (the logo emblem) straight? Would I run the risk of cracking the overlay?
THIS IS LENGTHY INSTRUCTIONS FOR DOING SUCH A JOB; Just in case something might be desired in describing the process. ANYONE NOT INTERESTED MIGHT WANT TO SKIP THIS SECTION:

To do a good job of the glue removal and covering up the crack in the laminate repair, ...the logo emblem should be removed to do the work IF the emblem brads and emblem plate can be removed without scarring them. If the brads & emblem can be safely removed, then why not fix the emblem's tilt:

It's often difficult to get a good enough grip on the brad head to pull it out without scarring the brad heads. Small scars can be taken off with super-fine sandpaper or emory cloth. That you apparantly installed the new plate & brads makes successful removal of the brads more likely (a looser hole). Before I unneccesarily remove brads, I make sure I can find exact replacements should I scar one ...or god-forbid break the head off with the shank left in the hole. To eliminate the risk of losing an original or correct brad in the search for a new exact match: Keep the old brads in a conspicuous container kept in the work area. If there's any chance you might lose an old original brad while finding a new replacement, then put a chunk of modeling clay or melted candle wax in a small box (such as a matchbox drawer) level with the top (and cooling wax back to solid); And press it onto the brad head to make & have an exact size and shape to compare where-ever you look for a replacement; A too-long length can be trimmed off and filed to a point, ...a bit too short no biggie, only the head is going to show.

IF you can successfully remove the plate for drilling a new mounting hole(s):

Measure the depth of the hole with the small end of a FLAT toothpick, marking the depth on the toothpick with a pencil while the toothpick is in the hole, ...and set it aside; It will be used to put a piece of masking tape around the drill bit to STOP the drill from going any deeper than the original holes.

Fill the old hole(s) with a round toothpick. If the toothpick hits bottom loosely, pull it out and break off a small amount of it's tip until it will fit tight tapped into the old hole. Further tightening will occur when you put the final seating taps on the toothpick dowel later on. The toothpick dowel will reinforce the wood and laminate when drilling a new hole in close proximity, ...and will remain as filler to be capped later with black nail polish (explained further below). Clip off the toothpick with wire dikes placed flush with the top of the hole; It will leave a bit sticking up higher than the hole, which is good at this point of the repair; Tapping it further down as said later will tighten the toothpick dowel in it's hole.

Now apply a strip of masking tape down the center of the headstock from it's top to the strings nut. Carefully measure a centerline at the top of the headstock and the nut, and draw that line down the tape with a sharp pencil. Then rub around the brad holes with a match, or a blunted toothpick or such to find and mark the existing holes, to make sure which of the old holes are out of alignment, and use the old hole marks to align one or both new holes properly. The tape will also help (but not fully) protect the laminate from scratches and boo-boos during the drilling process, and help stabalize the drill bit starting a new hole. Using a hand-cranked drill works best, ....or a SPEED CONTROLABLE dremel motor drill set at it's slowest speed. The hole through the laminate MUST be slightly larger than the brad size to ensure that the brad doesn't crack the laminate while being tapped back in (the laminate is probably not as strong as it was when new); So you can either use a drill bit slightly larger than the brad (tightening a loose hole for the brad is said further below) or better-yet use a drill bit exactly the size of the brad and later simply ream the laminate out just enough for the brad to pass freely through the laminate into a correct size hole in the wood. Use the hole depth measure toothpick you made earlier, to wrap the drill bit with about 1/8" thickness of masking tape, to PREVENT the drillbit from going any deeper than the original hole; Better the hole is slightly shallower rather than deeper than original. Drill the new hole(s) at slow speed and light hand pressure, stopping the penetration when the depth prevention masking tape shows the depth is perfect, ...and allow the drill to spin down to a stop before carefully removing it. Rub the masking tape that's protecting the headstock to make sure it's still seated around the hole. Coat the new hole inside with a kiss of Elmer's general purpose white glue, using a toothpick or paperclip wire or such to push the glue in the hole and work it around inside; Remove the toothpick / tool. This glue priming will narrow the hole slightly when it dries and provide some soft grip for the brad and will seal the holes wood.

Now it's time to fix the old hole(s). ACRYLIC nail polish is generally made out of the same material that the laminate is; So get a bottle of the blackest acrylic nail polish at your local "Wally-world". Get a bottle of THINNER specifically for the type nail polish you bought (NOT cleaner / remover) ...usually co-located on the rack with each brand and type of nail polish.

Back at yer workbench lay out these additional tools: Hairdryer, ...round toothpicks, ...roll of paper towels, ...cup saucer for a pallet, ...nail polish and thinner, ...2 or 3 wood chopsticks, ...a finish nail smaller than the brad hole(s), sharp end filed off flat, to later use like a mini center punch to seat the old brad hole's toothpick filler dowel.

Use a small hammer to tap the wood chopstick like a center-punch to tap down the toothpick filling the old brad hole(s), carefully tapping the toothpick down level with the laminate. Hitting the laminate too hard, even with the chopstick, can chip or crack the laminate around the hole; So just tap the toothpick. Now use the filed down finish nail "center punch" to tap the toothpick down about 1/16" deeper into the hole to provide a receptacle for an adequate depth of nail polish to cap the hole (said later).

Remove the masking tape that's down the center of the headstock. Clean off around the old holes to ensure they're flat, clean and free of any burrs; AWAY FROM THE GUITAR, put a few DROPS of the nail polish thinner on the tip of a piece of paper towel folded into a small point, making the tip DAMP and NOT WET, and gently rub the rim of the hole with that paper towel TIP to make sure it's clean; This preps for capping the old holes with nail polish. WET NAIL POLISH OR IT'S THINNER WILL INDEED MELT INTO ACRYLIC, so damp is the trick not wet.

Now cut a 1/4" hole in a strip of masking tape and place it over the old brad hole, centering the tape hole over the old brad hole. Press the masking tape down firm and mask around it with more masking tape. This will protect the area that's not going to be worked on, and reduce the area that will need to be compounded and polished.

Set your acrylic nail polish mixing / work area up far enough away from the guitar so that if any spills are made it won't be made on the guitar. Nail polish thinner IS ACETONE and THE THINNER AND POLISH WILL DAMAGE A GUITAR'S FINISH AND PLASTICS. Use a cup saucer for a pallet. Put 5 or so round toothpicks on your work area to be used as nail polish applicator tools. Place and keep a roll of paper towels on your work area ...for the job and for cleanup and any boo-boos. Place the bottles of nail polish and thinner so they won't fall or get knocked over, ...farther than arms reach is a good rule, ....then open BOTH. Place a puddle of the nail polish about the size of a dime onto the saucer pallet and close the bottle up, then without delay place about 1/2 teaspoon of thinner alongside it in contact with the nail polish; This will create a puddle of different thicknesses of nail polish to get the feel of, especially as the nail polish will start getting thick rather quickly but can be thinned by stirring a little into that puddle of thinner. You will likely have to make new puddles before the job is done, because they get thick rather quickly. Don't make a new puddle over an old one; Use a fresh clean spot on the saucer pallet. Use a toothpick to pick up SMALL DROPS of nail polish and practice placing them elsewhere on the pallet. When you get than hang of it, pick up a SMALL DROP of nail polish and place it over the toothpick sealing the old brad hole; You can tease it into the hole with the toothpick point if the drop doesn't want to go in there by itself. Repeat with more drops if neccessary until the wet or soft nail polish forms a convex dome cap over the hole; The dome cap will shrink / deflate during the drying phase. Now use the hairdryer on warm to accelerate the polish drying ...or take a break for 20 minutes or-so. Repeat the process until the hole is capped with a DRY and SLIGHTLY convex DOMED cap of polish. Let it cure OVERNIGHT in at least room temperature or higher. An unshaded electric lamp with a 60 watt bulb placed 18" above the work will help cure the nail polish; Lesser or greater wattage can be used but you MUST check the temperature of the guitar OFTEN to get the right bulb distance to WARM the work area never letting it get HOT. I also use a sheet of aluminum foil laid over the guitar, with a hole cut in the aluminum foil to let light only hit around the work area, ...but that's overkill Murphy protection. When the nail polish is thus cured with a slight convex dome intact, then the dome can be CAREFULLY leveled with light pressure upon 800 grit fine sandpaper, emory cloth or emory paper, then compounded with rubbing compounds or toothpaste slightly thinned with water. Go slow and careful because rubbing pressure can warm-up and resoften the nail polish cap and cause more filling & curing to be needed. When it looks like a good job, remove the masking tape and you will likely discover that additional compounding and polishing will need to be done around where the masking tape hole perimeter was.

-------

The above nail-polish filling technique can also be used to fill-in / hide the crack in the headstock laminate repair ...after the glue residue there is removed. The top of the crack should be cleaned out with the tip of a pointed-tip exacto knife, blown out with compressed air or by mouth blowing through a drinking straw, to clean out glue and dust and provide a tiny nano-trench to receive and secure the nail polish filler. Even work-thinned nail polish is too thick to go into a tight untrenched crack, and thinning it too much will melt some plastic along the crack seal it without an adequate / durable dose of the nail polish (thinner = weaker; thicker = stronger; Although it can't be very thick sealing a crack). Very small drops of the nail polish, as thin as will form drops on the toothpick, can be applied into the trench by dragging the thinned drops along the trench with the tip of toothpicks; The toothpick should not touch the laminate surface but only touch the drops to drag and tease the drops along and into the trench surface. If you make a small boo-boo, then run your writing hand index finger across your forehead; It will pick up just the right amount of body oil and sweat on your finger; Rub the boo-boo TOWARDS the work with a forward rolling motion of the finger, lifting the finger when the boo-boo is thus led back to the crack. Let the work dry good ...hairdryer is a charm ...before resuming the work. Let the fill cure overnight, lamp again helps, ...then compound smoothe the next day or thereafter.

-------

THERE IS A GOOD FUTURE FOR FOLKS INTERESTED IN DETAILED GENERAL MAINTENANCE OF VINTAGE GUITARS (and certainly in repair) ....imho:

We are dealing with instruments 50 or more years old, and I suppose they're quite dear to most of us. With the exponential growth of population, and continued atrition of these old wonderful instruments, ...those of us that treasure them, and even those that just play them, should be evermore careful and comprehensive in preserving them, ...which discussions such as we're having here will help allot in the fine details important to keeping these old instruments in the best condition plausible. In that vein I hope more and more Players realize that it doesn't take much more than being even nominally talented with hand tools, and slow & careful attention to details, and research BEFORE executing work, and some nominal education from even just a few of the many good books, and by combing info from internet forums and searches (even just right here on the SGF!), including even-BASIC electronics, .........for a person to be able to even go into small business keeping old instruments in good condition and at least troubleshooting them if not repairing them. And even though I don't know for a fact, I'll bet that a number of Luthier schools are picking up on the current and future importance of guitar general maintenance as opposed to full-on luthiery, ....and are including general maintenance courses in their corriculums for that reason; Something for "young-uns" to consider (anyone under 40 is a "young-un" to my wrinkled / weary 60!).
Last edited by Denny Turner on 20 Sep 2007 10:47 pm, edited 1 time in total.
Aloha,
Denny T~
http://www.dennysguitars.com/

Please help support humanity:
http://www.redcross.org/en/aboutus
User avatar
Fred Kinbom
Posts: 1230
Joined: 28 Sep 2005 12:01 am
Location: Berlin, Germany, via Stockholm, Sweden.
Contact:

Post by Fred Kinbom »

Thanks so much Denny for taking the time to share all this great info! :)
Denny Turner wrote:I think you meant to say the NUT (the headstock-end's "bridge") rather than 'saddle'?
No - it is strangely the saddle I refered to. A very unusual choice of material! The nut appears to be bone.

Thanks again!

Fred
Denny Turner
Posts: 1632
Joined: 4 May 2003 12:01 am
Location: Oahu, Hawaii USA
Contact:

Post by Denny Turner »

Thank You for the kind undeserved words, Fred. I'll never be able to pay back those that have so generously helped me far more times than I can remember / count.
No - it is strangely the saddle I refered to.
Well see there; There's my autism I mentioned; My work suggestions wouldn't have made a bit of difference whether you were referring to the nut or the bridge saddle! (well DT~, how 'bout comparin' the word with pictures more closely) Image :?
Last edited by Denny Turner on 20 Sep 2007 11:23 pm, edited 1 time in total.
Aloha,
Denny T~
http://www.dennysguitars.com/

Please help support humanity:
http://www.redcross.org/en/aboutus
Chris Drew
Posts: 274
Joined: 7 May 2007 6:22 am
Location: Bristol, UK
Contact:

Post by Chris Drew »

Whatever, Denny, you deserve a medal* not only for the depth of your knowledge, but for your willingness to share it here on this marvellous forum in such detail.

*or possibly some form of treatment... ;-)
Denny Turner
Posts: 1632
Joined: 4 May 2003 12:01 am
Location: Oahu, Hawaii USA
Contact:

Post by Denny Turner »

*or possibly some form of treatment...
Hmmmmmm,..... a 6 pack of Asti Spumante and a toe job from a young girl in a red dress.....

Poop..... there I go again........ :roll:

Thank You,
Aloha,
Denny T~
http://www.dennysguitars.com/

Please help support humanity:
http://www.redcross.org/en/aboutus
Post Reply